FINISHING KIT - Page 49.
July 11, 2004: This day was for cleanup and
priming of aluminum parts again. I also painted some of the parts after priming.
Any of the canopy parts that are INSIDE the canopy were painted Pewter Gray from
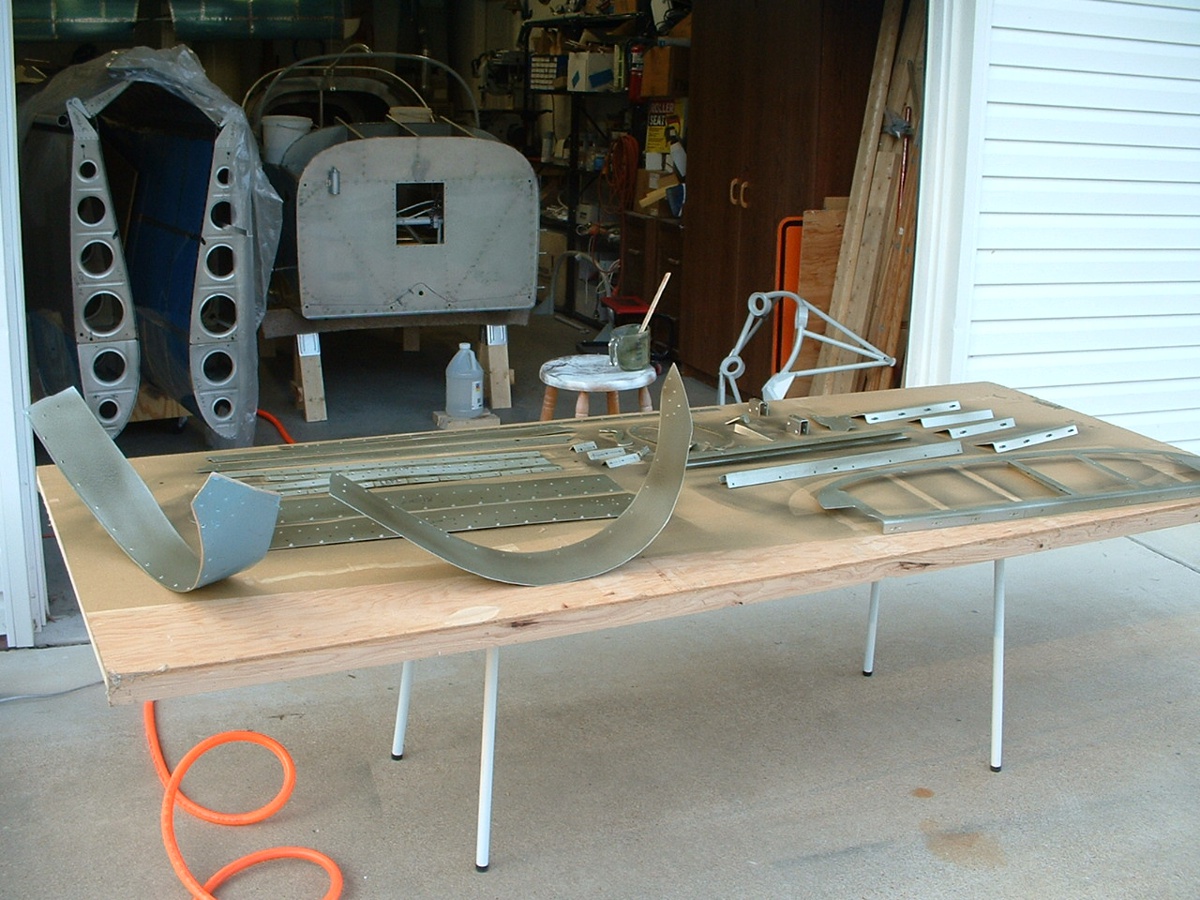
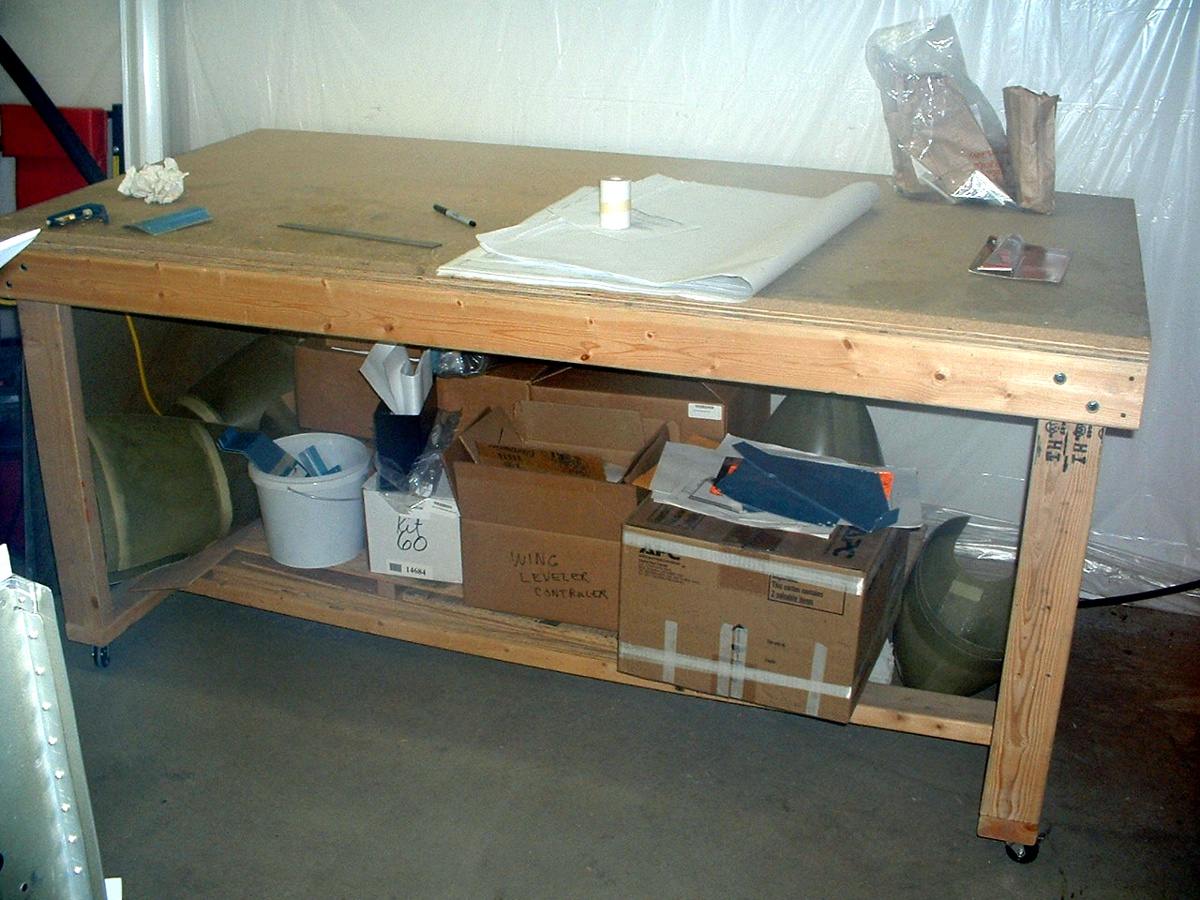
spray cans. Here are the photos. I had rolled the wing cradle away from the
garage wall in order to get out this old shipping crate board for use as a work table.
Those are the canopy aluminum parts and the control panel frame and other parts
that are now all primed and drying. I mixed up about 350 milliliters of primer for
this job and still managed to leave one part on the shelf that I had intended to prime
today. Oh, well, I can get it later when I am priming the engine baffles from the
firewall forward kit.
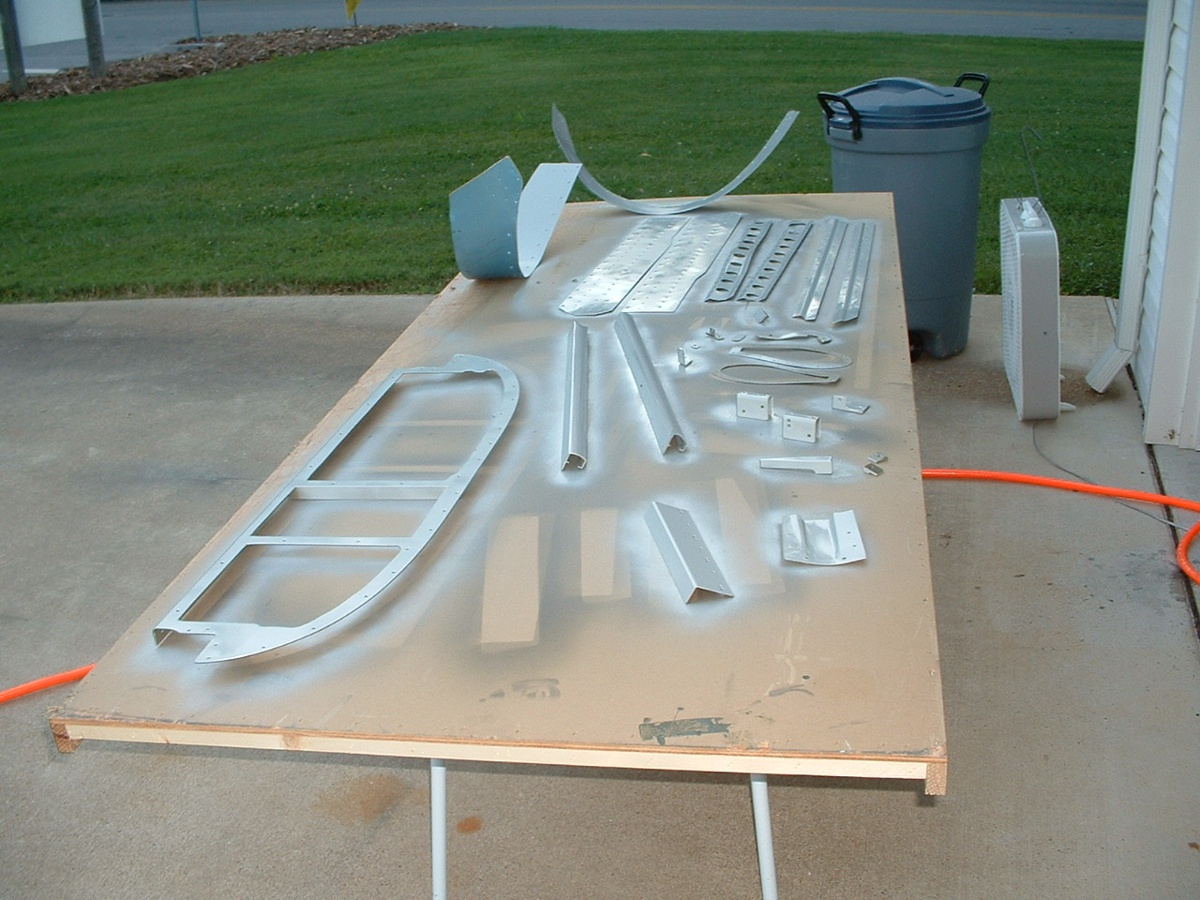
It was a hot day above 90 degrees and everything dried very quickly, so next
was painting the inside parts a pewter gray color from a spray can. What can I say,
if the color is good, and I did not have to mix it, go with it. Notice that the
curved skins still have the blue protective plastic on the outside. It took one
complete spray can to do everything you see here with a good smooth coat of paint.
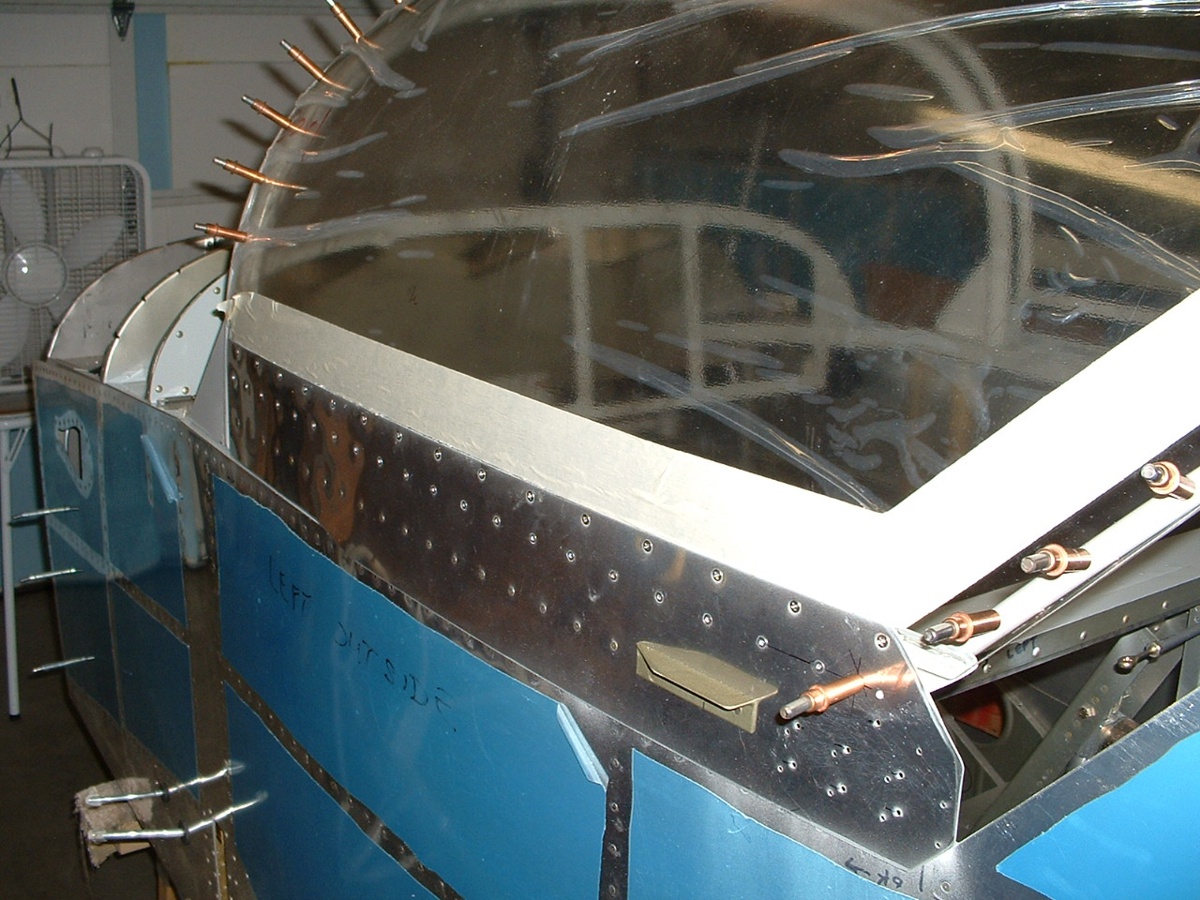
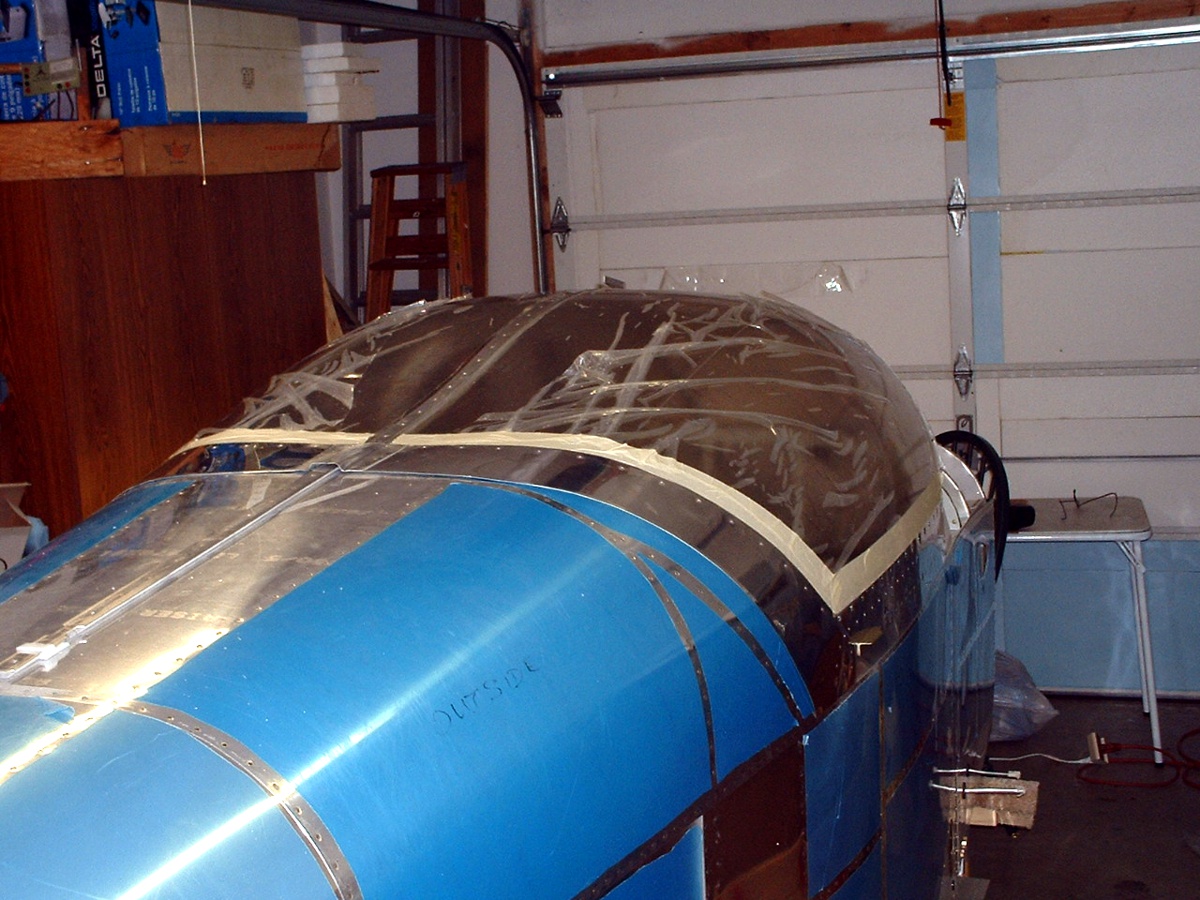
July 12, 2004: I managed to get some work
done this evening and finished attaching the LEFT side of the canopy to the canopy skirt
with #6 screws and also riveted the side skirt and brace to the canopy frame. I put
a light coat of clear RTV between the plexiglass canopy and the side skirt aluminum skin
to minimize the rainwater drips and runs, etc. The lifting handle that I fabricated
was made of 6061-T6 aluminum angle (not an alclad material) and needed to be primed to
prevent corrosion. It will be painted white when the entire airplane gets painted.
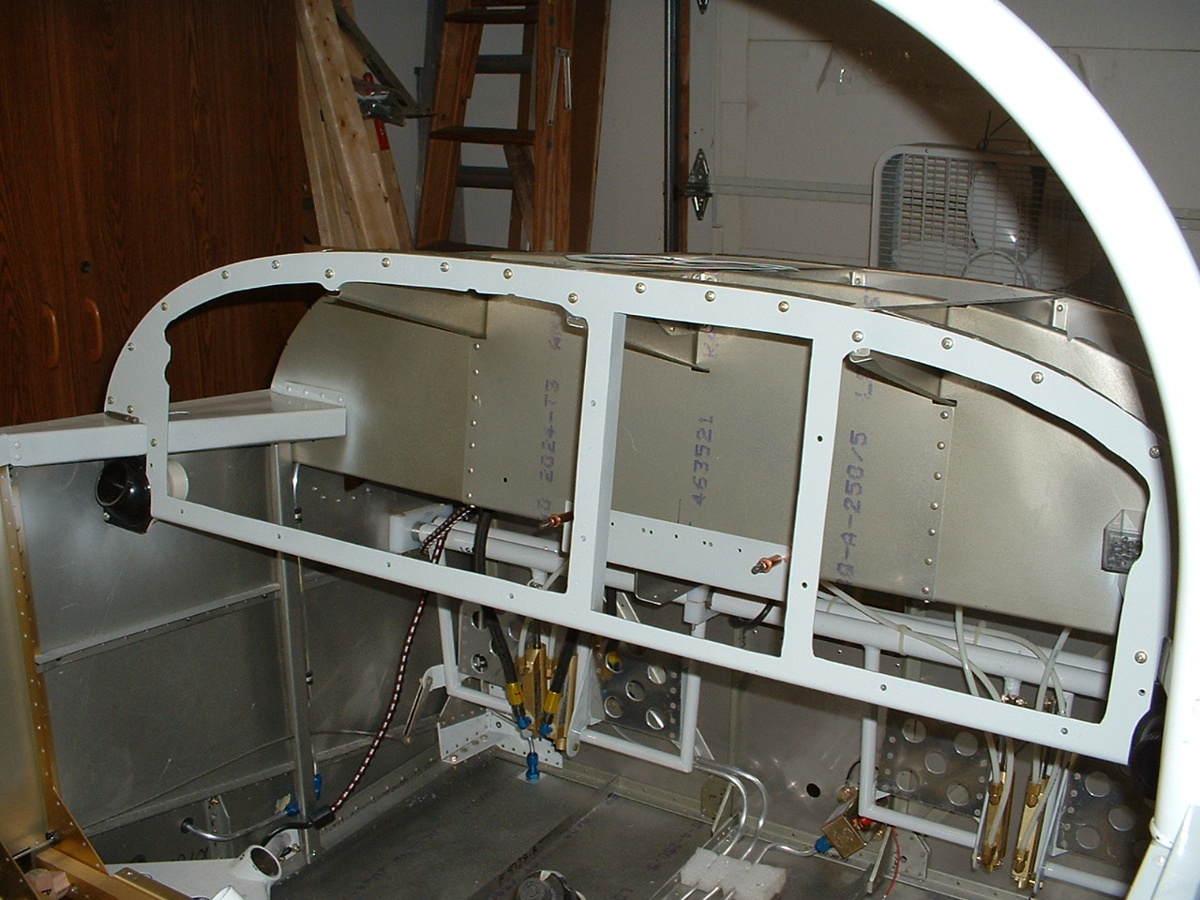
Here is a look at the instrument panel frame after being re-installed after
painting. You can also see where I painted the canopy deck on the pilot's side of
the aircraft. Both sides were painted along with the top and front of the bulkhead
behind the seats.
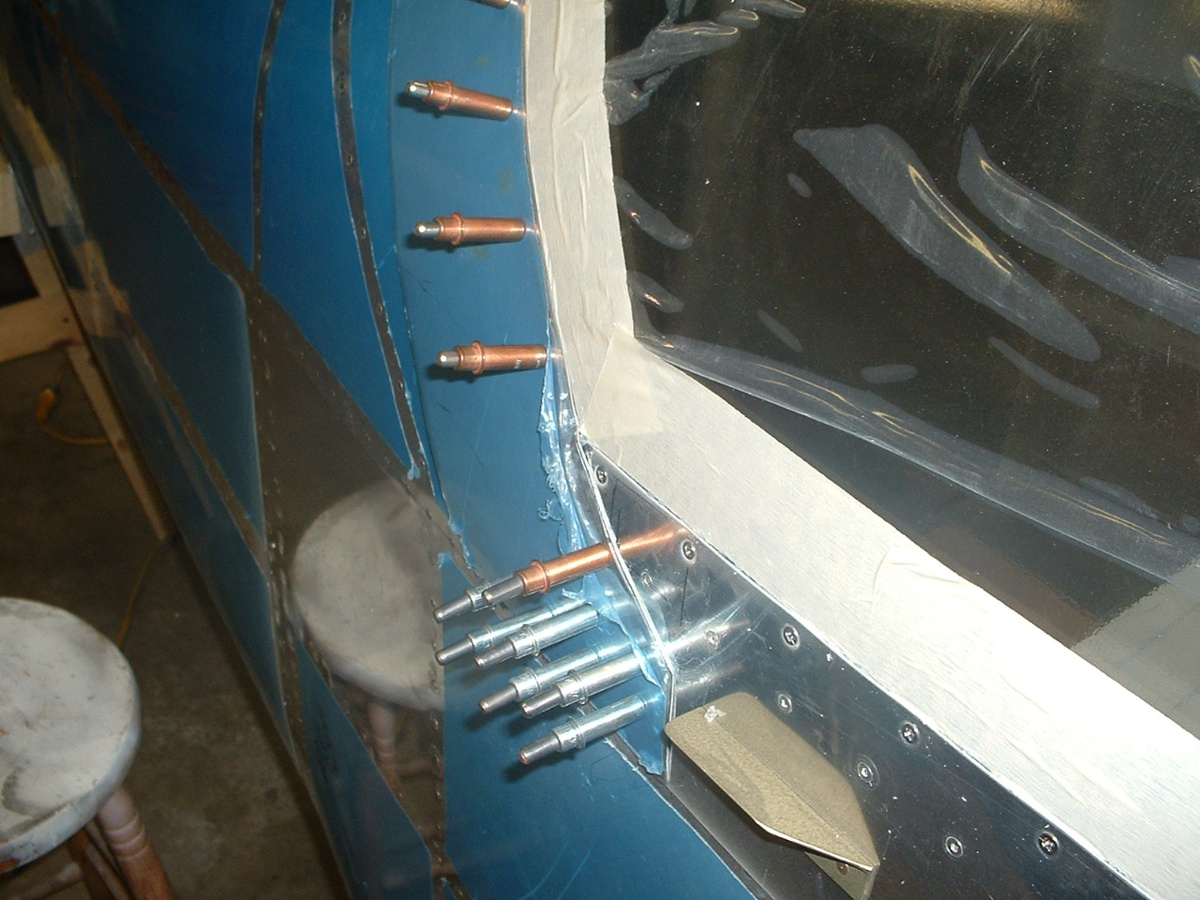
July 13, 2004: More work on the other side
of the canopy today. I finished with all the screws and rivets on the RIGHT side of
the canopy and later in the day I also worked to improve the "fit and finish" of
the intersections of the AFT canopy skirts with the side skirts on both sides. The
area in the center of the photo below is where I put some extra effort for
"good" fit at the overlap of the aft and side skirts. Although I did not
take a picture of it, I also finished with the canopy locking handle. It is now
tapped and drilled so that the latch can be opened from inside or out.
And to make matters much better, I received two shipments from Van's Aircraft today. One was the back-ordered nose wheel pants fiberglass parts from the finishing kit. That box was delivered in the FEDEX Home Delivery truck (surface freight). Then about half an hour later, the FEDEX air freight truck showed up with the two boxes containing the Firewall Forward Kit. I spent the hottest part of the day inside doing an inventory of the parts in the two boxes and getting to know them and the plans. I was making a few mental comparisons from what I have seen on David Edgemon's airplane and noticed a few things that David did not take from Van's in his kit. There was one piece of stainless steel strap material that eluded me until I raised the bottom end flap inside the box and found that it had slipped under the flap out of sight. I also found out the ONLY difference that I could find between the firewall forward kits for the RV-9A and the RV-9: ONE fuel line is ONE INCH longer in the RV-9 kit than in the RV-9A kit. David had complained about one of these being too short. He bought one that was about 1.5 inches longer from a custom hose house in California. My ordering mistake online for the RV-9 FF kit got me a fuel line that is longer than was planned, but that may just be what I really need. I will know when the engine arrives and is mounted on the fuselage (September?)
And here is the work table exposed again since the canopy is not coming off the
fuselage again. I have put away the "blanket" that was there during canopy
work, and have rearranged things underneath to accept the sub-kit boxes from the firewall
forward kit. I also put some of the parts on the shelves across on the other side of
the garage.
July 14, 2004: Here it is, canopy riveted
and complete as far as Van's plans go. I have to put on two strips of UHMW tape on
the side skirts, but all the rivets are installed. I am thinking about doing one
more modification from Tugwell's Designs for
an easy opening mechanism tied to the normal canopy latch handle. I will keep you
posted on that one when it is done. For now, it is time to move on to firewall
forward components.
Updated October 8, 2004: I just wanted to add this link to another page in my web site in case you have not already seen my Tugwell page 2. It shows how I modified the aft skirts for a better fit against the aft fuselage deck.
| CLICK HERE for Firewall Forward Page 50! | RETURN to MAIN MENU |