FUSELAGE CONSTRUCTION - Page 37.
January 15, 2004: The altimeter from Van's arrived today with the correct calibrations in INCHES, not millibars. I finished preparing the LEFT sub-panel to accept it. It was only 1 hour of work, but it was the 1000th hour of actual aircraft production time. I also applied with the FAA online to reserve my N-number.
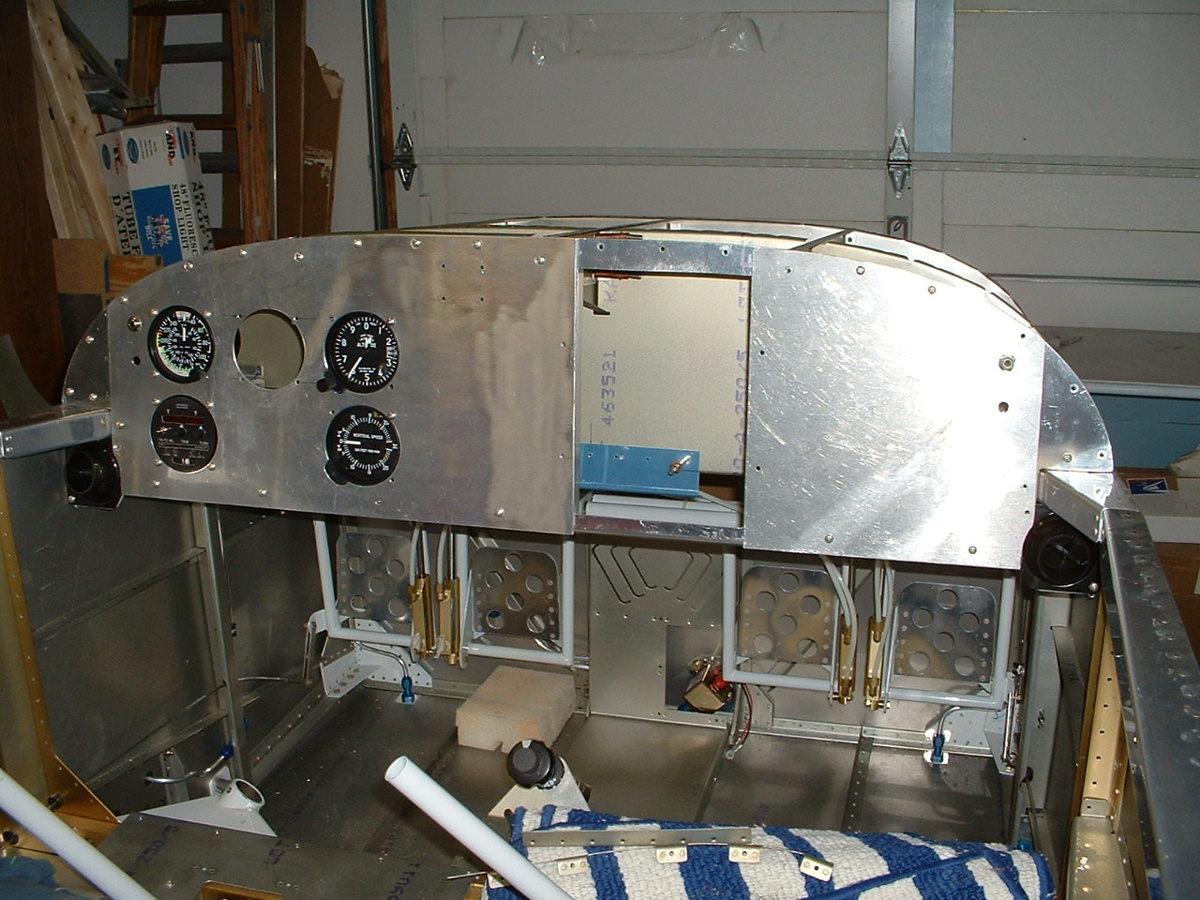
January 16, 2004: This day found me finishing up
work on the RIGHT sub-panel for mounting to the F7103 frame that I made from the original
blank instrument panel. I also cut out the clearance area behind the RIGHT sub-panel
to allow whatever I want to be mounted to the panel. I think the Hobbs meter will be
the first thing I put there.
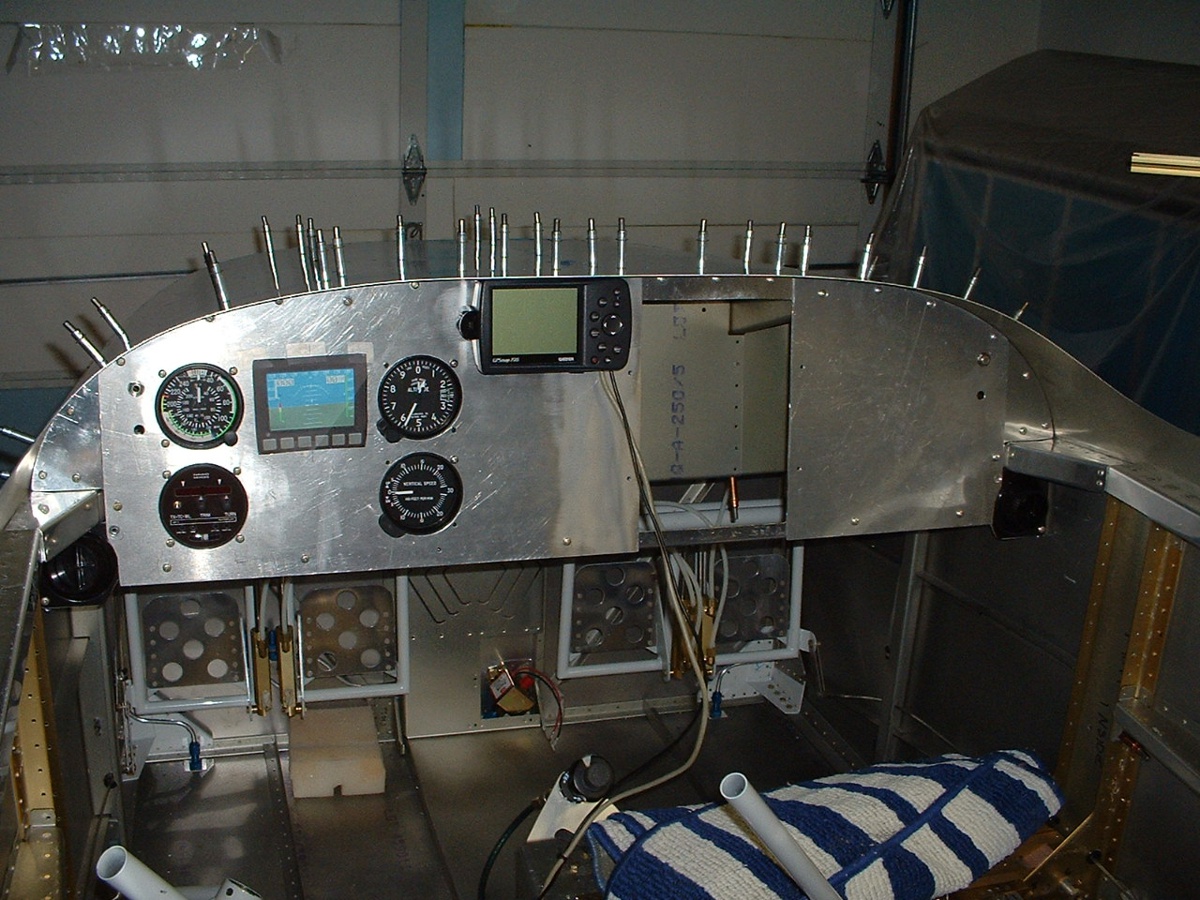
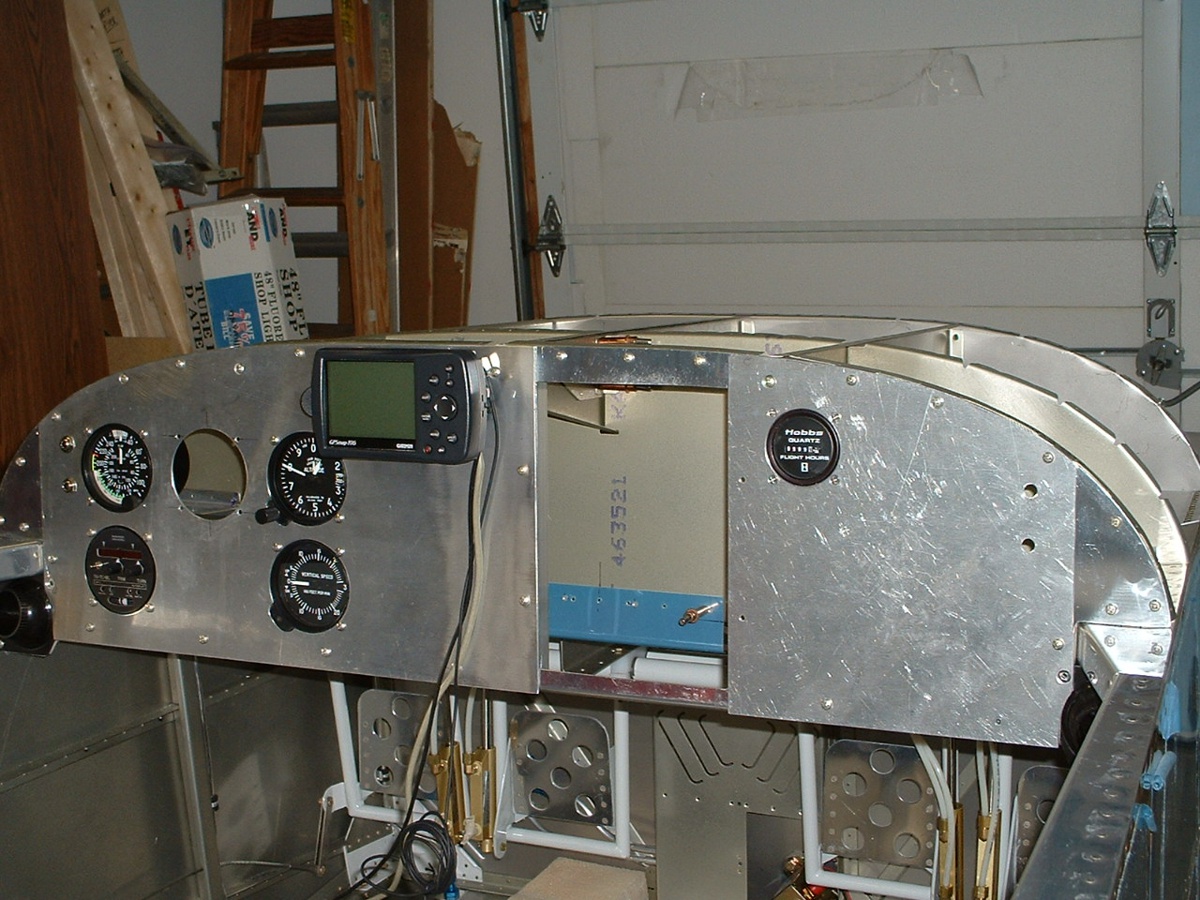
And here is the panel with everything I have on hand as of today. I just
had to verify one more time that the GPS would not hit the top skin. I also wanted
to check that the right panel would be removable with the top skin in place. I made
the same test after I had cut the LEFT panel to its correct length last week. A
little more grinding along the top edge of the panel on the Scotch Brite wheel did the
trick. The Dynon color display is still a "Paper
Tiger" for now, but all the others are real. I am going to be busy with
Pitot/Static air plumbing in the weeks ahead. I am also considering my budget for
acquiring the Dynon unit, since it too, must be part of the Pitot/Static system.
And in the email reply from the FAA today, I have been told that no one else has applied for the N-number that is my first choice. I will confirm that when the paper work is processed next week. It should show up on their web site by Tuesday or Wednesday.
January 17, 2004: SATURDAY is a great day to get some RV construction done. This morning I went over to visit Larry Champion, who is building an RV-8 tail dragger. It was his first day of using sealant during the riveting of one of his wing tanks. I gave him a few pointers to save him some of the pitfalls I had when I was doing my own fuel tanks. He had ONE wing up on his jig with the leading edge skin riveted in place, and the other top skins clecoed in place. Sorry, guys, I left my camera at home on that visit.
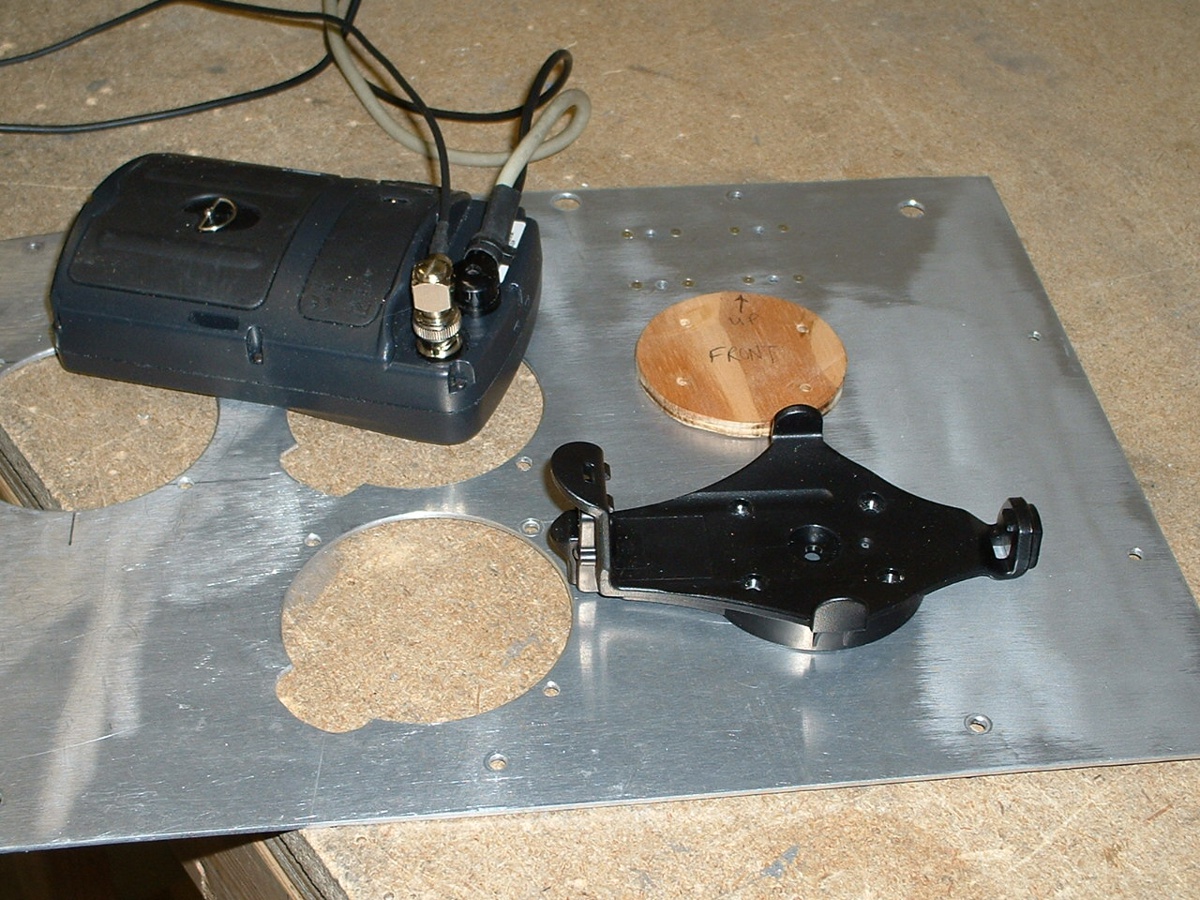
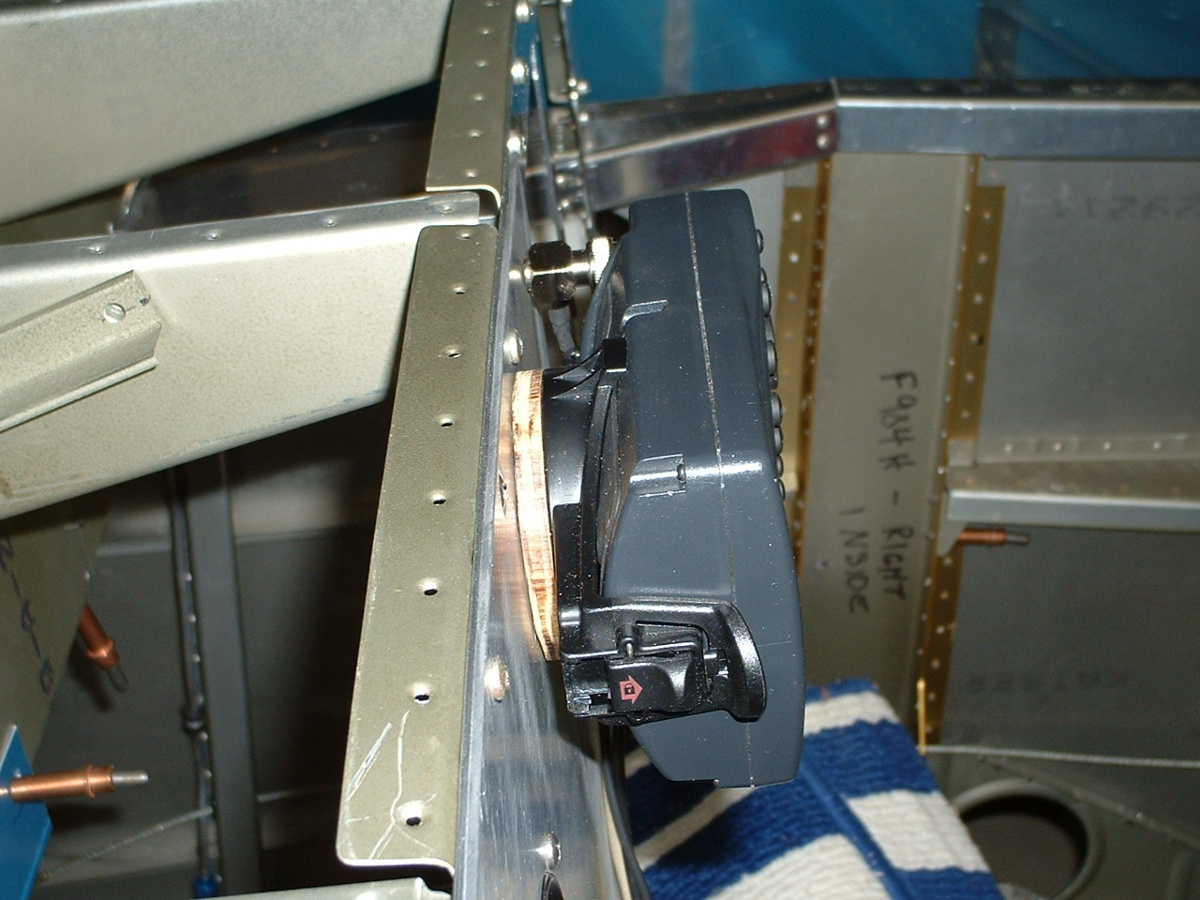
As for my work today, it is still focused on the panel. The 6-32
plate nuts were riveted in place to hold the GPS mounting bracket to the panel. I
also attached the right-angle BNC antenna connector and discovered that I needed a
1/4" thick spacer to move the GPS away from the instrument panel. I fabricated
a round plywood spacer to do that and bought the extra long screws to pass through the
spacer, the bracket, and the panel.
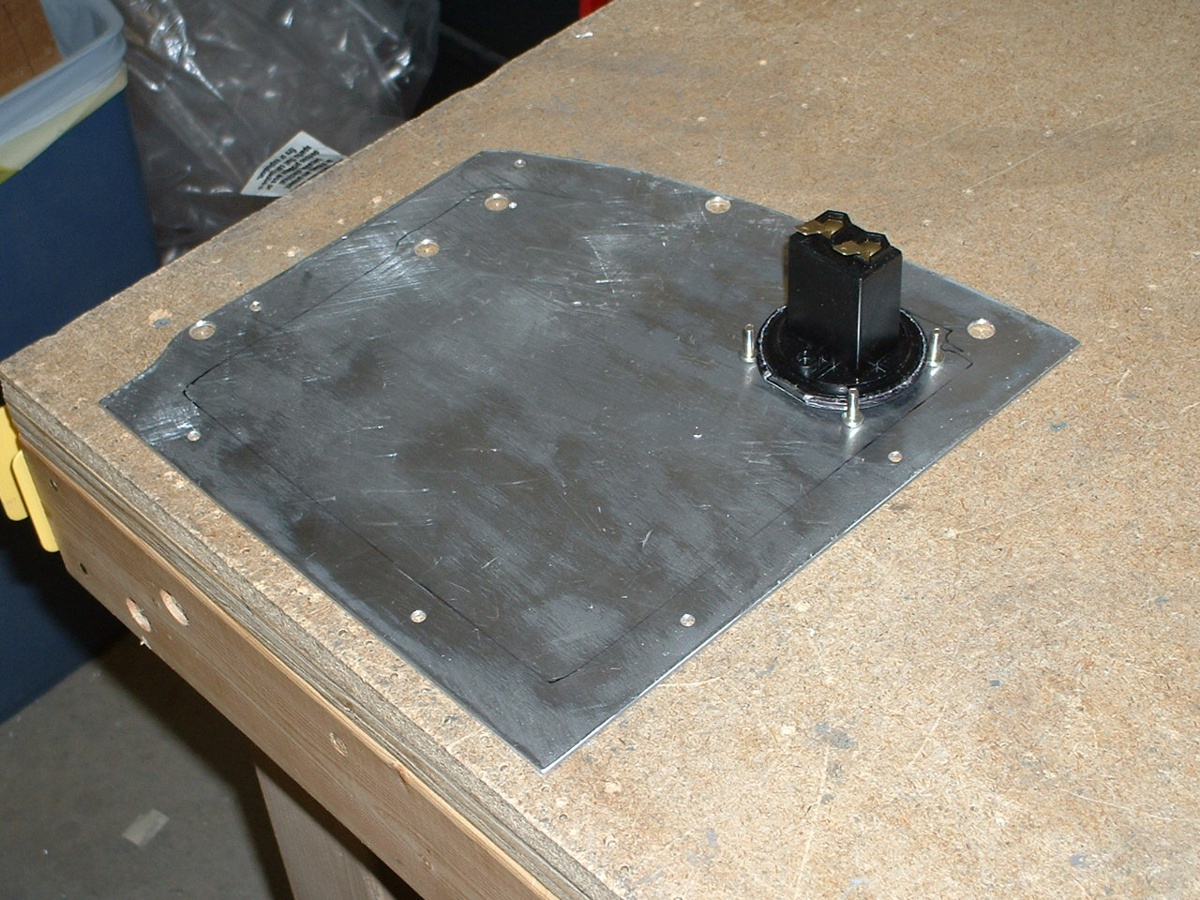
After getting the GPS squared away, I started to actually do something with the
RIGHT sub-panel. I cut the 2" hole and mounted the Hobbs meter to it.
This Hobbs meter was given to me by Larry Westbrook after it had failed on him at 233
hours in his RV-9A. I was able to take it apart and determined that an internal
electrical connection had been intermittent. I reset the meter to something near
9968 hours and plugged it into a power supply that I have and it ran. When it got to
9999.9 hours, I stopped it. I figure I can finish it off to 0000.0 hours in the
airplane when I am wiring the panel. It will eventually be attached to the oil
pressure sensor switch when the firewall forward kit components are installed.
Look closely at the left side of the panel below and you will see that both the
microphone and headphone jacks are installed. I picked up a pair of 1/4"
headphone jacks today, but have not installed the jacks on the right side yet. All
three wires from the GPS will be bundled together and end up going through a grommet in a
notch of the radio stack panel near the top. That panel will also contain the engine
monitor. I won't cut any more holes in the LEFT main sub-panel
until I get a Narco NAV-122D for ILS approaches. An audio panel with marker
beacon receiver will be at the top of the radio stack. The engine monitor will go
below that, followed by a COM radio, then the radar transponder. If all goes well,
the radio stack will also accept a Garmin GNS 430, which you have seen represented on
previous pages. When that shows up ($$$$), the GPS 196 could go away and that would
leave only four small holes in the panel -- or I could just keep dual GPS units.
| OK, time for you guys to give me some feedback via email to |
| "When my Narco NAV-122D is ready to install, where should I put it?" |
| 1. Put the NAV-122D below the Dynon unit in between the wing leveler and the vertical speed indicator for prime viewing on approach. This location leaves space under the GPS in case I may want to add stuff to the radio stack and move the engine monitor below the GPS 196. |
| 2. Use the space under the GPS to the right of the vertical speed indicator, leaving space for a real electric-powered (not vacuum) gyro compass as a future backup to the Dynon unit in case it should fail. |
| An electronic 2-inch dual fuel level indicator has to go in the panel. It is the size of the Hobbs meter shown in the RIGHT sub-panel. Where do you think it should go? |
| 3. The space to the right of the altimeter and just below the GPS 196 would accept TWO 2-inch round gauges. Should I put the fuel monitor on the LEFT or RIGHT of these two possible locations? |
| 4. What about the location just below the Hobbs meter on the RIGHT sub-panel. Do you think the fuel gauge would be too far out of sight? |
| So, there you have it. Give me your thoughts in an email if you think paragraph ONE or TWO above is the best choice for the NAV-122D location. Also, give me your opinions on the pros and cons of both answers in THREE and FOUR above. Now I can get an idea how many of you are looking in on my little bit of web space since I cannot put a hit counter on any of the pages here. |
January 18, 2004: Sunday, a day to think about what next? I took a few minutes to put the flap motor and braces back in the fuselage to support the bulkhead behind the seats. I figure if I am going to be getting in and out and using that cross bar as a support, I had better stiffen it up a bit. Eight screws later, all is STIFF. I started to make a written list of things that can be done with what I have on hand. The list says I have to wait for more stuff to arrive.
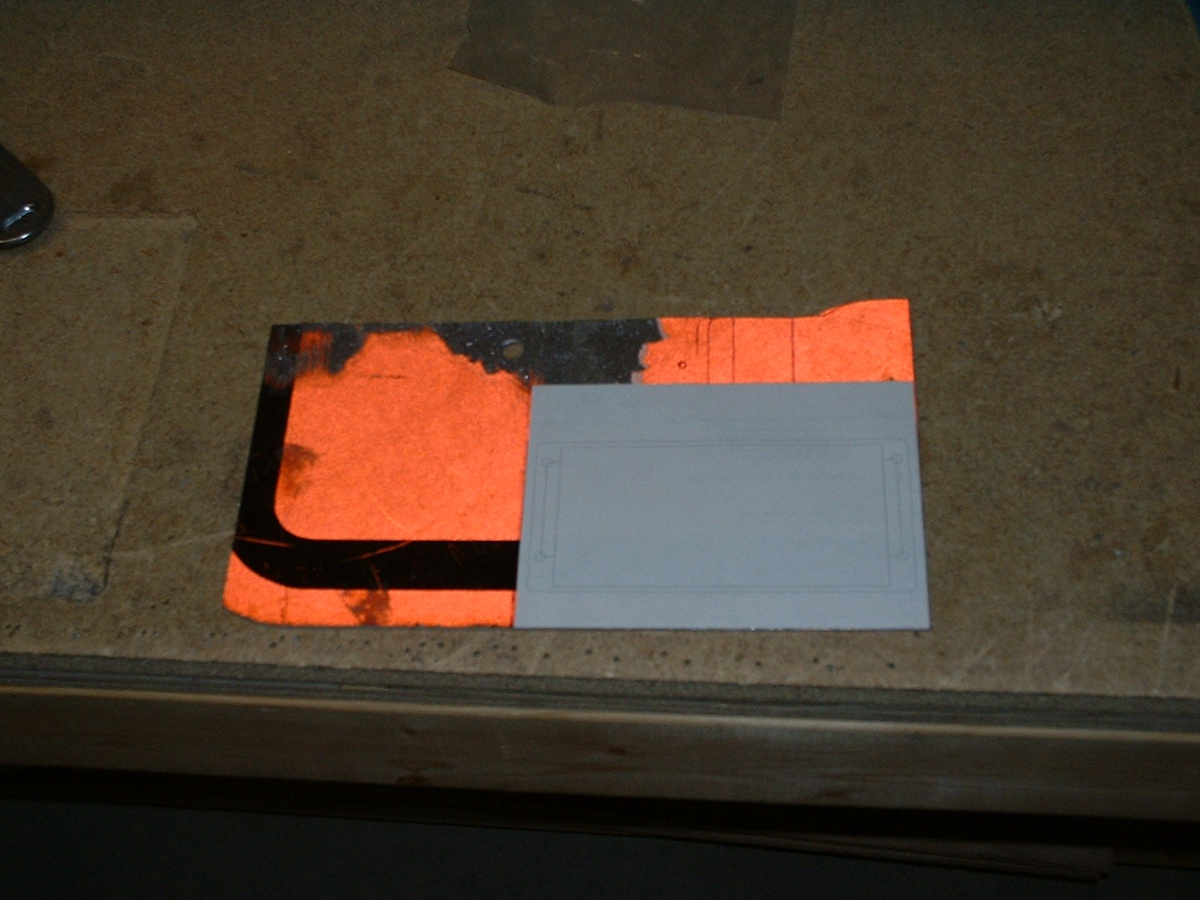
January 19, 2004: A day off for most of the
country. I made a template to cut a mounting plate from the infamous road sign.
As you can see in the photo below, I used very fine lines on my CAD program to show
the engine monitor outline, clearance hole, and mounting screws to fit the plate.
This plate should be at the TOP of the radio stack -- IF I decide to put it in the stack
and NOT on the LEFT sub-panel. That still remains to be seen.
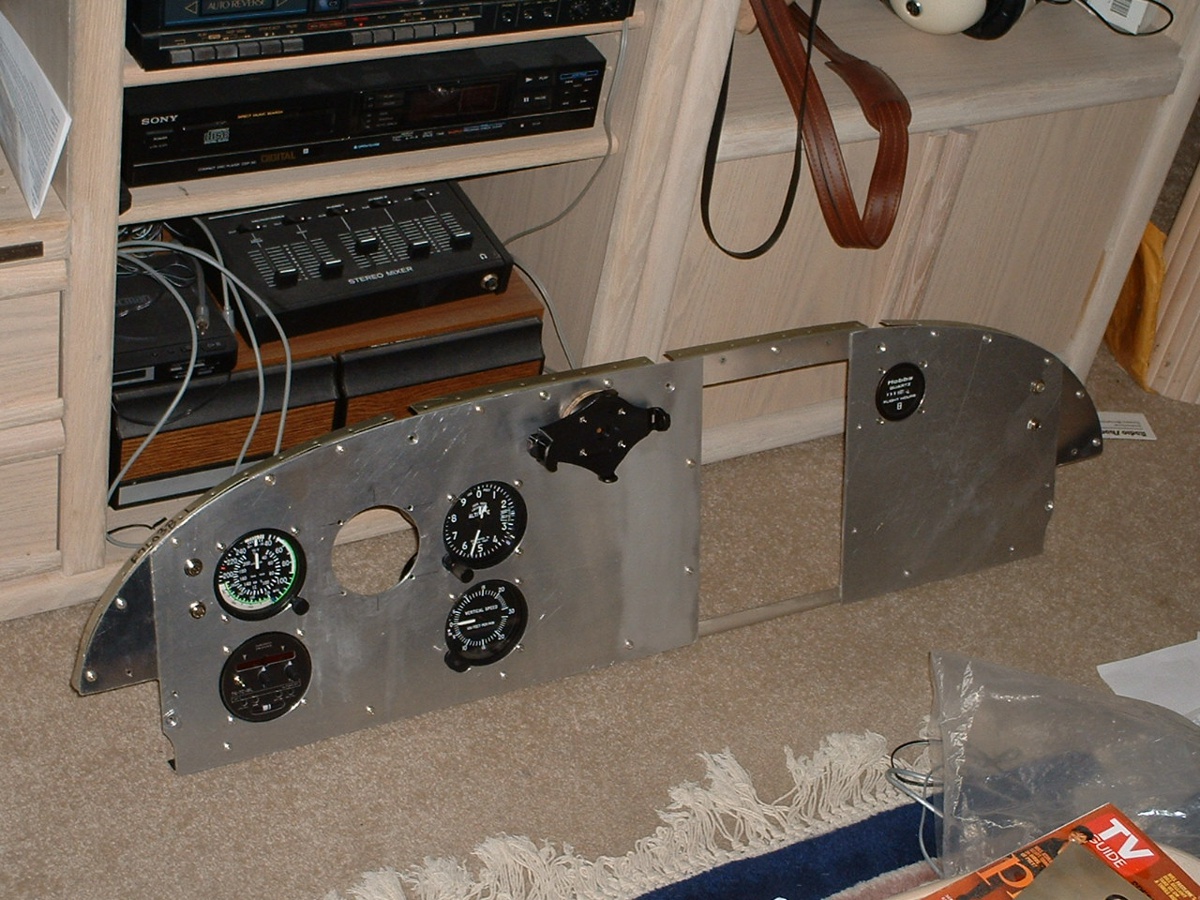
And speaking of my instrument panel, I decided it does not need to stay out in
the garage, so in to the living room it came.
As for what I will do in the coming weeks, well there is this RV-8 builder who needs some help bucking a few rivets, etc. I will post some photos in my Other RV Section on those happenings as they do. Also, today, I got an email from Larry Westbrook with his new email address. He commented on my repair of his "old Hobbs unit" that I put in the right sub-panel as shown above. I know that the Hobbs units are inexpensive, but I wanted to see what makes them "tick" and I did, successfully. The FAA acknowledges that experimental aircraft are an educational experience -- I can say that it is just that, educational, right down to what makes it tick.
For those of you who may not know, this Hobbs unit "ticks" once every FOUR seconds. A quartz timing circuit pulses a solenoid inside the case to turn the wheels that are the readout. On this particular unit, there is a wheel on the far right side that has alternating black and white squares that are visible through the window. It changes from black to white or white to black every "tick". And it takes 6 minutes (90 ticks) before it will move the white wheel one digit. After all, the white wheel is measuring tenths of an hour.
Speaking of TIME, the project stands at 1007.0 hours and holding...until March. You can keep checking my main menu for UPDATES. When something happens to get me going, I will post it in these pages.
| CLICK HERE for fuselage page 38. | RETURN to MAIN MENU |