Airport Assembly - Page 122.
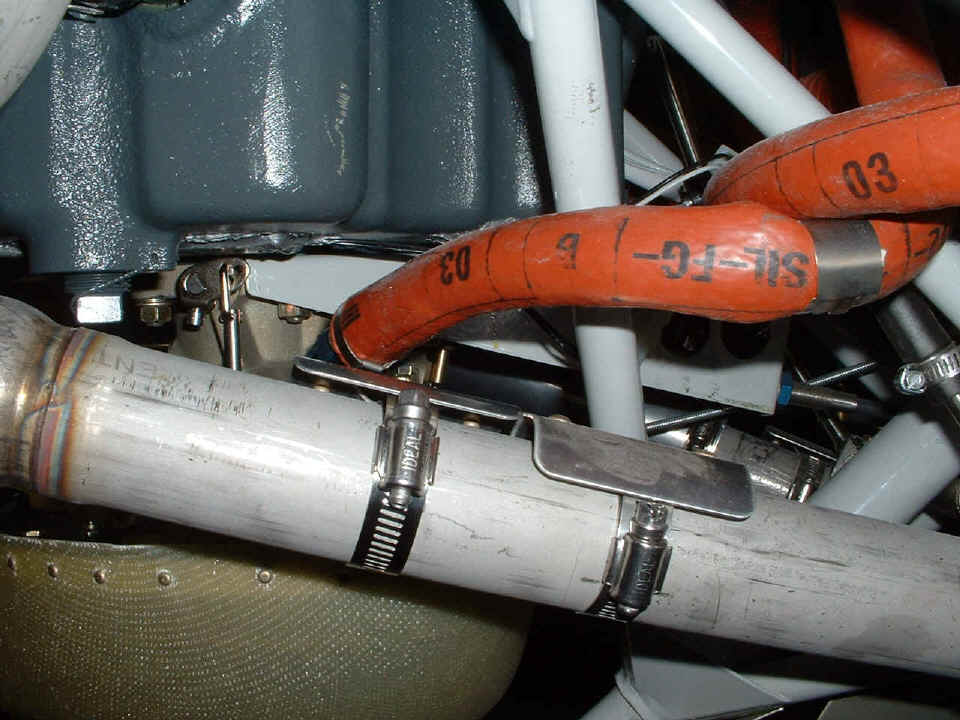
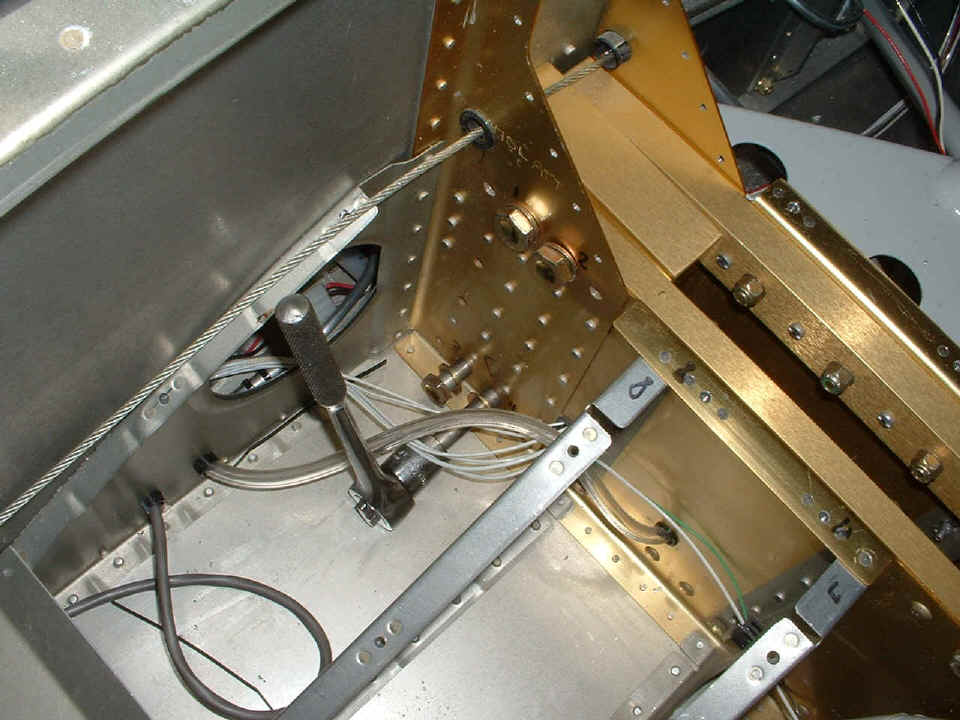
May 3, 2005: The last thing tonight was the
relocation of the hose clamps on the heat shields of the LEFT exhaust pipe. I moved
both screw clamps to the near side of the exhaust pipe to clear the lower cowl when it is
put in place. The screw clamps were previously on the bottom side of the exhaust
pipe. I also raised the pipe slightly at the rear by adjusting the little hose clamp
you see at the far right of the picture on the smaller black hose. The lower cowl
went back on with less problems this time. I think I have learned the correct
sequence to get it on and off smoothly now.
One more item to note, the Tugwell canopy opening cable is working just fine with no jamming today during opening or closing of the canopy.
May 4, 2005: Wednesday was a milestone day if there ever was one to be had in the whole project, as you will see in the pictures below. The airport manager stopped by to visit for about 20 minutes or so. Frank Zarski was the EAA chapter 150 President when I joined the local group a couple of years ago. He has been the airport manager for several more years. He commented on the airplane, and his experiences building his Rutan design.
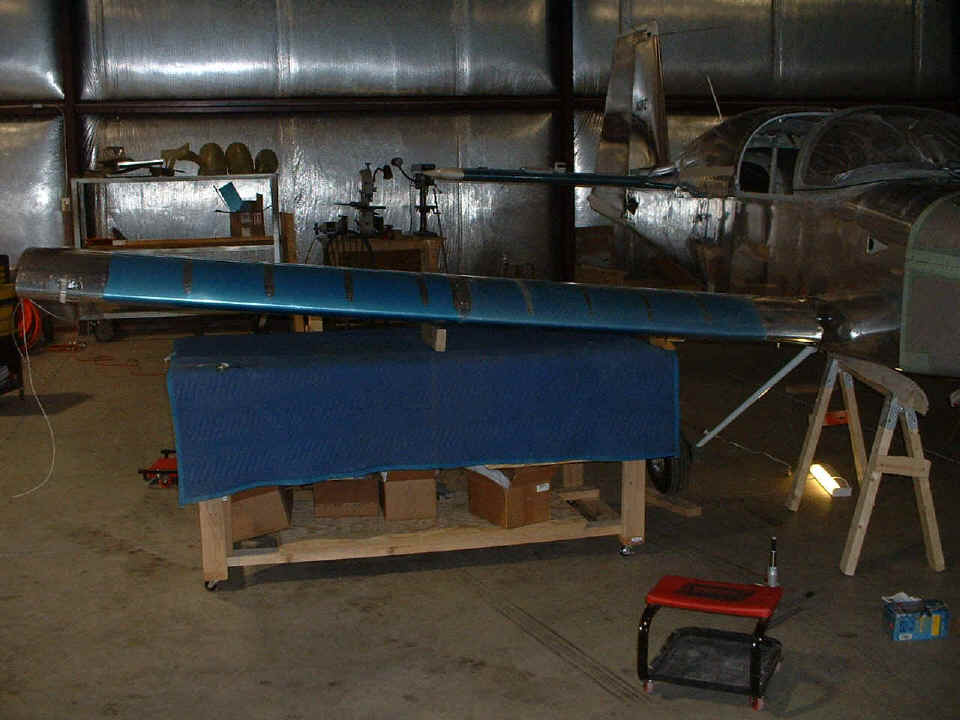
I had the left wing up on the work table and was checking things like how much
of the wing spar will be showing when the bolt holes are lined up with the wing bulkheads
in the fuselage. I took a piece of scrap fuel tubing and tried to predict the
correct length of the tubing before I cut the one sticking out of the fuselage. I
missed it by about 3/8" SHORT of course. Don't worry, there is enough extra
tubing under the fuel valve that I can change my bends and get the extra length I need
outside. The fuel vent line was fine since it had an expansion loop inside the
fuselage. I finally settled on the routing of the pitot tube through the inside rib,
and cut it to the desired length and shaped it to avoid the aileron push rod when it gets
installed. I will not hang the ailerons or the flaps until I get both wings
installed in the fuselage.
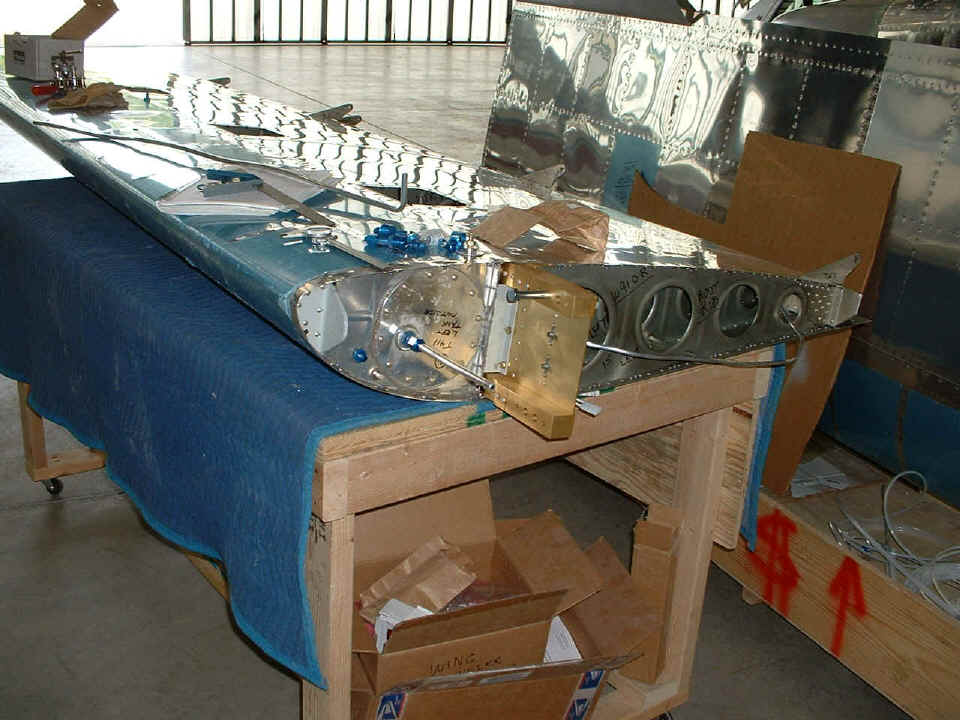
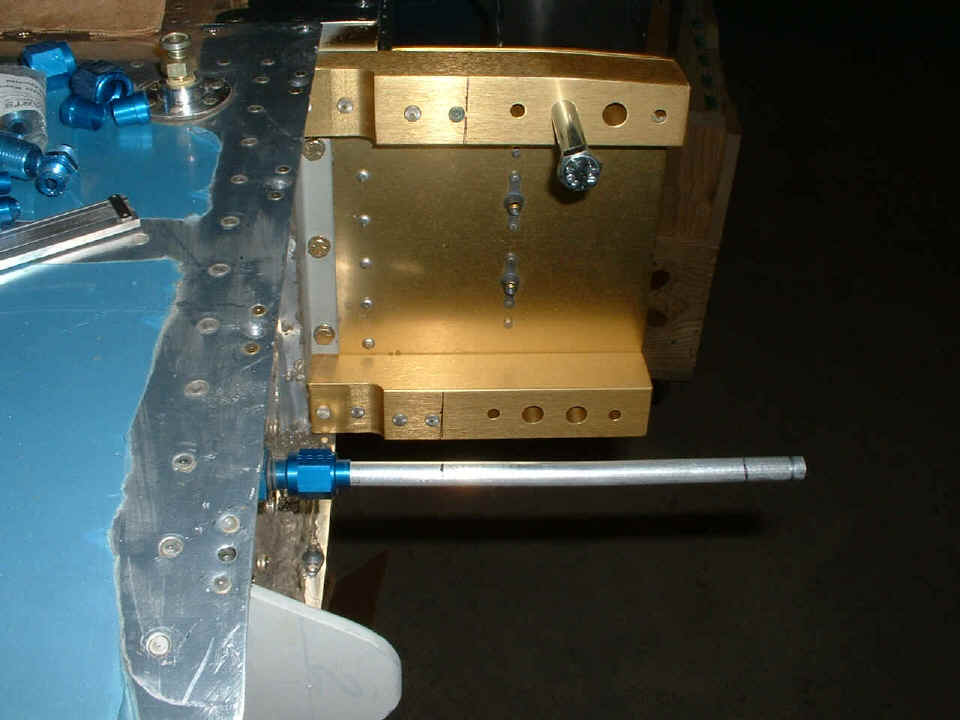
Next came the marking of the fuselage side lines on the wing spar to tell me
when I have it pushed into the fuselage for the main bolt hole alignment. Those four
holes are 7/16" precision holes that were drilled on a jig at the factory to mate
perfectly with the wing spar bulkheads in the fuselage. Notice that line on the
scrap tubing? It is 3/8" too close to the fuselage and should be closer to the
tank. It is a long story, I will cut it longer when I put in the RIGHT wing.
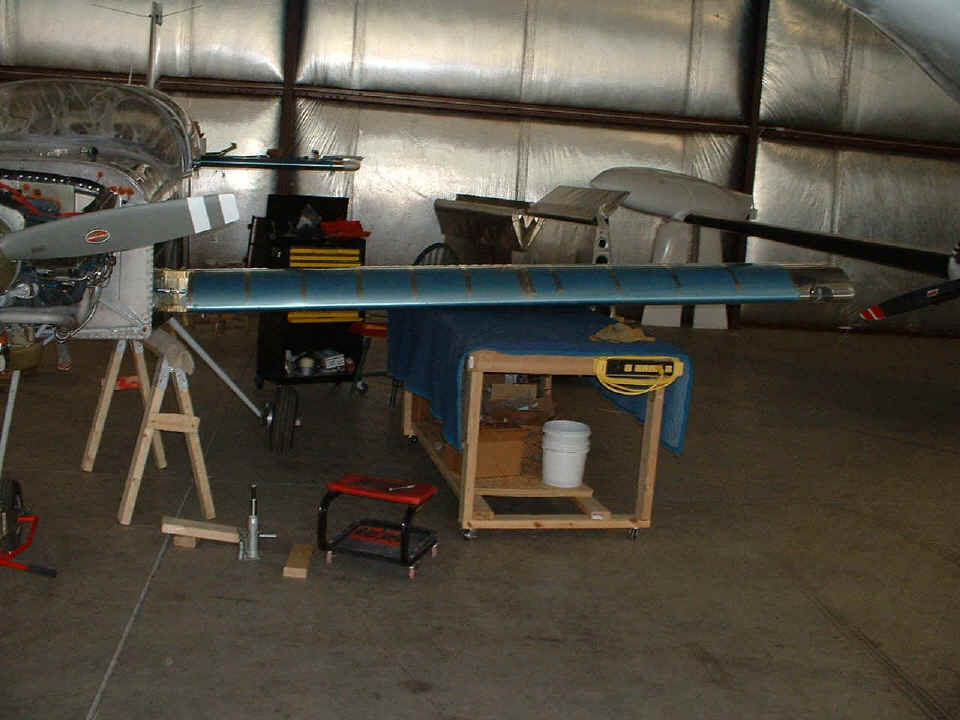
This was when I first put the wing in the fuselage without any bolts holding
it, just the table and the fuselage opening for the wing spars. Notice the hydraulic
jack on the floor, and the saw horse under the fuselage holding the LEFT main wheel off
the floor. We had this discussion before, but for those tuning in late, it relieves
the pressure on the wing bolts and the gear leg weldment that is bolted to the front wing
spar bulkhead. That allows the close-tolerance wing bolts to fit through the wing
spars and the bulkheads with minimal effort (stress on my part). This photo was
taken before the sun went down.
It does not show up well in the photo above, but before I worked on the wing
installation, I finished grinding off the excess fiberglass and resin from the fiberglass
cap to the vertical stabilizer and secured it to the VS with six screws. I also
finished up the mounting of the tail light fixture after drilling a new screw hole and
tapping it with my 4-40 tap.
Inside is where all the action is on this part of the project. I had help
from two of the local pilots to get the third and fourth bolts in position. I used
the cheap bolts from Ace Hardware to get things going. I would move the wing very
slightly up and down using the roll-around work table. That allowed me to get the
undersized bolts into the wing, one in the top row, and one in the bottom row. Then
I put in one precision bolt beside each of the two Ace undersized bolts. After that,
I needed the help of the other two guys to get the last two bolts started as you see them
below.
Here is the result of the day's work, "a wing and a prayer".
This photo was taken late at night and I had to process it in Corel Photo Paint to get it
to look this way. It was underexposed, and it shows in the noisy textures.
Yes, I remembered to connect the pitot tube and the light wires at the wing root when I
was putting it all together. The weight of the LEFT wing without the flap and
aileron installed on it is around 60 pounds. The airplane is sitting a bit off level
on the landing gear, but it is in no danger of tipping over on the LEFT side. Notice
that I brought the bottom half of my tool cart to the airport today. Now I can save
some steps when I need a tool.

It was 10:30 PM when I closed the hangar doors and headed for home. I got home in time to see the 11 o'clock news, get a sandwich, some grapes, and a Mint Sundae ice cream cone before coming up to post these photos. I may not go to the airport tomorrow. That will depend on how I feel from doing all that kneeling down inside the cabin to secure the wing bolts. I had to get out one time to "un-link" my knees, if you know what I mean? It is now after midnight and I am heading off to bed! Add 6.6 hours to the log book today, for a construction total of 1879.7 hours.
May 5, 2005: (aka 5/05/05)
I could not let that pass, sorry. I got to the airport late today after doing
some grocery shopping and answering a phone call from a friend in the Denver area about
job possibilities, etc. I learned from my mistakes from yesterday. The RIGHT
wing went on with the ACE Hardware temporary bolts to allow
me to get some measurements of the fuel line, then cut it a second time to the correct
length. You heard me, I cut it twice before getting down to the correct length.
The marks on the front of the wing spar at the top and bottom representing the side
of the fuselage helped again in getting it right the first time (before putting in all the
wing bolts) and not fooling myself into doing something rash again.
If you look at the extreme left side of the picture above, you will see the
plexiglass lens of the landing light. There is a piece of tape on it which served as
a handle when I was putting that lens in the wing cut out for the light. I finally
took that piece of tape off each of the lenses and cleaned them to remove the remaining
adhesive. You may also see the "mechanic's creeper" peeking out from
behind the LEFT end of the covered work table. I used that tonight to scoot under
the wing and drill some screw holes in the fuselage bottom pan where it overlaps the
nut plates in the wing root rib. I deburred and dimpled those holes after I pulled
the wing off to work on it up on the table as you shall see.
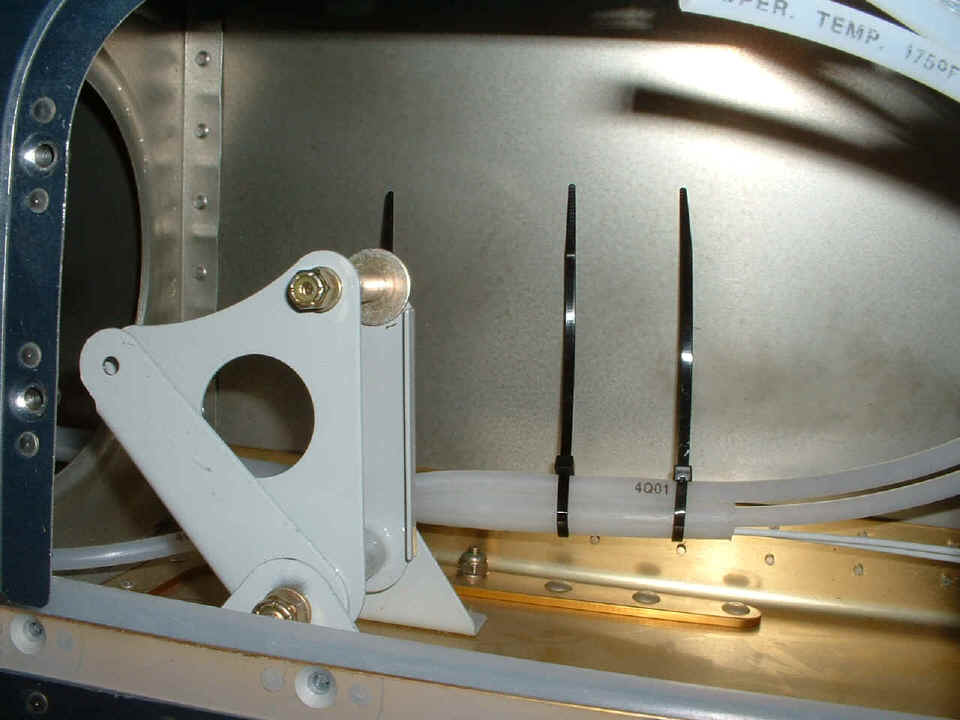
After I pulled the wing back out of the fuselage, I installed the two plastic
tubing air lines for the stall warning device. This is the eighth picture on this
page and that means it is time to move to page 123. You can see more of how I did
that on page 123.
| CLICK HERE for Airport Assembly - Page 123. | RETURN to MAIN MENU. |