FINISHING - Page 104.
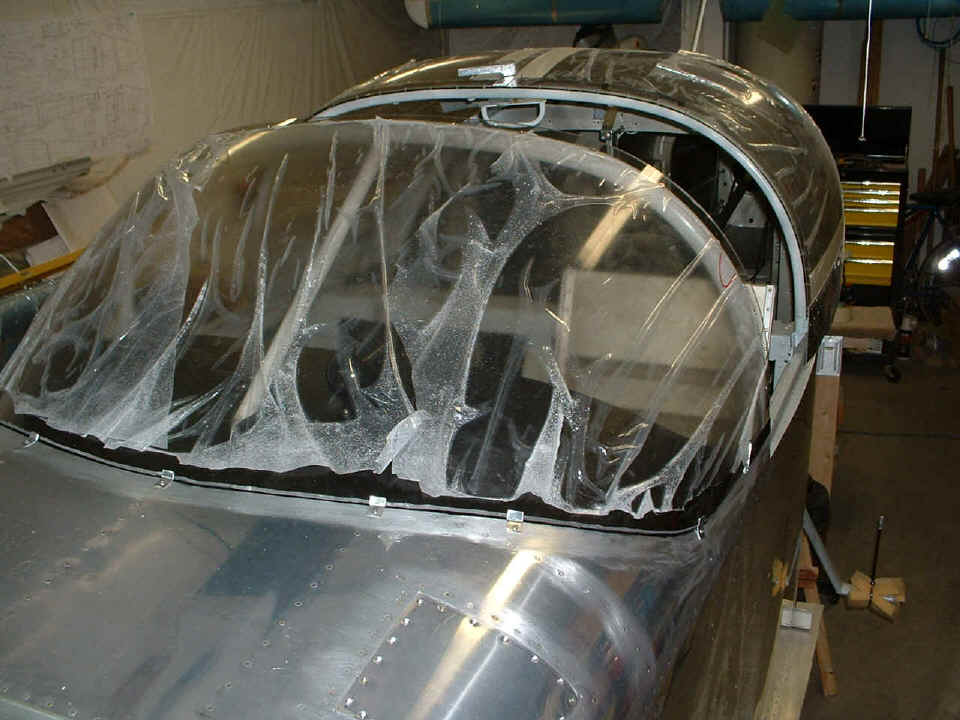
March 14, 2005: After the second fiberglass
session, the process was a bit different after removing the Dacron Peel Ply this time.
I checked the thickness of the layers across the top of the windshield and the
overlap of the sliding canopy. It exceeds the 0.080" minimum specified in the
plans from Van's Aircraft. With that good news, I trimmed the aft edge of that glass
to a reasonable dimension and rounded the aft edge to insure that it would be safe to
touch in everyday usage getting in and out of the cockpit area. Then I had to vacuum
up all the fiberglass dust.
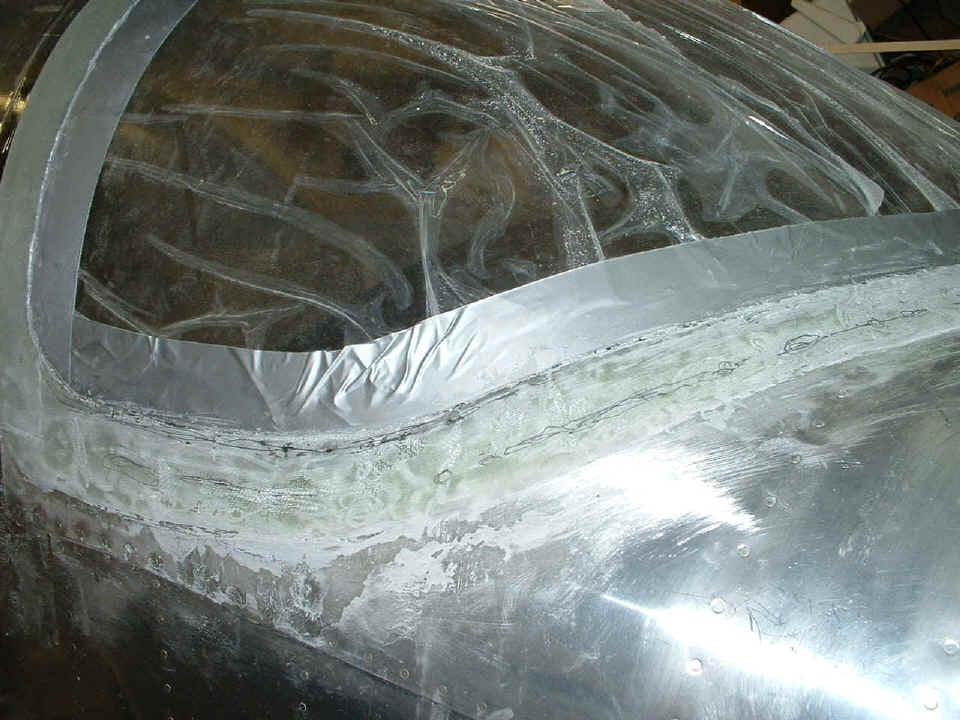
Over on the front side of the windshield, the results of the second session are
now plainly evident. After sanding the surface in preparation for a third and
hopefully final fiberglass session, I marked the areas that still need filling with glass
cloth and epoxy. But that comes later, not today.
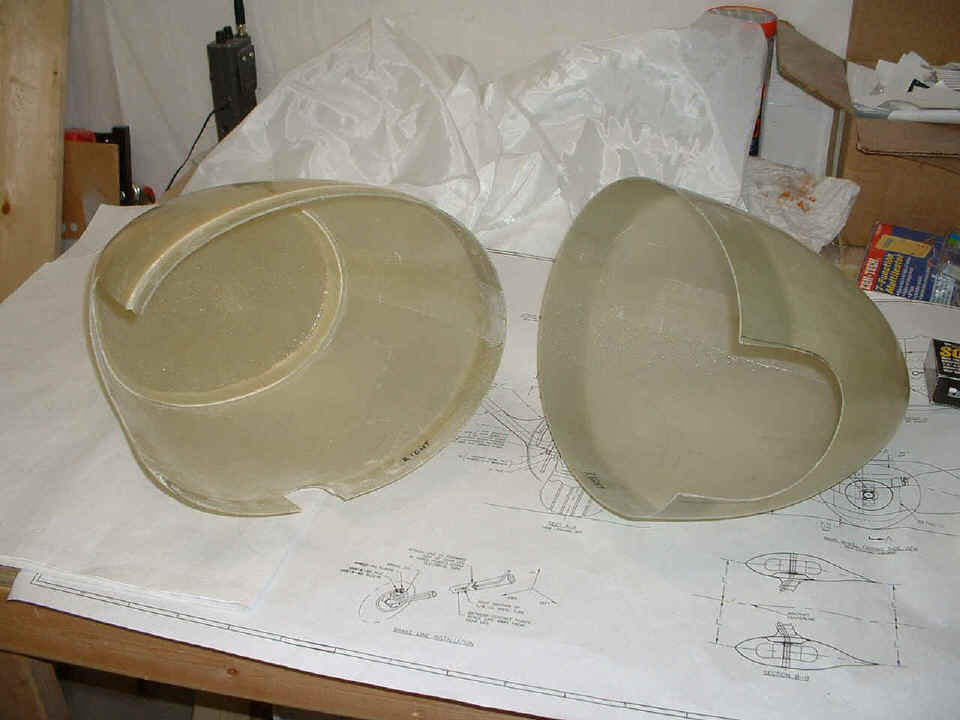
In the second session today, I turned my attention to the wheel pants.
This is cut to fit on the wheel opening area on the bottom and the axle clearance on the
inside. The larger aft piece on the left has the wheel opening enlarged a bit
already. The nose piece on the right has been mated to the aft section and I have
marked the same width on it to be cut in my next session. The axle clearance when I
took this photo is not to full size.
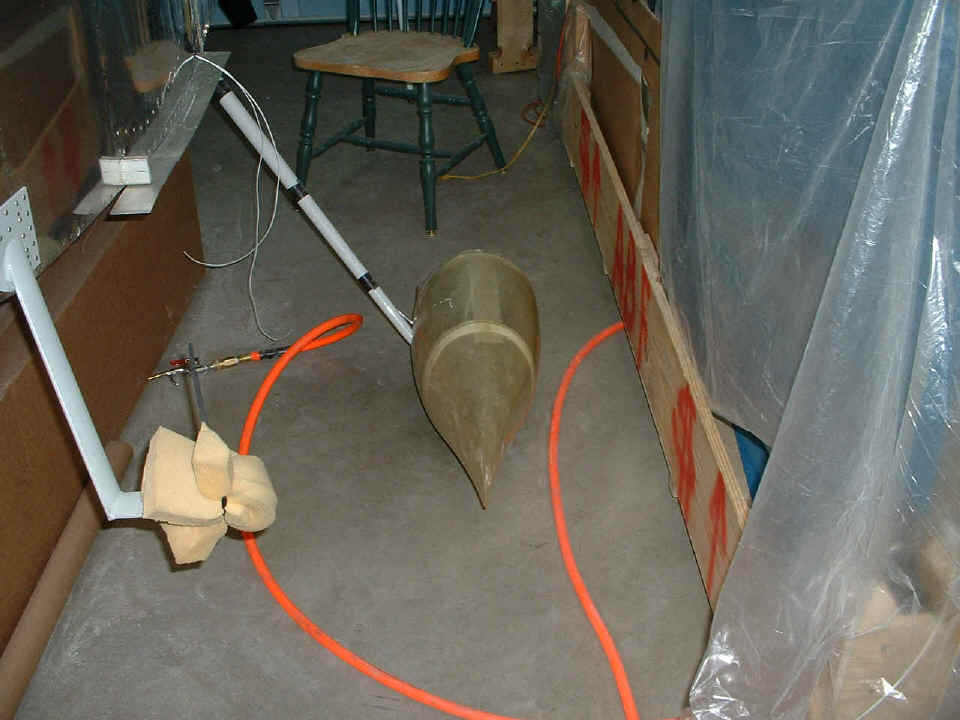
Here is the AFT section held in place by the lateral pressure from the attach
brackets only. I need to move the wing cradle out the garage door before I can get
down there to drill the holes in the fiberglass to rivet this thing to the outer attach
bracket. I will probably have to move the airplane to drill the same holes on the
other side. It is a good thing I have that tow bar.
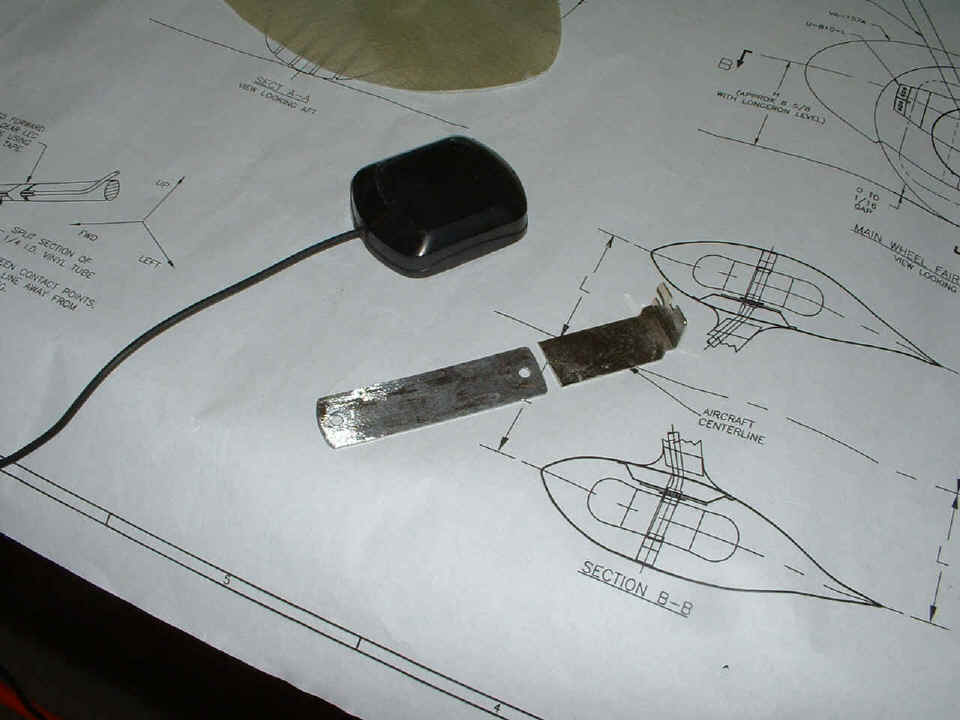
March 15, 2005: A
short session this afternoon. I worked on more commercial web files after lunch,
then put in 1.6 hours to put in the mounting plate and antenna for my amplified GPS/WAAS
antenna. I have been using this magnetic mount antenna on my car with my GPS 196 for
some time now. Since it won't stick to aluminum, I made a simple steel mounting
strip to be riveted to the F7106 forward top skin inside the windshield area. Some
of you may recognize this strip normally used in the open slots of a desk top personal
computer. I cut it to the desired length, then roughed up the top surface with my
Dremel sanding drum to be sure the flat black paint would stick to it. I also
drilled two #30 holes for blind rivets.
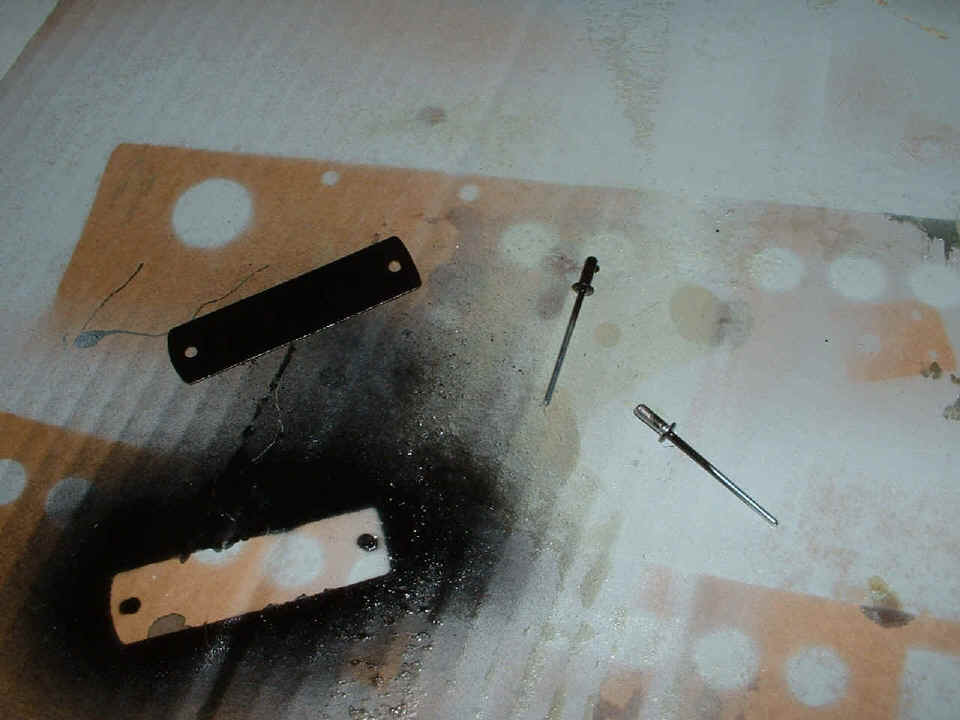
I even painted the rivets to minimize any reflections off the inside of the
windshield from this thing. The antenna sticks to the steel strip between the two
rivet holes. The strip will be mounted with the holes running fore and aft on top of
the avionics stack.
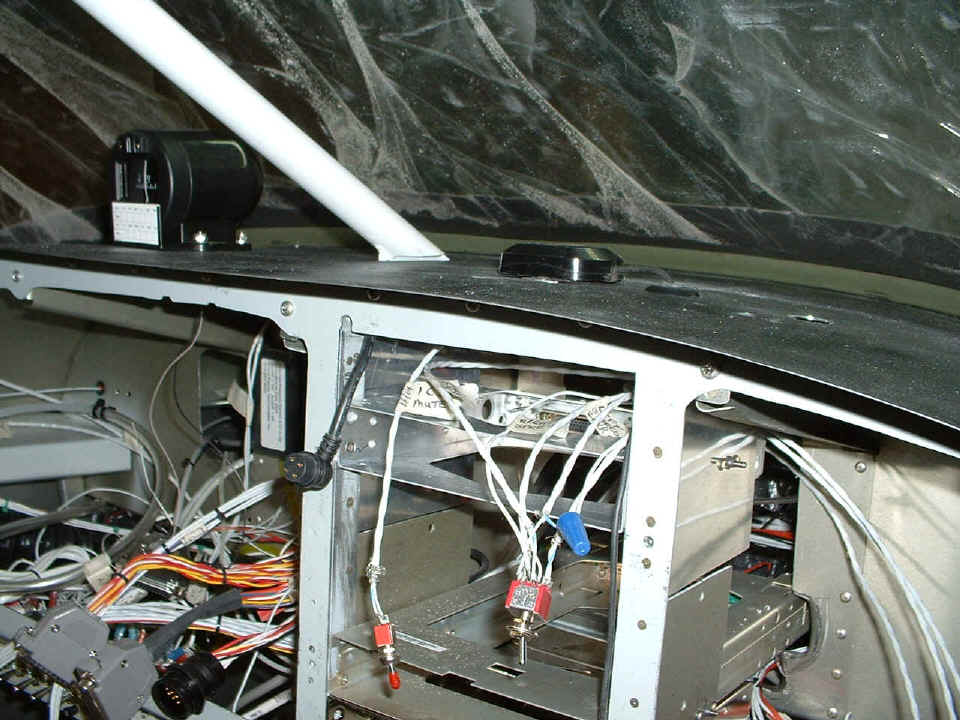
Here is the final result after I figured out how to use my large unibit in a
6-point socket and some 1/4" square drive extensions chucked into my cordless drill
up through the baskets of the empty radio stack. There was just barely enough room
to use the pop-rivet tool between the plexiglass windshield and the top skin. Before
I started this process, I moved the GPS antenna around on the panel to be sure the magnets
in the antenna base would not deflect the compass. I have to hook up the light in
the compass to the dimmer circuit and make connections to the other panel lights before I
can close up the instrument panel and put back all the avionics. By the way, that blue wire nut is on one of the stereo system speaker wires.
It is not essential for safe flight. That fat red switch is to mute the speakers
except when I want to use them on the ground, engine off. The majority of the time
the stereo is operational, it will be via the intercom headsets.
I had two visitors this evening to look at the project. Maurice Garner came again, but this time with his boss, Dan Spencer. Dan is a pilot who has not been flying in a long time. Maurice took him flying recently and the bug has bit him to get current again. Maurice has been telling him about my project and they wanted to come over. I did the usual things of showing prints and the Van's instruction manual, explaining the various skills that are developed while building the empennage parts, etc. While they were here, I got inside and closed the canopy from inside for the first time since doing the fiberglass work on the windshield. It was a tight fit. I also found a few drips of epoxy on the latch mechanism that I removed.
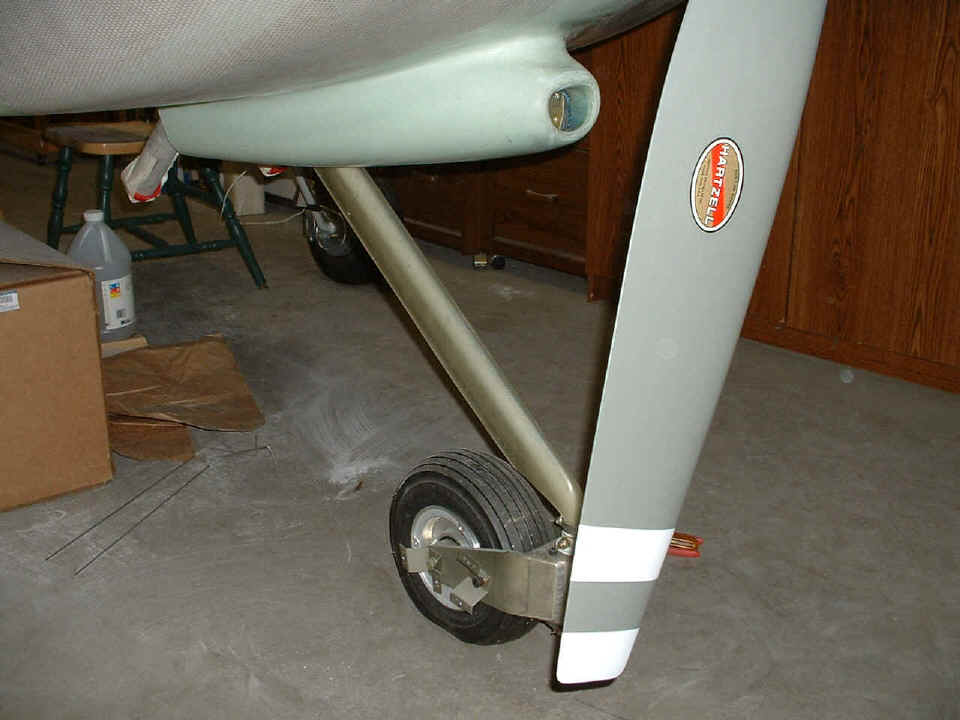
March 16, 2005: A short
session today with other non-aviation chores to do taking up my time. I have
installed the hinge on the nose gear leg fairing and secured it to the gear leg.
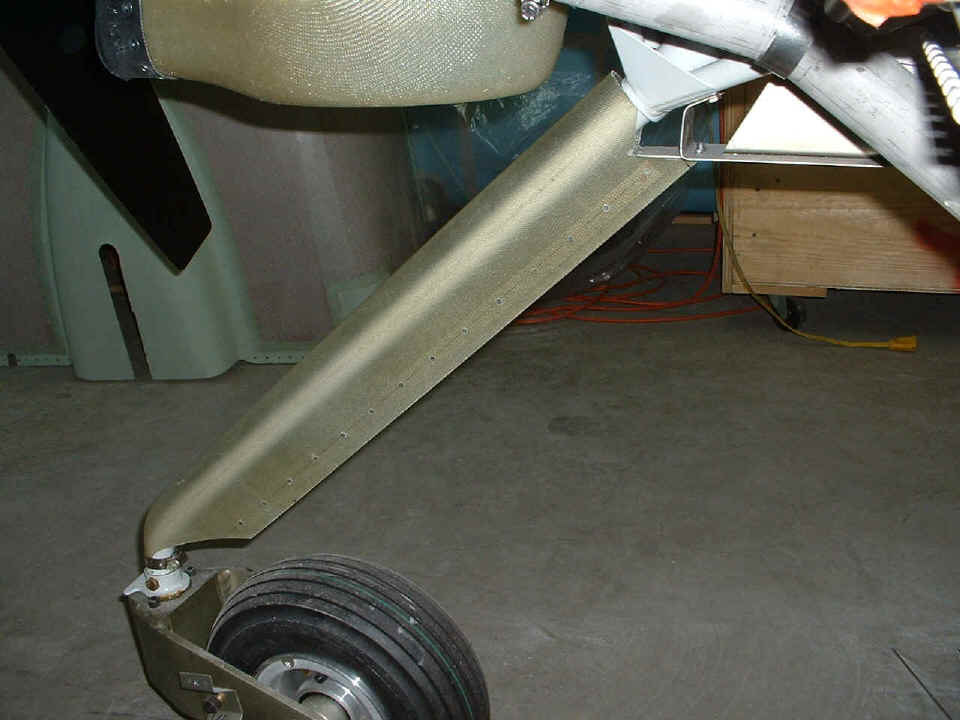
After that, it was time to check the fit of the lower cowling with the gear leg
fairing in place. Next steps are to get the wheel pants ready and the intersection
fairings. This entry will complete this page. Next time, we go to page 105.
| CLICK HERE for Finishing - PAGE 105. | RETURN to MAIN MENU. |