
FINISHING - Page 103.
March 11, 2005: I got up this morning and
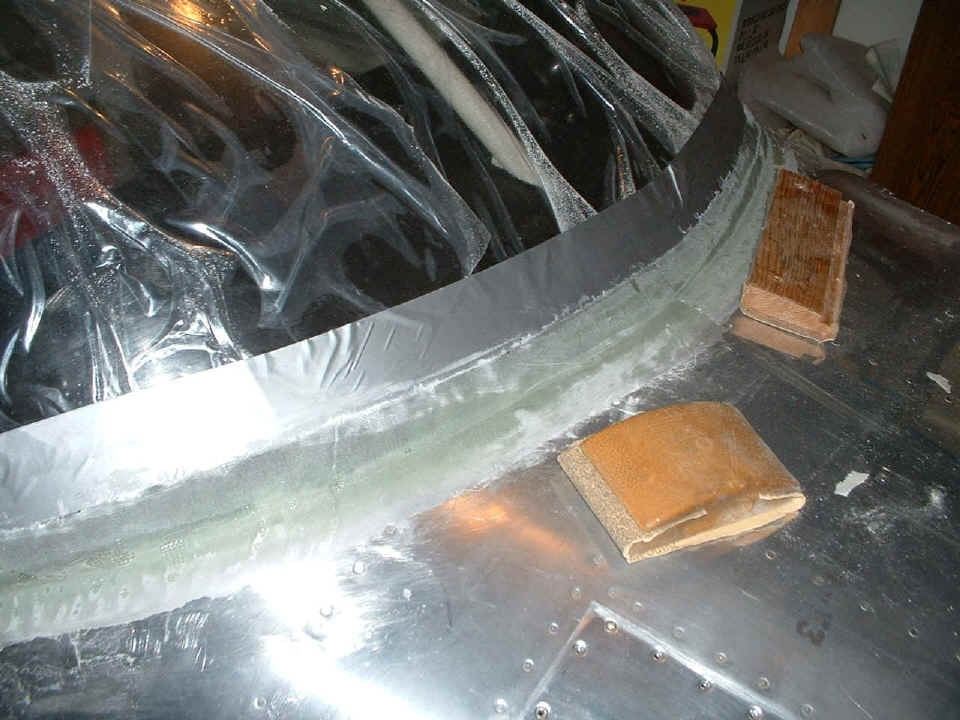
peeled off the layer of Dacron to see a nice surface on the epoxy over the layers of
fiberglass. I could also see where I overlapped the Dacron layers. I found
that any air bubbles under the Dacron will have to be sanded and filled. Look
closely in this photo and you will see the place where two Dacron layers overlapped.
It is on a line from the camera lens to the latch handle. The gray vinyl
electrical tape was partially covered with epoxy resin this morning, but I have removed
most of it with my razor scraper/cutter. I tried to keep the glass cloth from
overlapping the tape to keep this part of the clean up neat.
The second shot shows where I sanded the epoxy and fiberglass layers to check
the curing after 24 hours. A fine layer of dust was created by the sanding blocks.
I should have no problem tomorrow getting the preparation I need for the final
layers of glass to be applied. You can see a few flakes of the thin epoxy that were
dislodged from the vinyl tape and from the aluminum skin that was not sanded for bonding
to the fiberglass.
I also opened the canopy tonight to part the fiberglass across the top of the windshield from the slick packing tape on the plexiglass of the sliding canopy. It worked well once I made the initial movement of the canopy. While trying to do this initially, I pulled the cable out of the clamp on my Tugwell canopy-opening option. When I got the canopy open, it was time to go into repair mode. It only took about five minutes to get the frayed end of the cable twisted together again and threaded back into the clamping block on the latch handle.
It was a short session of only 2.1 hours. Other things kept me out of the garage much of today. More for you all tomorrow and Sunday.
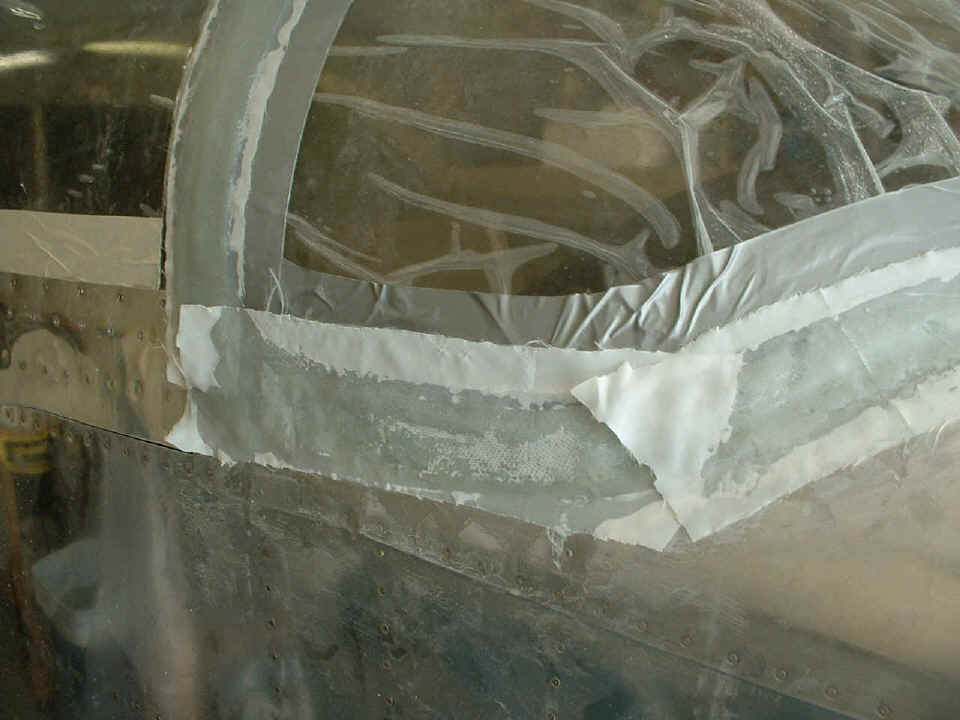
March 12, 2005: It was
a good warm and sunny day to open the garage door. I managed an afternoon session of
2.6 hours working on the fiberglass along the lower and side edges of the
windshield. I am saving the area across the top for last. This was a day of
sanding using the Dremel tool at very low speed, and sanding blocks. Some areas also
succumbed to the razor scraper to get off thin layers of epoxy that was "out of
bounds" from the windshield area. I had to be very careful along the edge of
the two layers of gray vinyl tape so as not to damage the plexiglass underneath.

Over on the LEFT side, this is the current status of affairs as I ended the
afternoon session at 5 PM. When I got to this side of the fuselage, I wanted to
stand on the floor for a while instead of up in the chair. As a result, the side got
most of the attention of the sanding blocks, etc. When I blow away the dust with the
air hose, it reveals the areas at the extreme edges of the epoxy resin where it is not on
the sanded aluminum. The air gets under the epoxy in those places and I sand it
away. There are some places far from the windshield area where epoxy has dripped or
been smeared. Those places have been attacked with the razor scraper, and will later
be wiped down with MEK to get back to bare aluminum again. The bottom center edge of
the photo below shows such a place just below the joint of the side and top skins.

I went back for another 0.9 hours after dinner tonight to finish sanding and trimming the fiberglass and epoxy across the top of the windshield. The "green" area in the photo above and in the top photo on this page has now been sanded to the green/white color ready for the next step. That brings construction time on the airplane to 1722.4 hours.
March 13, 2005: Sunday
is a good day to get in plenty of work time on the RV-9A project. I have 3.2 hours
completed as I break for lunch and to post these pictures. I did the sanding of the
new epoxy on the carburetor air intake of the lower cowl. Then I moved on to round
TWO of the windshield fiberglass work. I cut a number of thin strips of glass cloth
to layer in the recessed areas around the windshield area in the "front corners"
areas on both sides. I did not take any pictures until the Dacron was placed over
the top of the work areas on the sides and across the top of the windshield.
I did not put any new glass layers in the front center area in this work
session, but that will happen in the "final" work session, whenever that is.
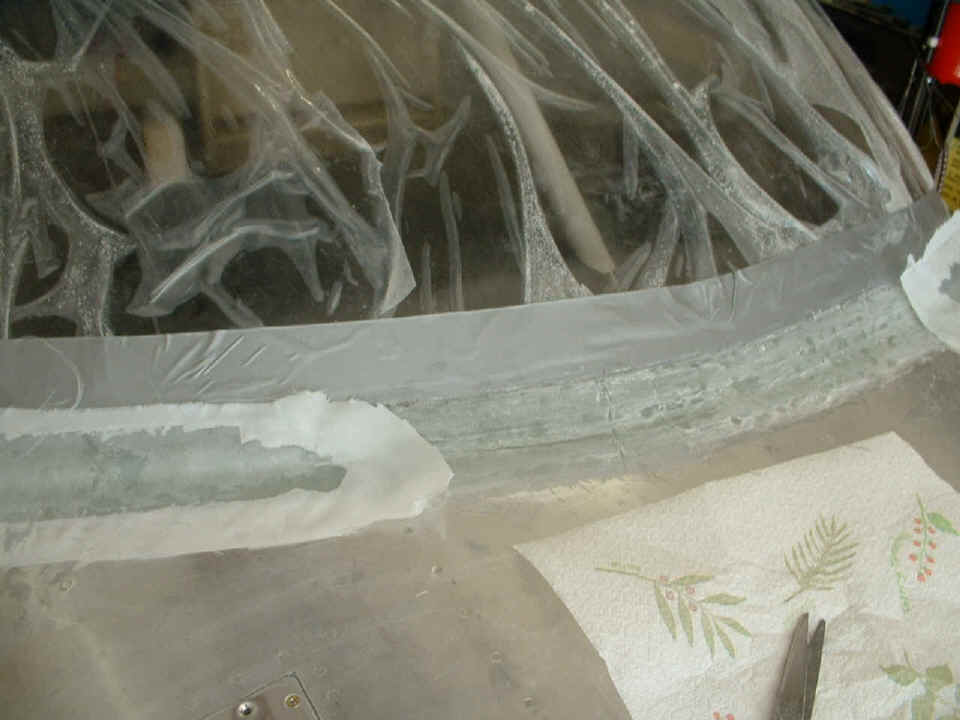
Here is the view across the top showing layers 4, 5, and 6 after they are
covered with the Dacron Peel Ply.
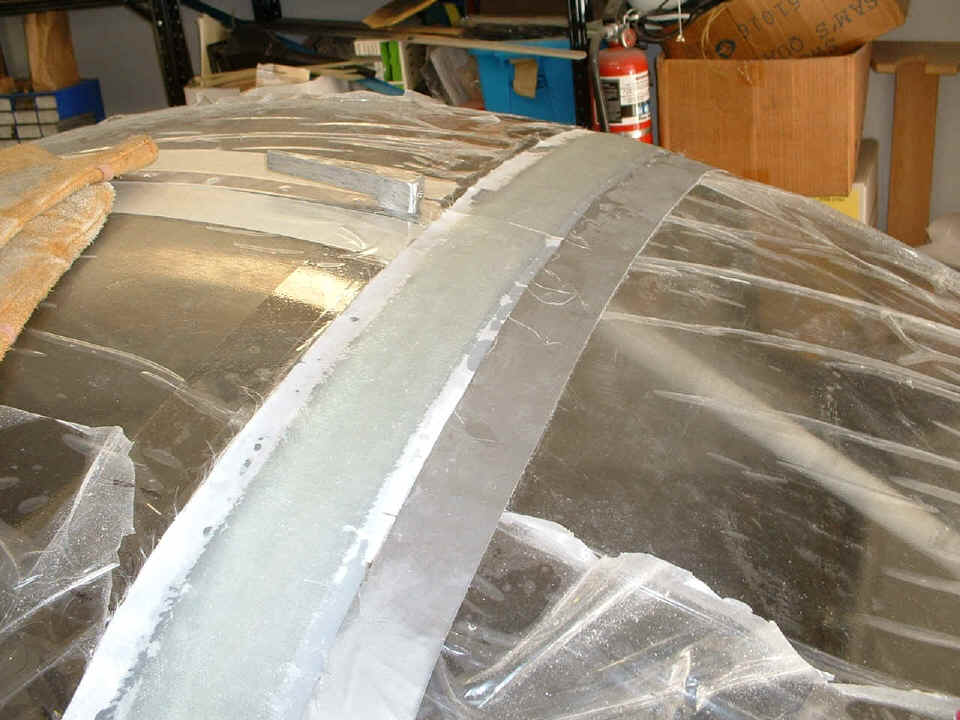
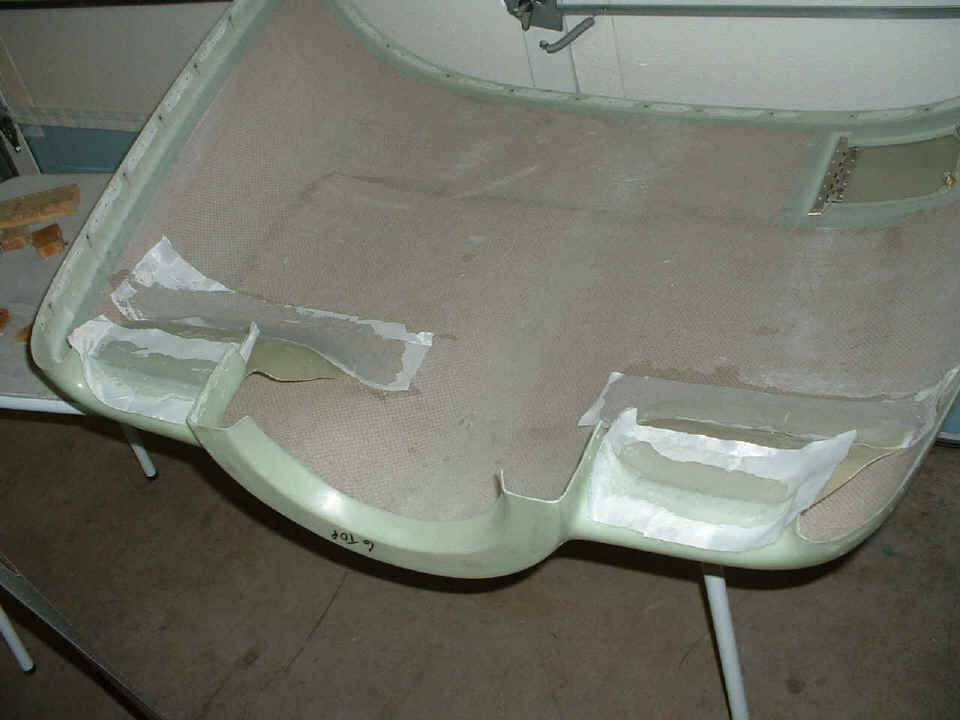
The last shot this session is the pilot's side of the windshield. This
was the other area that got multiple layers of thin strips in the "notch area"
where the windshield meets the aluminum. I also added fiberglass layers in the
corner area of the windshield, and the bottom corner of the long strip that goes all the
way across the top of the windshield and overlaps the sliding canopy. You can see
where I had to cut and overlap the Dacron.

6:15 PM, Sunday: What can I say? I
went back for a short session late in the afternoon to bring the total today to 5.0 hours.
While I was in the mood to do fiberglass, and the nice weather was still here, I
opened the garage door and did some work on the upper cowl air inlets. I sanded the
inlets and "ramps" provided by Van's and crossed the gaps with some fiberglass
cloth. Only the epoxy was there before today. I also put some Dacron cloth
over the new fiberglass areas to smooth the finish of the joints.
I also prepped the abandoned rivet holes for filling with epoxy as well, but
decided to let that wait as the sun was going down. You can see where I lightly
sanded the inside surface around the three rivet holes between each screw hole along the
sides and the back of the upper cowl where it attaches to the lower cowl and the upper
fuselage platenut strips. I put clear scotch tape over the rivet holes on the
outside smooth surface of the upper cowl, and I cut 24 Dacron strips 1-inch wide to put
over the rivet holes after I put in the epoxy and paint the surface around the rivet holes
with a thin layer of epoxy.
| CLICK HERE for Finishing PAGE 104. | RETURN to MAIN MENU. |