FINISHING - Page 96.
February 23, 2005: The days are getting
longer and I took advantage of the warm afternoon sun just after 5 PM by opening the
garage door for ventilation while using the spray adhesive that secures the insulation
material to the stainless steel firewall. This was one of three new pieces that were
cut to fit. The warning on the spray can told me that putting on the respirator
mask, turning off the gas heat, and opening the garage door were the smart things to do.
I also had my box fan set up near the tail of the airplane blowing the fumes out
the door. I put some of the "Sticky Stuff" behind all the panels that did
not have fuel lines or brake lines holding them in position. I peeled those panels
out far enough to spray adhesive behind them and pushed them back into position. I
have one more area that needs the blanket applied, but I will have to crawl under the
panel to do that section.
After dinner this evening, the job was to secure the crown nuts on the rudder
pedal links with cotter pins. This is the rudder cable on the RIGHT side of the
fuselage. The same treatment was given to the links on the LEFT side as well.
I also reconnected the brake lines from the reservoir to the master cylinders on the
rudder pedals. I keep looking to be sure that everything is in place before I put
that skin on the fuselage for the last time.
This should look familiar. Since I have created the access panels on the
F7106 forward top skin, I no longer needed to leave the panel mount for the altitude
encoder and the ignition control module out of the way for bucking bar/riveting access.
The panel is secured and both boxes are wired up.
I was amazed at how quickly the top skin came off to allow this session to begin. I also vacuumed up the aluminum filings and debris from the front floor board area that was the result of the access panel work. The radio stack needed the audio panel basket lowered to make room for bucking bar access when the F7106 skin goes on for the final time. One of the #6 screws sheared off and I had to drill it out of the platenut. After that, I ran a 6-32 tap through the platenut and it was fine. I took the time to run the tap through all four platenuts used to secure the audio basket to the radio stack rails and side panels. Hopefully, there won't be any more broken screws as a result of the tapping procedure.
I went to Ace Hardware before 9 PM tonight to get some 7/16" bolts to push through the wing carry-through spars and the landing gear weldments that are bolted to them. I took my micrometer with me to ACE, along with one of the precision wing bolts from Van's kit. The difference in the diameter of the bolt shanks is only 0.003 inches, but that makes all the difference. I can push the ACE bolts through the wing spar bolt holes, but the Van's bolts are just large enough to NOT go through easily. The bolts are sized to insure a proper fit of the wings to the fuselage when mated. The cheap ACE bolts are used to line up the wings with the carry through spars when the time comes for final assembly. The last time I talked with a technical adviser at Van's, he gave me the secret to getting the wing bolts installed properly. Stay tuned for that session when we get to the airport.
Before we leave the garage, the F7106 skin gets riveted in place, and the windshield goes on with its associated fiber glass work. As I write this before bedtime, the rain has come back to the Chattanooga area. I would say my timing for using the noxious adhesive spray was appropriate.
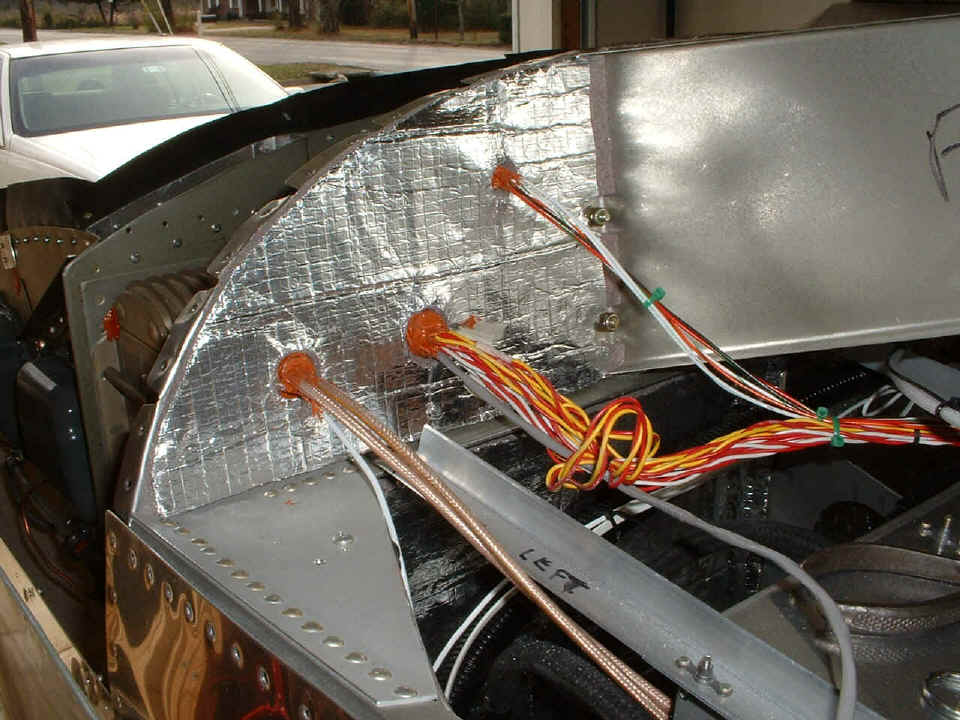
February 24, 2005: What
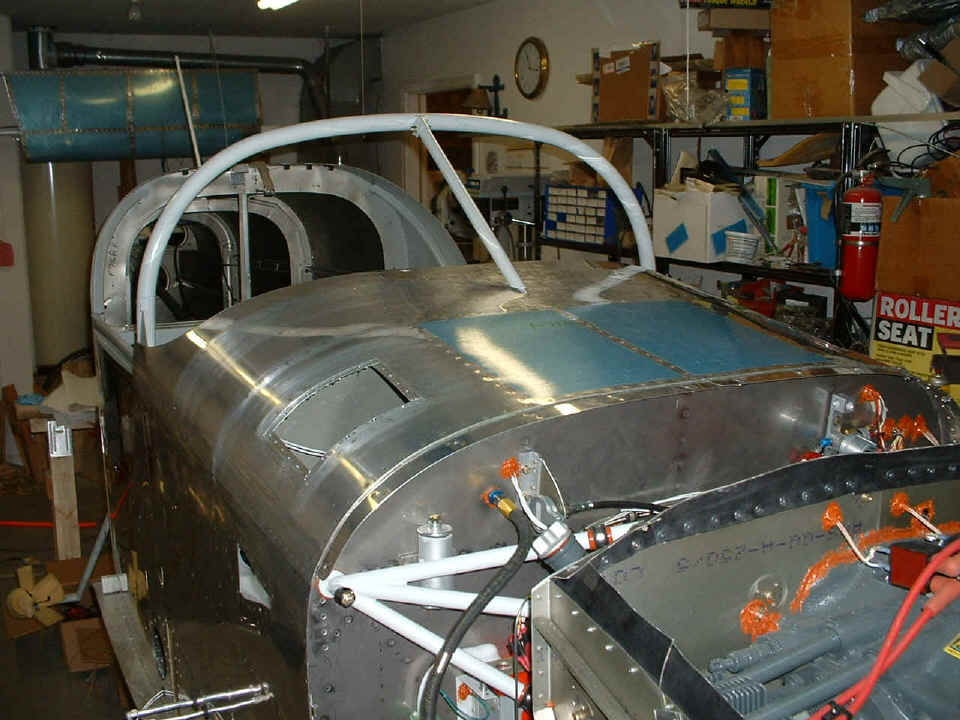
a NIGHT!!! A milestone for sure now that the F7106 is riveted in place! Here
is the last picture showing how everything that can get in the way of a bucking bar is
hanging down out of the way of the longerons on each side of the fuselage. The
switch panels and the fresh air vents are all down and out of the way. I also
managed to put in a small rectangle of insulation blanket to the left of the electric fuel
pump. The cabin heat control cable was put back in not long after this shot when I
realized I could work around the cable with my bucking bar. And I also cleaned up
the bad rivets around the new F7106 access panels I put in a couple of days ago. It
was easy to do while the F7106 forward top skin was off the fuselage.
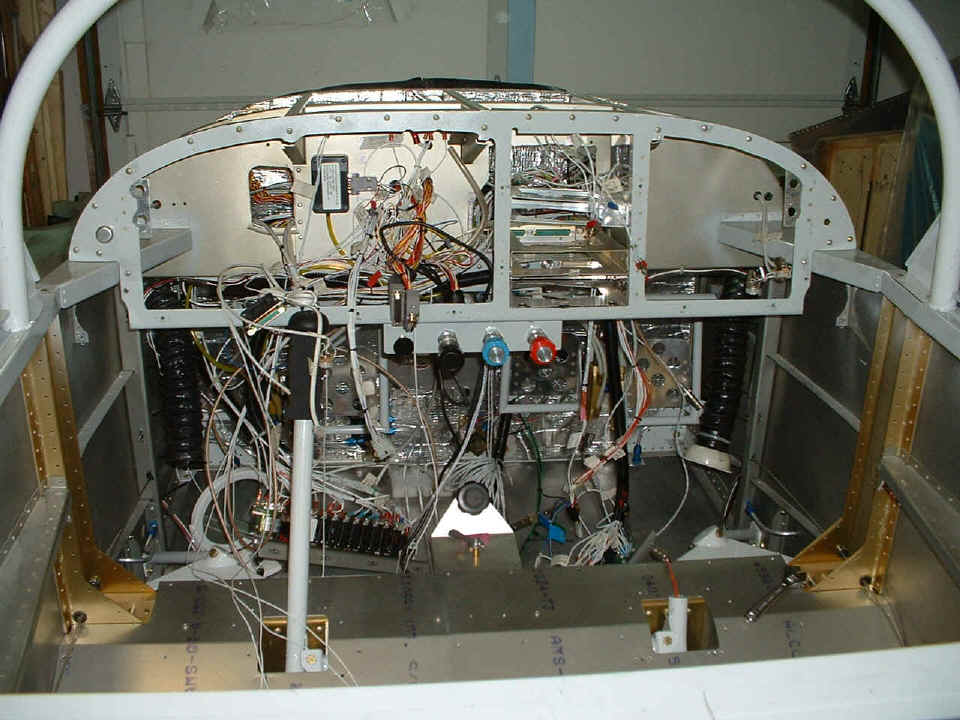
And here is the result of a busy evening. Look, NO
CLECOES (on this side at least). The WD-643-SS canopy brace bar is bolted
into position at the center of the windshield roll bar. The headphone and microphone
jacks are back in positions on both sides of the instrument panel area. I sealed the
F7106 forward top skin to the firewall with some clear RTV silicone before setting all
those firewall rivets with my squeezer. The aluminum strips with #8 platenuts are
riveted on to the firewall in place of the hinges that were part of the original Van's
design. I have drilled the upper cowl to use #8 truss head stainless steel screws to
secure the upper cowl to the firewall and the lower cowl where the upper and lower cowl
section meet. The lower cowl is still secured to the firewall using the original
hinges from the kit across the bottom and sides of the firewall. Those hinges are
straight and I have no problems putting in the stainless steel rods that secure the lower
cowl hinges together.
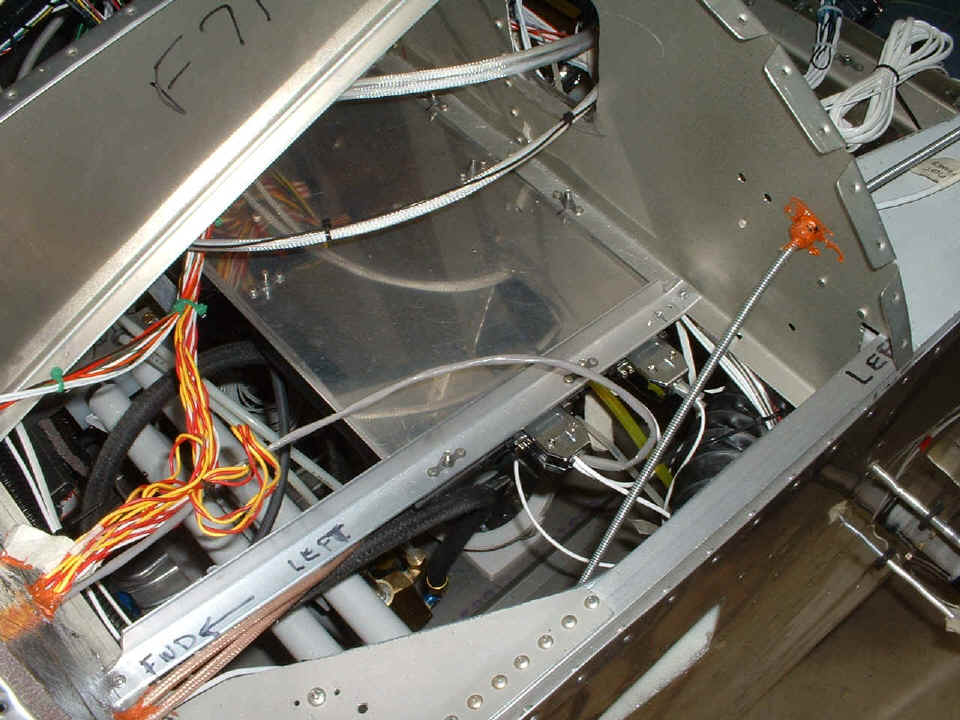
When 11:00 PM arrived, the work stopped and here are the remaining clecoes that
will be replaced with the proper rivets in the next session. Looking through the
access panel on this side, you can see the hole in the sub-panel that is behind the Dynon
location on the instrument panel. Those access panels really made the riveting job
go quickly and easily with no bucking partner needed. My most sincere thanks to
David Edgemon for the idea to build in those access panels.

When all those clecoes are gone, I can put the windshield up there and start
cutting off the excess material from it. But of course, I will have to put the
sliding canopy back in place to be sure that the windshield is aligned properly.
Stay tuned!
February 25, 2005: No chores
tonight going out, so the airplane got my attention. It did not take long to drive that
row of rivets to replace the clecoes in the photo above. After that, it was time to
get the inside of the airplane back in order. The first thing to go into position
was
the RG-400 coax cable to the communications antenna. The stereo speaker wires and
the static air line also run down that side of the airplane. I used the 1/4"
vinyl tubing to "armor" the wires against vibrations before tucking them up
under the canopy deck railing. Now you see them....
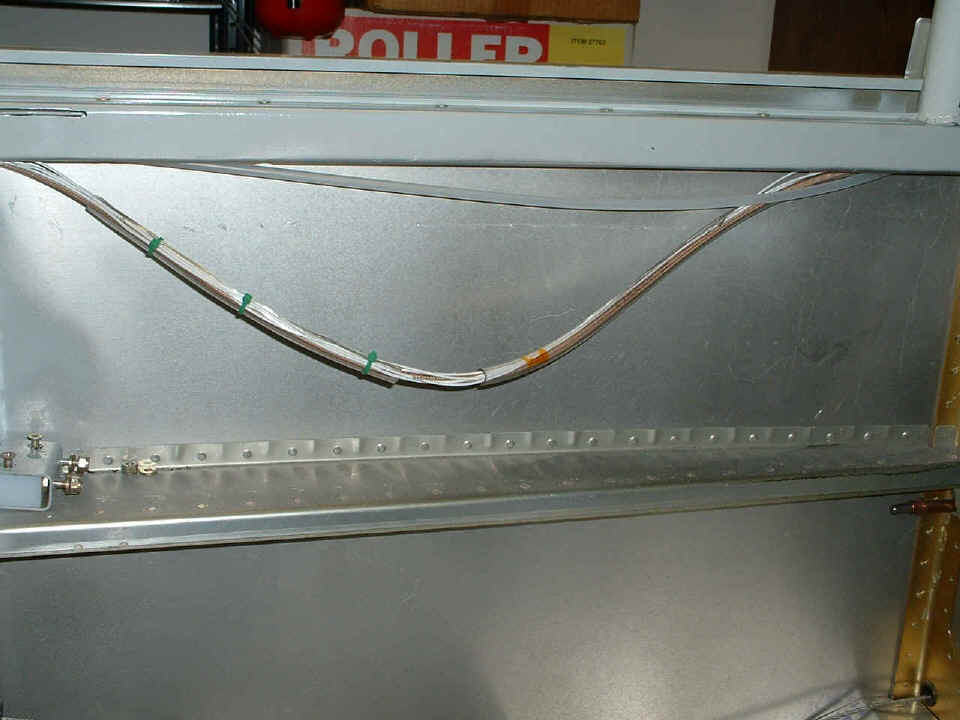
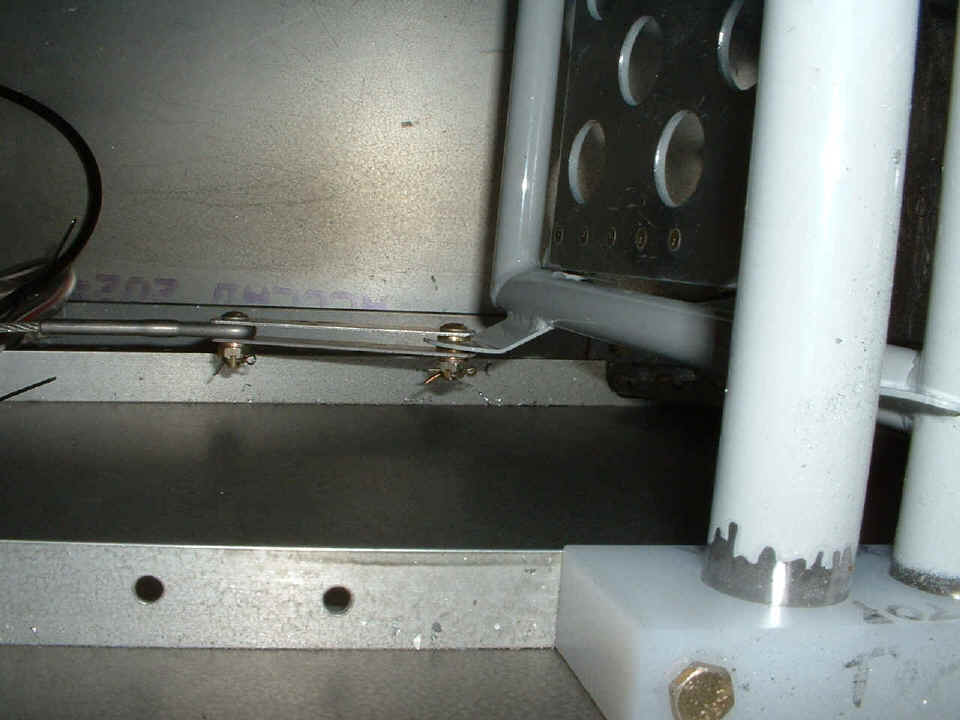
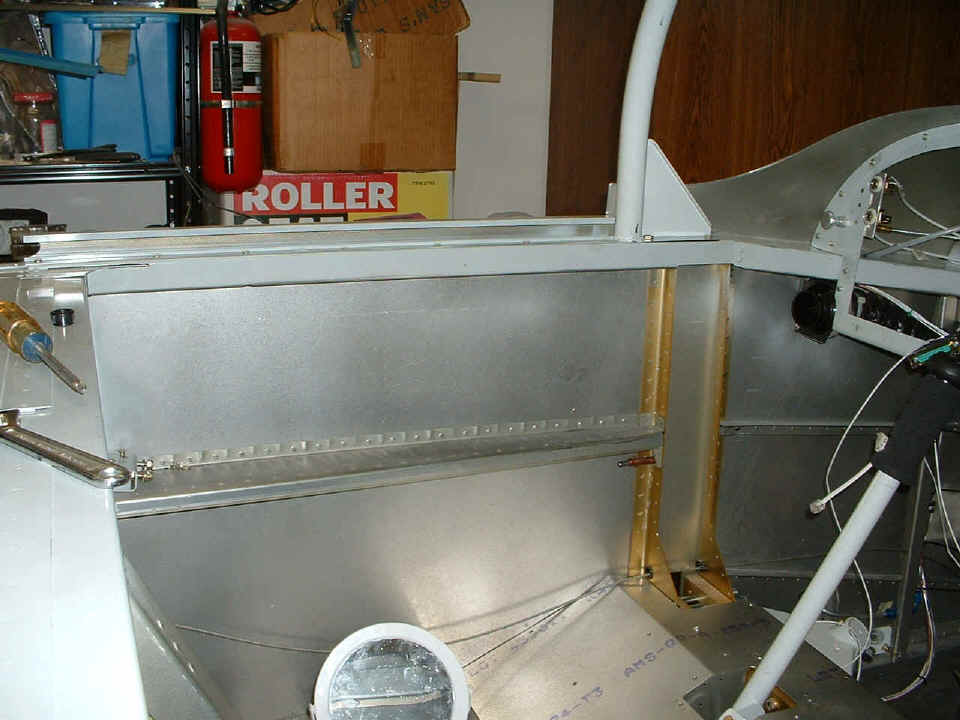
... and now you don't!! I also put in black
plastic bushings like the one you see next to the screwdriver on the left side of the
photo. They are used at three bulkheads as the wires pass through the baggage area
along the LEFT longeron route to the aft section. You can also see one of the fresh
air vents back in position at the right side of the photo. The switch panels went up
right after the air vents. The instrument panel and avionics will stay out until I
finish the windshield work and put in the GPS antenna, and pedestal-mounted magnetic
compass. Both of those will be inside the windshield area on top of the panel.
It is time to start a new page for you dial-up internet fans out there. And to do that, we will begin with something new on PAGE 97.
| CLICK HERE for Finishing PAGE 97. | RETURN to MAIN MENU. |