FINISHING - Page 95.
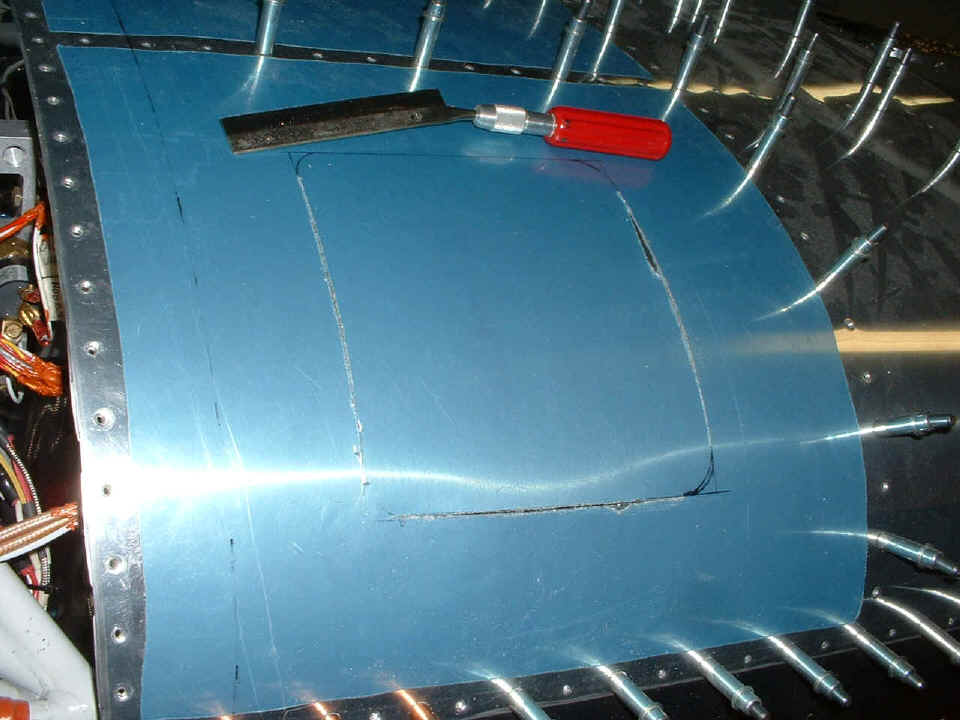
February 21, 2005: As the fiberglass work
winds down for a while, I turn my attention back to getting ready for the final skin
riveting session that is coming soon. One thing I learned from David Edgemon was the
inclusion of two access panels that are not in Van's design. Using my Exacto razor
saw, I was able to cut out both panels with a minimal gap in the seams. I had dreams
of doing nice radiused corners, but that soon became a drilled hole at the corners and
deburring everything with Scotchbrite pads, etc.
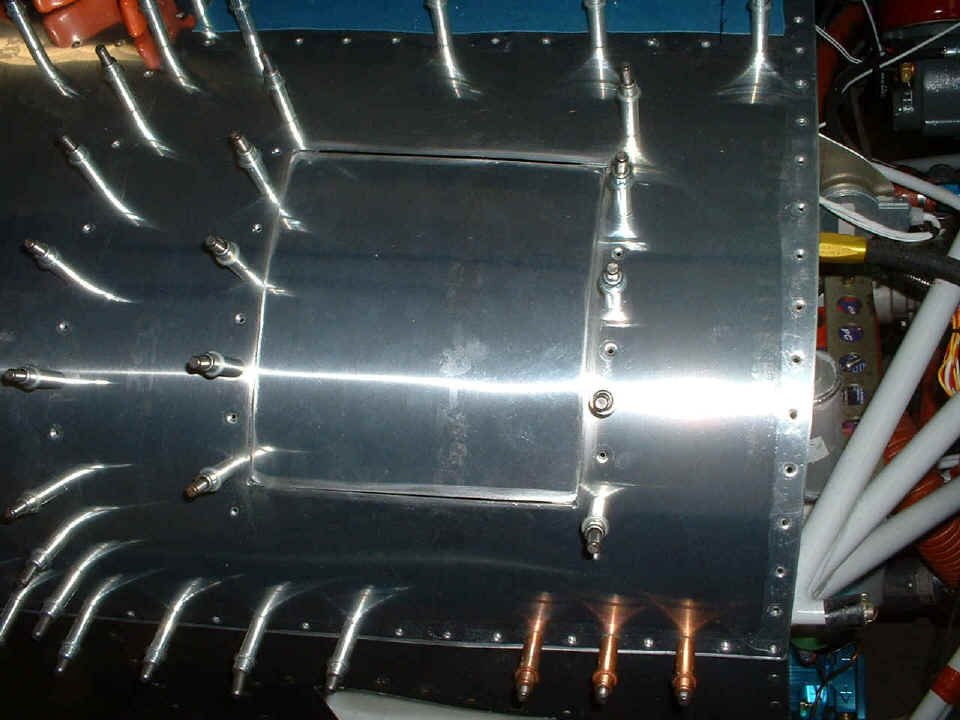
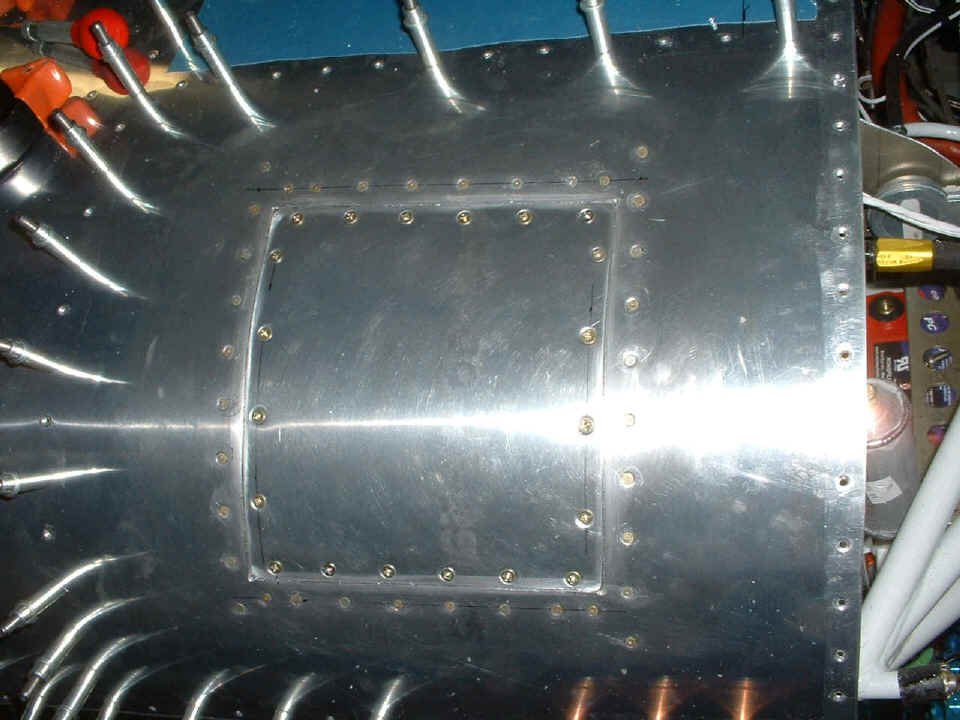
Here is the view of the RIGHT side of the forward top skin with the side plates
already fitted, but not yet equipped with platenuts. I have allowed a 1/2"
overlap similar to the access panels at the tail for the elevator control horns. I
am making overlap plates for the top and bottom of the panels which will also have #6
platenuts. All four of the overlap strips with the platenuts attached are made from
0.032" aluminum stock left over from the canopy aft skirts and other 0.032"
surplus aluminum provided with the kit.

This shot shows the panel not yet drilled, but shaped to fit in the proper
place.
This is the way I left things as I quit for the evening. I have made the
lower overlap section and riveted in four of the #6 platenuts. I also drilled the
platenuts that go in the lower corners of the panel, but will not rivet them into position
until I am ready for final assembly. The corner platenuts have additional
0.032" aluminum doubler plates to strengthen the corners against possible fractures
to the aluminum from engine vibrations. Since this area must be sealed against
moisture, the riveting of the platenut strips will be done with a thin layer of clear
silicone RTV between the strips and the outer skin when the final assembly takes place.
I will finish the other overlap plates with their #6 platenuts in the next session.
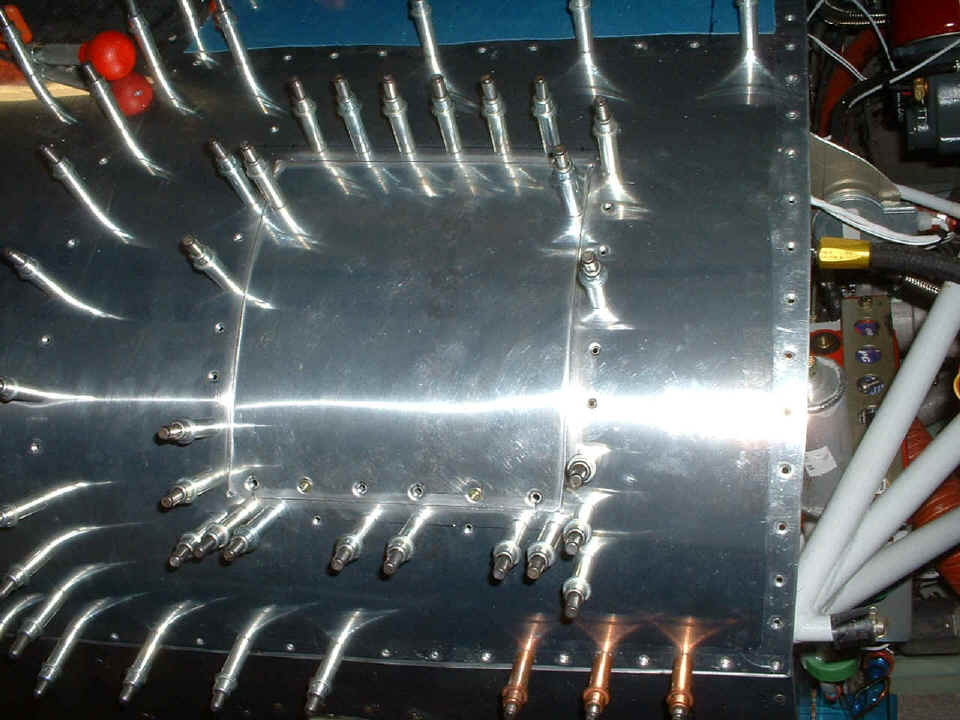
These access panels allow me to gain access to ground terminals on the firewall, brake lines, the solid-state ignition module, and the back of the radio stack without having to crawl under the instrument panel. The other big deal here is the ability to rivet all the forward top skin in place by myself now that I can access all three forward ribs and the forward section of the longerons with a bucking bar through these two access panels.
February 22, 2005:
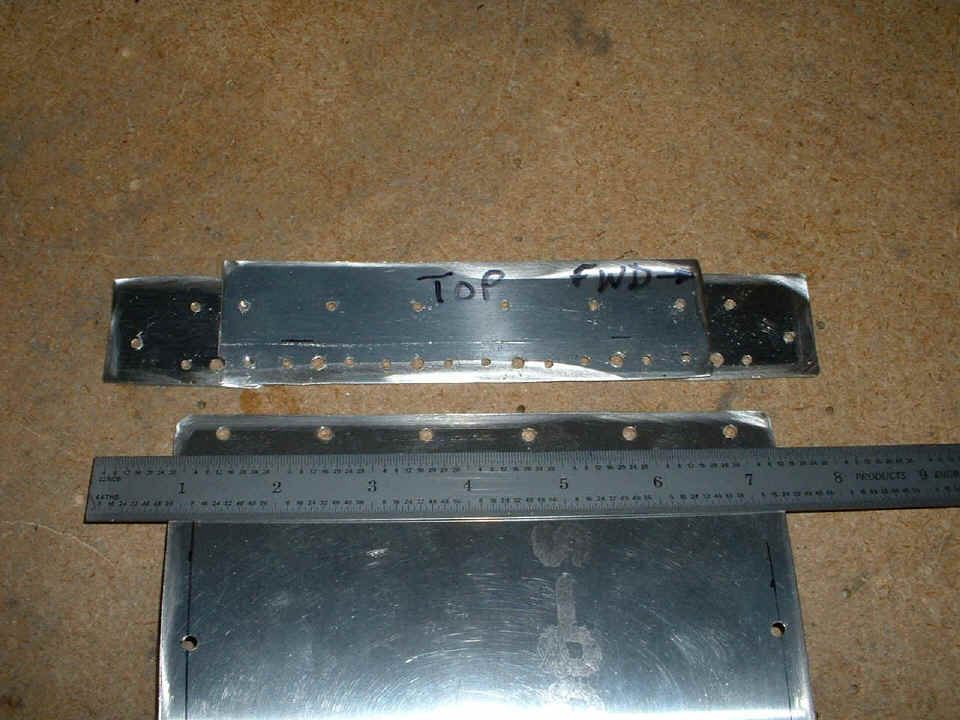
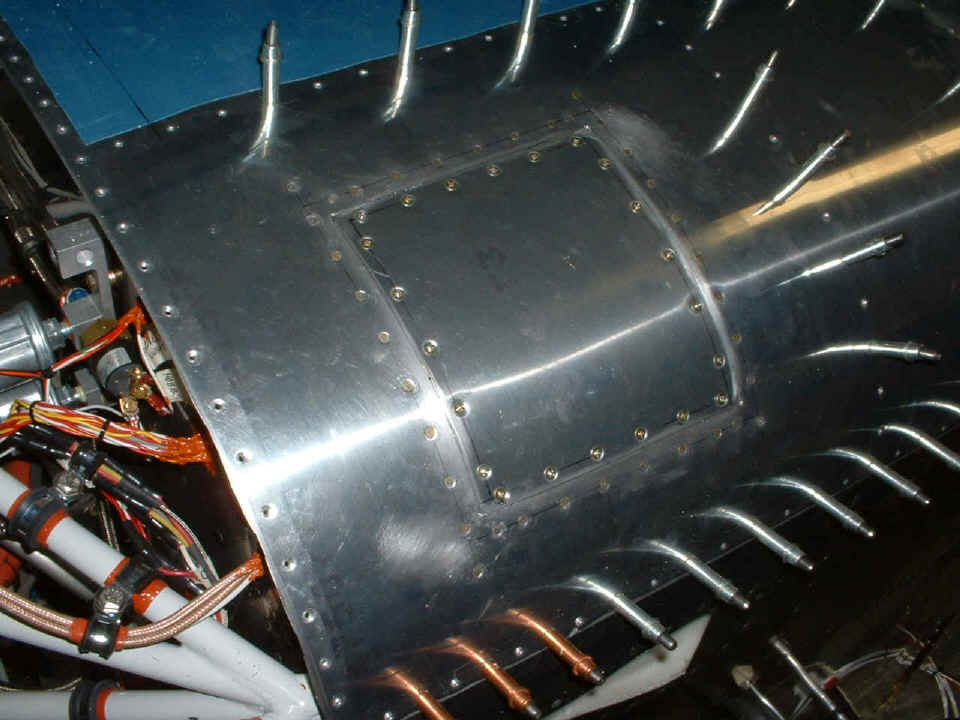
Access panels were the focus of tonight's session. Here is a picture of the top
platenut strip and two of the four doubler plates that give the entire assembly the
strength it needs in the corners. You can see that the platenut for the corner
screws through the panel are used to bind the horizontal and vertical platenut strips
together along with the doubler plates. At this point the panel screw holes have not
been dimpled with the #6 dimple die in my squeezer.
Discovering all the details made the first panel fabrication a bit longer than
the second one. Here you see the panel on the RIGHT side of the forward top skin
completed and secured with all twenty of the #6 screws.
The second panel on the LEFT side went a lot quicker even when I got the screws
too close to the corner screws on one of the strips.
Now that both panels are finished, all that remains to be done is finish up the insulation of the firewall before riveting the top skin. Of course, putting on the insulation means the top skin comes off again. The access panels will come off when it is time to rivet on the forward top skin. They give me the access for bucking all the rivets on the top skin without the need for an assistant. After that, the windshield will be getting my attention at last!
| CLICK HERE for Finishing PAGE 96. | RETURN to MAIN MENU. |