FINISHING - Page 90.
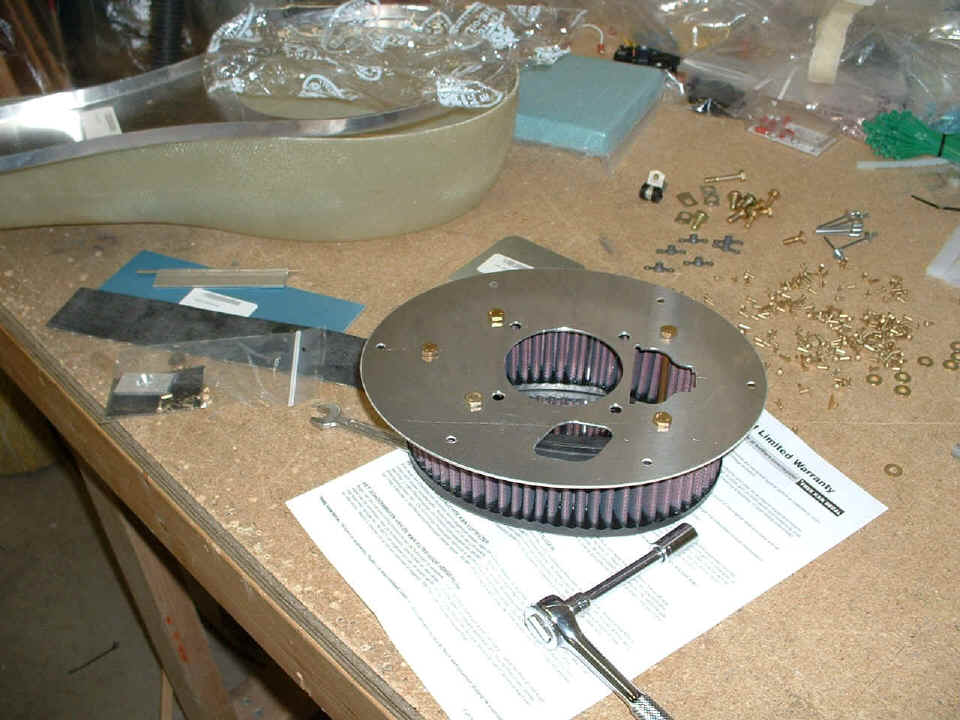
February 7, 2005: The filtered air box parts
are now out of the bag and I am studying the instructions about this assembly. I
took some time to de-burr the holes in the top and bottom plates that secure the filter and
give it an oval shape. I also changed the drain plug on the carburetor float bowl
using a plug provided in this kit. Those two odd-shaped cutouts on the top plate are
to accommodate the carburetor I have. The top seal of the filter has to be trimmed to
fit my carburetor under that diamond-shaped hole and then some RED RTV will be put in the
appropriate place where the shape gets altered. The instructions about how to do
this were specific with the proper technique, etc. Stay tuned to see how it all
comes together. The round hole in the center fits the air intake to the carburetor.
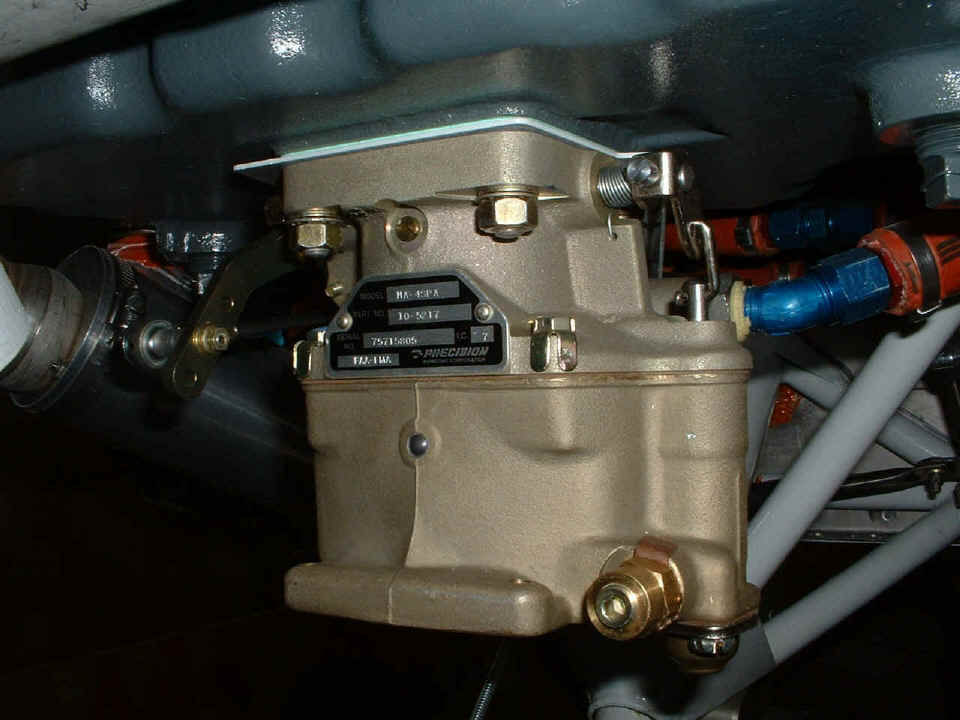
Here is the carb mounted on the bottom of the engine. That diamond-shaped
cutout in the photo above accommodates the pump on the bottom right corner of the
carburetor as you are looking at it in the photo below. This view is from the front
left corner of the carb.
When I am not working on the carb, it is covered with this plastic and wires
are tied around it to keep crawling critters out as much as possible. That pipe in
the upper left corner will provide warm carb heat air when everything is working and in
final positions.

It was a short session tonight, but rewarding as I launch into something new. I spent a few minutes before lights out to ponder the installation of the parking brake valve which should arrive tomorrow from Spruce.
February 8, 2005: The UPS guy brought my
parts from Spruce this afternoon and I had a chance to work with them this evening.
I also worked a bit more on the air filter per the plans. Since the pix above are
about the air filter, let's get those pix up first on this page. This section was
trimmed to clear the fuel pump in the carburetor.
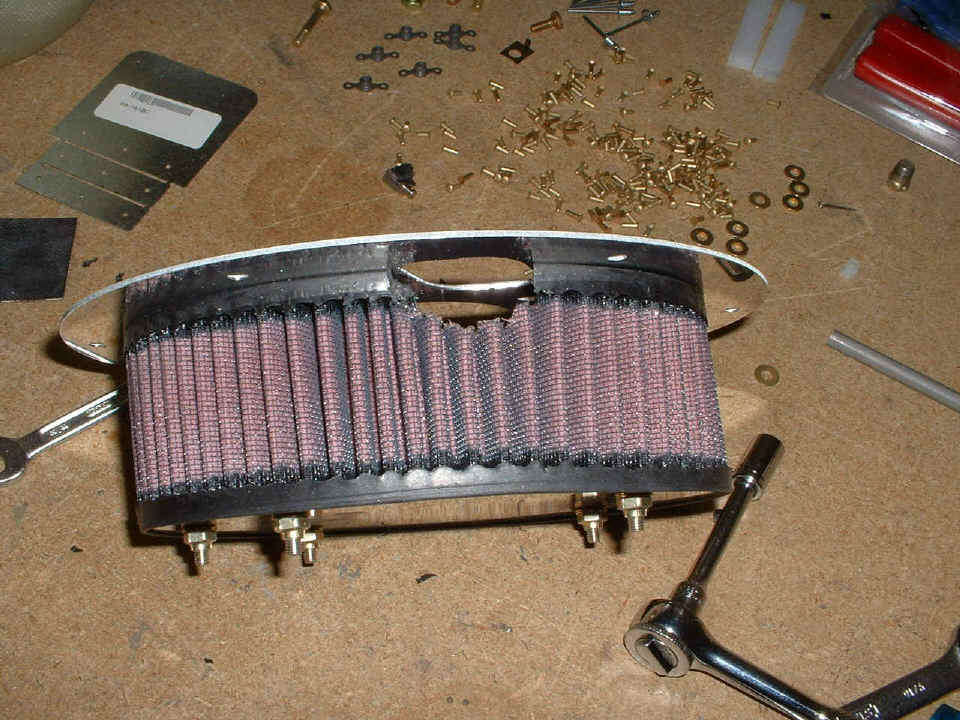
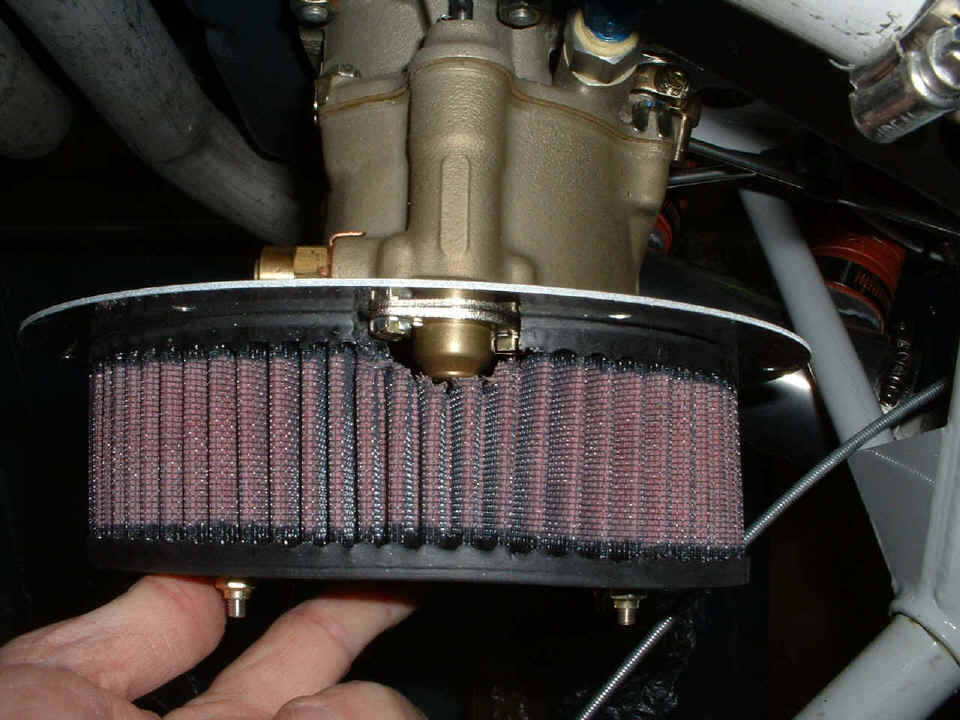
This view of the mounting plate and the filter up against the carb should make
it plain why this trimming of the filter was required.
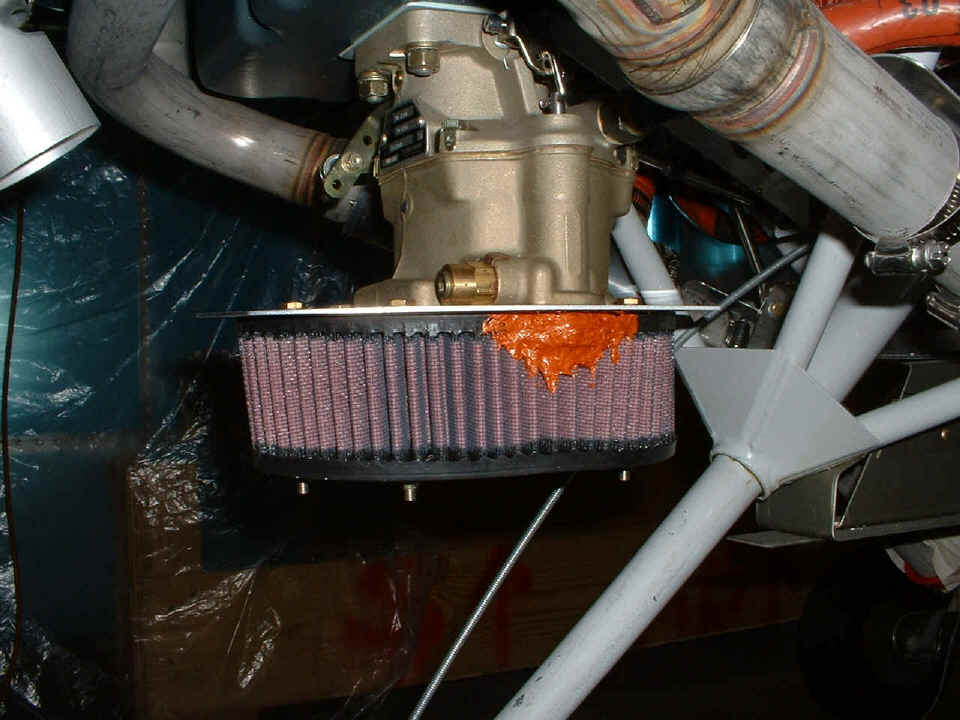
I bolted the mounting plate to the carburetor. After coating the pump
cover with a film of 3-in-1 oil from a cotton swab, and the area of the mounting plate
adjacent to it, I covered the whole area of the pump with RED RTV. I also applied a
liberal amount to the filter mesh and the rubber edges of the filter to complete the seal
in the ragged area of the cut. I used a popsicle stick to work the RTV into the
folds of the filter before smoothing it on the outside to what you see below.
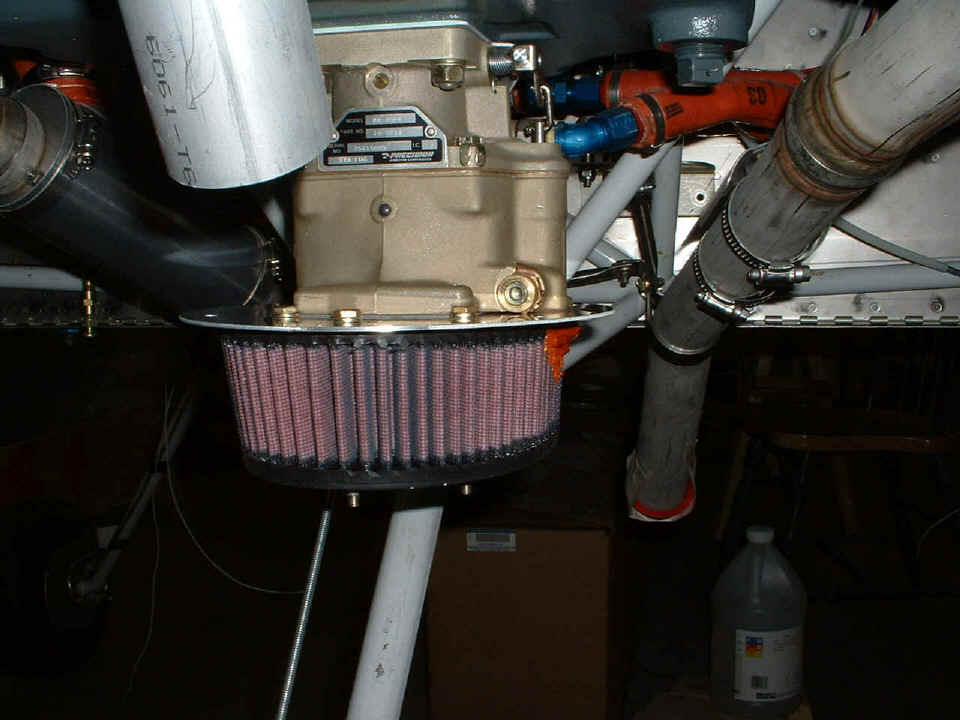
Here is the view from the front quadrant again. The RTV gets two days to
cure before I will disassemble the whole thing to finish the filtered air box per the
plans.
CLICK HERE for Page 91 to see the parking brake valve installation.
| CLICK HERE for Finishing Page 91. | RETURN to MAIN MENU. |