
FINISHING - Page 86.
January 18, 2005: FedEx delivered my box of
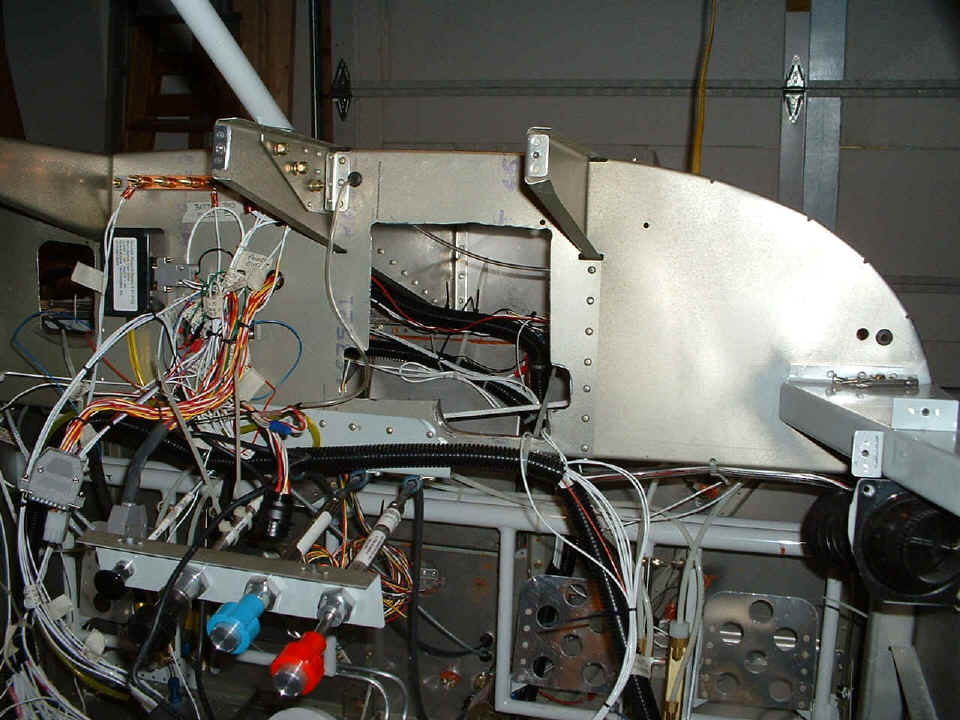
avionics from Van's. The easiest thing to mount was the GI-106 unit in the panel
below the Dynon display. I had to go to Ace Hardware around 7 PM to get the
6x32x1" mounting screws for it since I did not have any that size in my hardware
bins. I must admit, the panel is looking good at last! I also got a few
goodies from Spruce for use later, and I bought some nylon washers to insulate the
microphone and headphone jacks from the panel as needed to minimize noise pickup in the
audio. The audio panel will be the only ground point for the audio system. I
will put in a good ground wire from the CD/Tape player to the audio panel to insure that
it is quiet of any ignition noise also.
Next comes the radio stack and making room for the COM/NAV radio and the
future. This is my first planned cut in the back panel to clear the Garmin AT SL-30
basket and wiring harness. Yes, I know I have it in backwards, but the idea was to
find out just how much of a hole would be needed in the bulkhead back there. You can
see I have already been there with my fat Sharpie marking pen.

After some work with my unibit to put in the corner holes, then much
hand-nibbling of aluminum, filing, and deburring -- this is the result. I realized
that it would be easier to work this bulkhead over now than after the airplane if fully
assembled. I have pretty much planned access for the future, whatever the panel may
get. That throttle quadrant looks so "sad" like that hanging down.
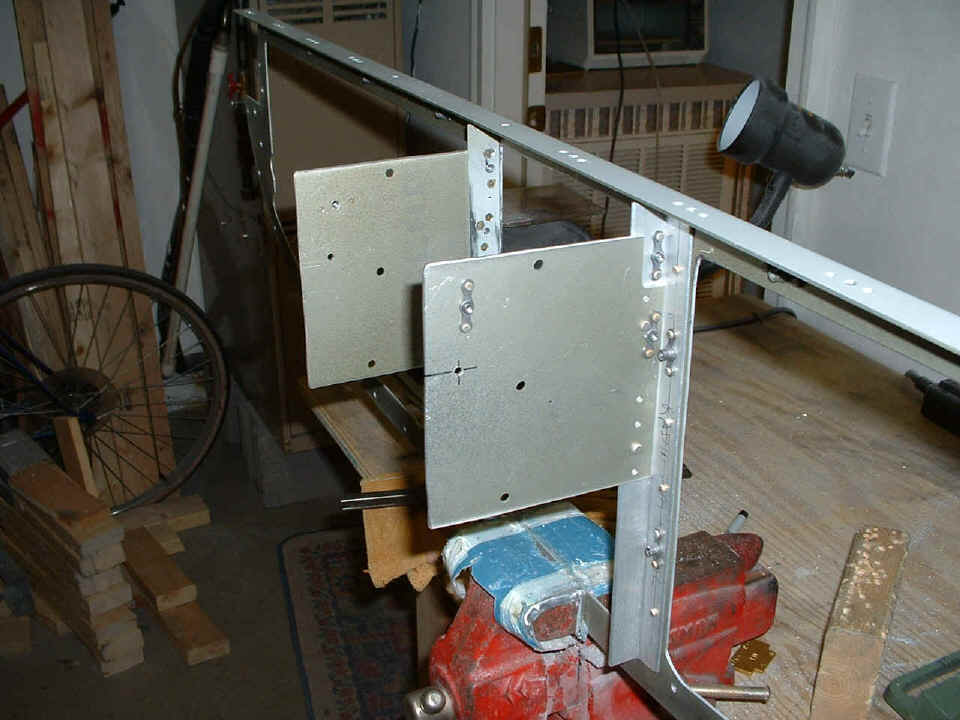
Back on the vise, the panel frame is going to get more side plates for the
radio stack. I have just put on the first #6 platenut for the SL-30 radio basket,
and drilled the other holes which will get platenuts. I moved the band saw out of
the way to open up the work area.
Here is where I called it quits around midnight tonight. The radar
transponder basket and the SL-30 Nav/Com basket are installed at the bottom of the stack.
The audio panel will be positioned tomorrow night. The open rack space
measures 4 and 13/16 inches between the audio at the top and the Nav/Com radio. The
audio basket is clamped in place for now, and may be moved down when I know what I can put
in the available space. The Garmin GNS-480 only needs 3.25" of space and I have
4.68" of rack space.
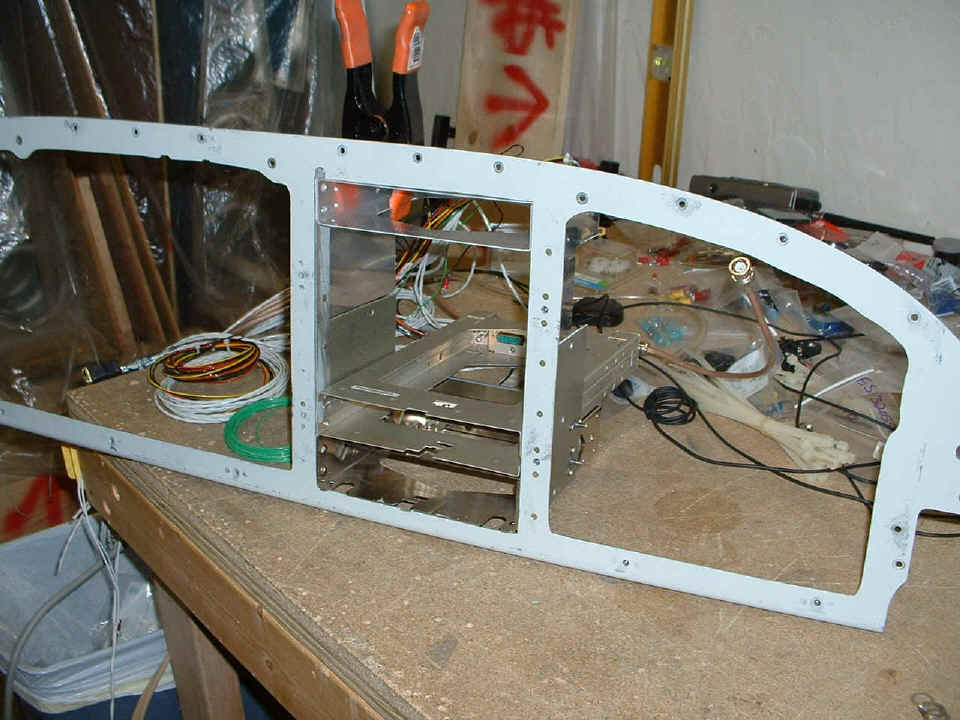
I had to redress the ends of both the RG-400 coaxial cables at the back of the SL-30 basket. They were not secured very well and the cable on the COM side fell out. Later the NAV cable loosened up and twisted, but did not drop out like the first one.
The goal for the next session is to get the audio basket in the "right place" and get the dimensions of the blank panel at the top of the stack for later fabrication. If you look closely in the photo above, you can see a notch that I cut at the top left corner of the radio stack to clear the GPS data/power cable and small GPS antenna coaxial cable. The blank panel will have a similar notch in it at that location and go all the way to the top of the panel frame in the center stack area.
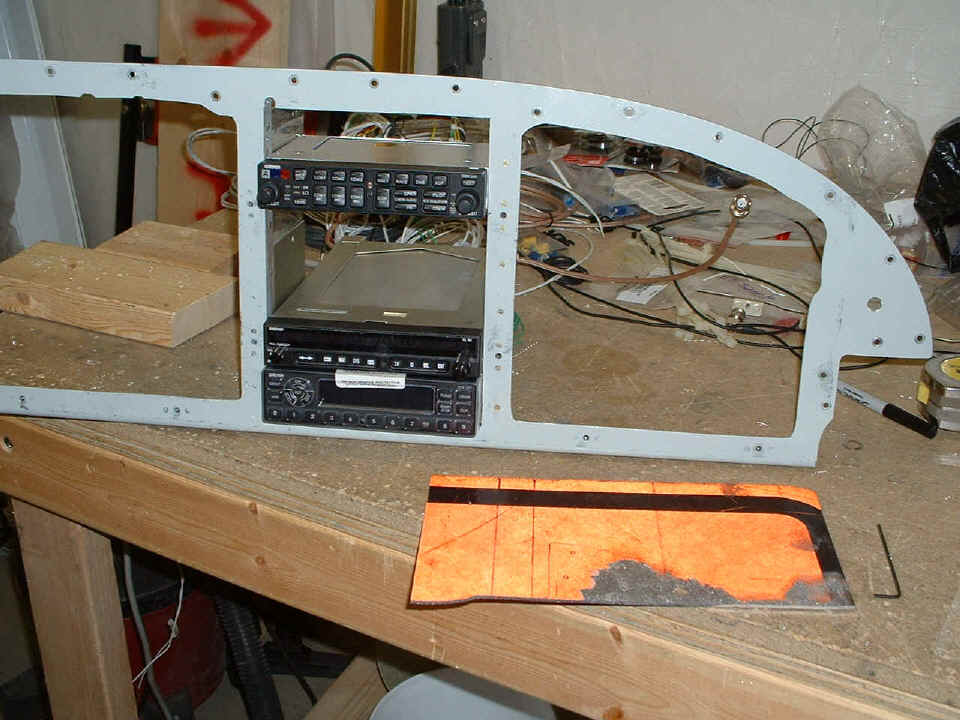
January 19, 2005: Just one picture for you
tonight. I reworked the stack after measuring the available space and what I might
want to put in that space. I am still looking at the Garmin GNS-480 GPS w/ WAAS,
ILS, COM package for the "future" to give me two COM radios, and dual NAV units.
Rather than put a second GI-106 unit in the panel, I would just switch it to the
GNS-480 since the SL-30 has a digital readout of the VOR radial directly on its face.
The SL-30 can do ILS only at airports with a true ILS system installed. The
GNS-480 can do an ILS at any airport with a published GPS approach, and at all the
airports with standard ILS installations. I will see about putting the SL-30 in the
COM2 location of the audio panel NOW instead of later.
Remember the "road sign"? It's back and
will be pressed into service at last. This time, I will leave the orange stuff on
the "back side" of the blank panel I will cut from it for use above the audio
panel. It could become the home of future switches, lights, etc. Add 3.2 hours
to the log book for the rework of the panel and the slow, sometimes frustrating use of a
Phillips screwdriver in the tight space of the audio basket. Part of that time was
used replacing the scrap metal aluminum plate that I thought would be OK on the top right
side of the mounting rails. Then of course, I had to re-install the platenuts on the
aluminum plate to hold the 6-32 screws that actually secure the baskets.
I have also been thinking of a better way to mount my microphone and headphone jacks for future easy panel removal, etc. More about that later.
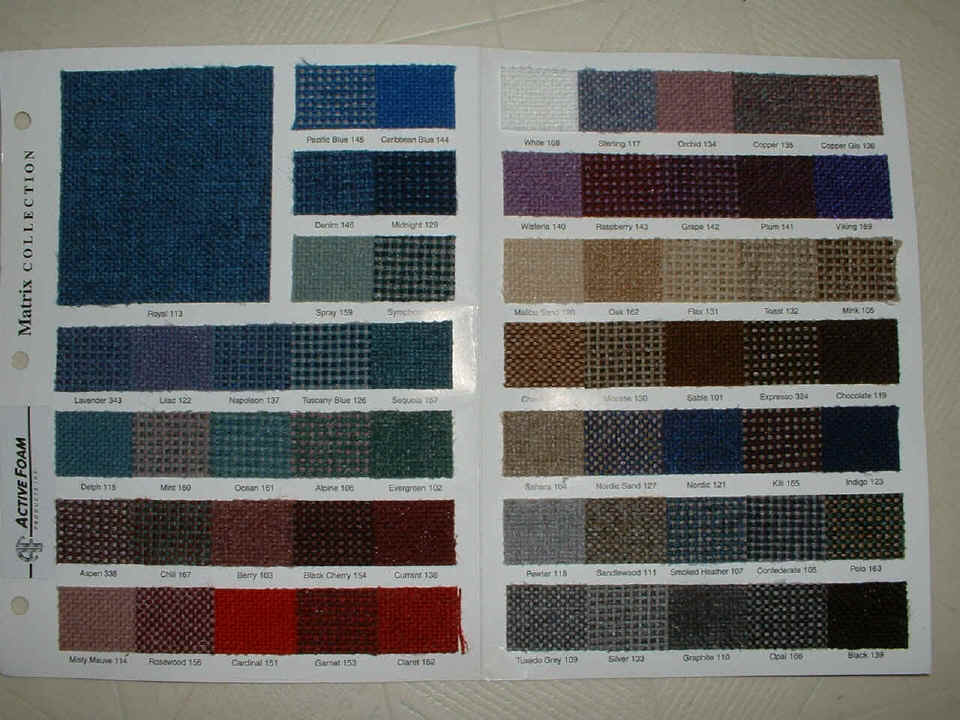
January 20, 2005: I got a package from
Flightline Interiors containing firewall insulation material and some fabric samples for
the interior. I am leaning toward the Caribbean Blue
for the upholstery trim color, and the Pewter 118 gray for the main fabric color.
The paint on the panel and the canopy rails is a Pewter enamel color. In case you
cannot read the labels due to screen or image resolution, the BLUE choice is the top right
swatch on the LEFT page. The Pewter gray fabric is the swatch on the RIGHT page,
second row from the bottom, LEFT end near the fold of the page.
January 20th continues on Page 87!
| CLICK HERE for Finishing Page 87. | RETURN to MAIN MENU. |