FINISHING KIT - Page 48.
July 6, 2004: The results from yesterday
were just not good enough for me. I revisited the aft canopy skirt for the LEFT side
and realized that I needed to cut off about ONE INCH of the skirt. Rather than cut
from the aft edge, I figured out a way to drill new holes and cut off the old ones from
the forward edge of the aft skirts. Below is the end results with a much better fit
of the skirt to the aft fuselage. I started at the center and drew a parallel line
on the skirt adjacent to the slider rail along the centerline of the aircraft. I
then made a new hole 1-inch aft of the existing holes for the first three holes nearest
the top center of the canopy. This worked well, but I could tell that as the
compound curvature started, that this method would not work well and would cause some
holes to miss their intended mark.
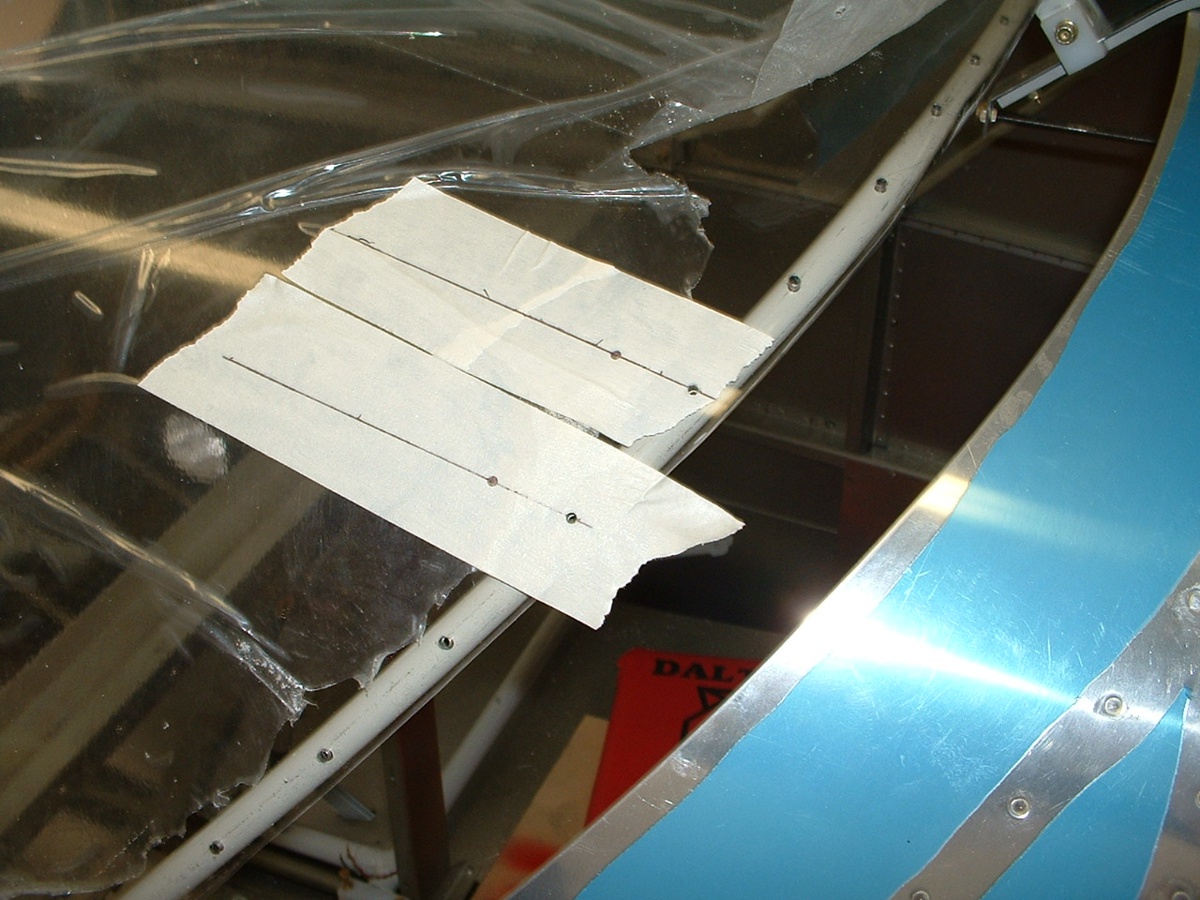
I solved the problem with some masking tape on the plexiglass before laying the
aft skirt back in position with clecoes. You can see below the location of the
"old holes" that I drew upon the tape after I had drilled the "new, better
aligned holes" in the aft skirt. I would then remove the skirt and draw a line
through the location of the old hole skirt location to the actual location of the hole in
the plexiglass and the slider frame tubing that supports the plexi. When I would put
the aft skirt back on at the new location, I would extend the line from the tape back
across the top of the skirt going ONE INCH back along that line to find the hole location
that matches up with the hole in the plexiglass underneath the skin. It worked like
a charm -- much better than the hole locator I used yesterday to make the first set of
holes. Speaking of those "old holes" that were not properly aligned,
I would compare their offset errors and correct them to the "proper"
locations when drawing on the tape. That procedure insured that the line pointing to
the correct location for the "new hole" would be OK!
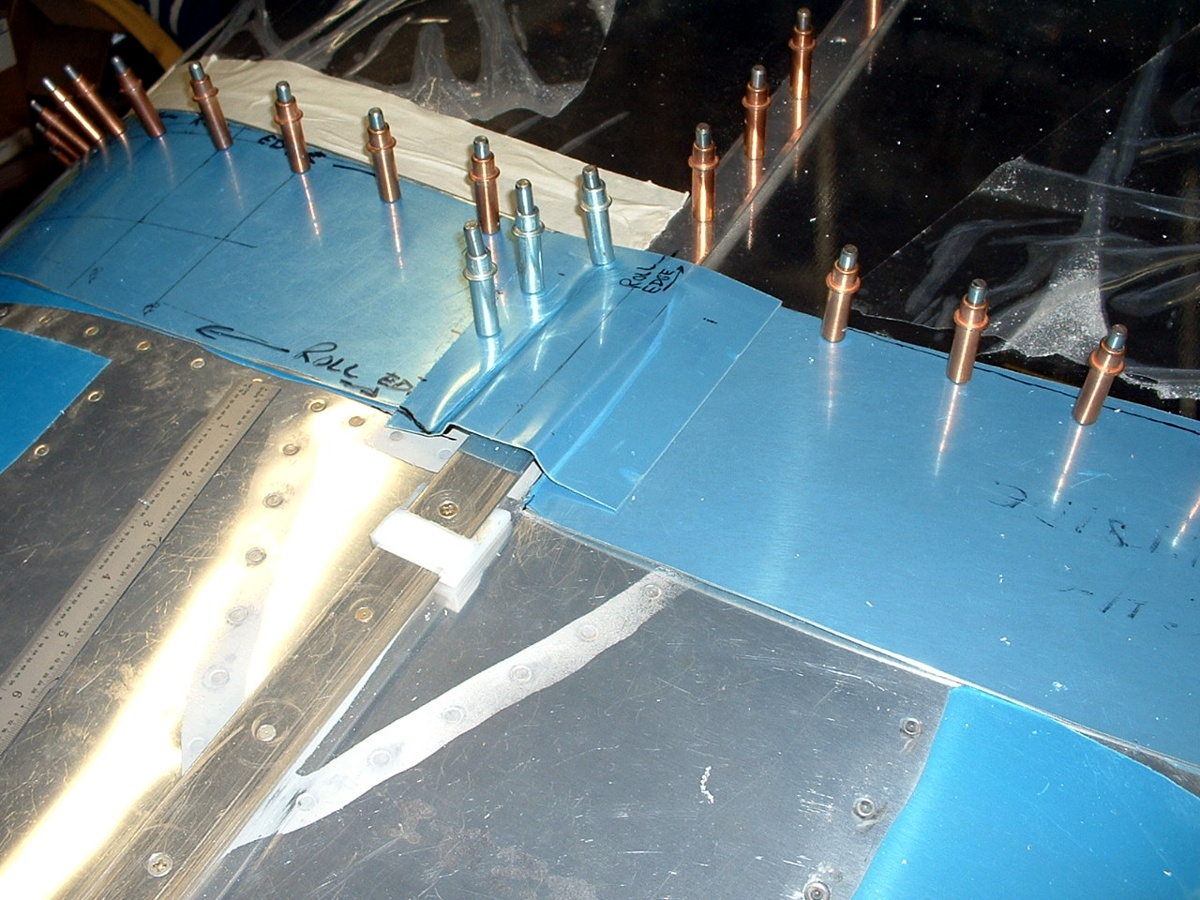
And of course, there is always some possibility of error in any good plan.
That little oversight was discovered when I realized that I should have only moved
the skin forward by 3/4" instead of 1". To cover the open hole between the
aft skirt and aft fuselage top skin required me to make a better and bigger "dog
house" from some blank aluminum left over from my empennage kit. You can see
some of my parallel lines on the LEFT skirt and the overlap of the new, wider and longer
"dog house" which now has only three holes drilled in it with those silver
clecoes installed.
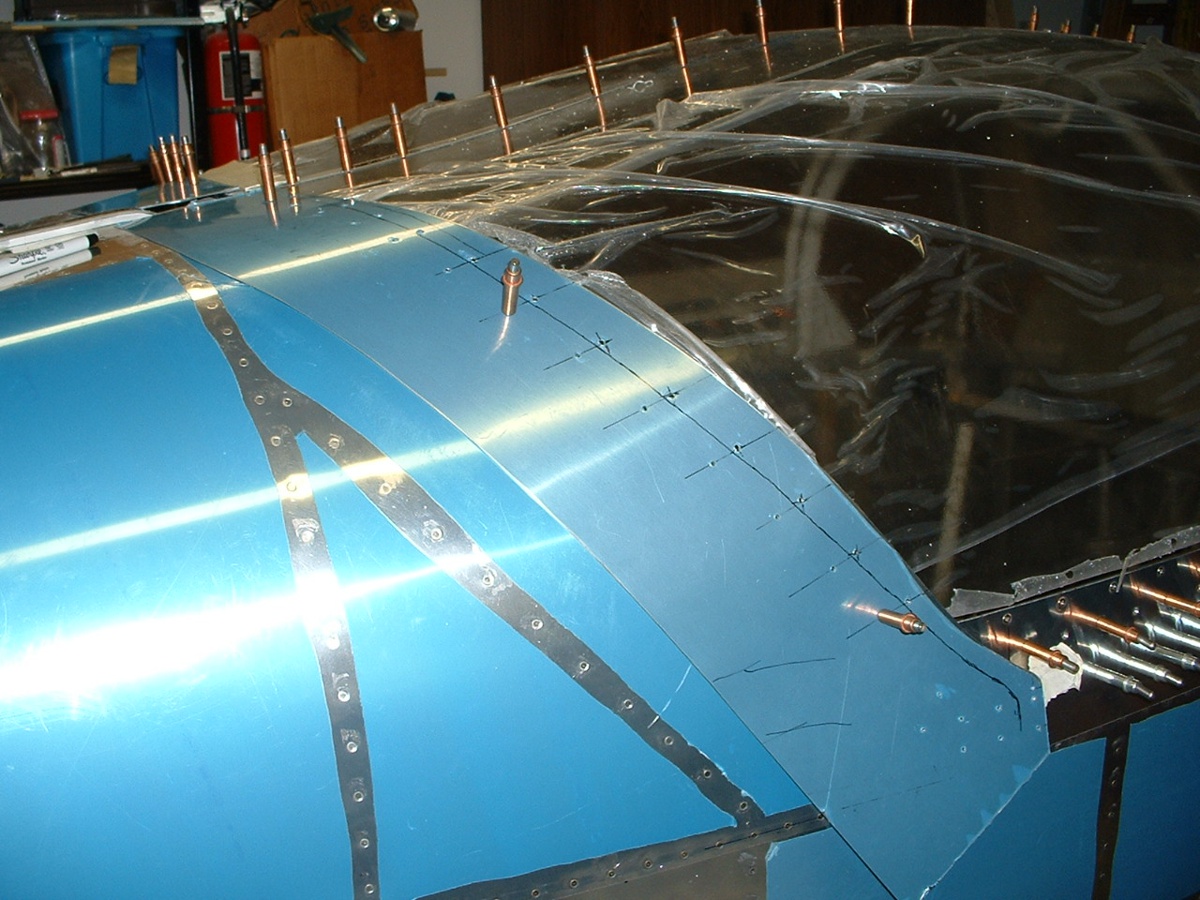
The next session will find me giving the RIGHT aft canopy skirt the same treatment
to correct its hole alignment problems. I will also finish trimming the center edge
of the RIGHT aft canopy skirt to insure easy movement of the plastic part shown near the
center of this photo on the slider rail. That little part will have a small nylon
fishing line attached to it to insure that it stays under the back edge of the dog house
when the canopy is closed. It will prevent an air leak at that point along the
canopy interface with the aft fuselage deck.
Total time for the rework today was 5.3 hours, but it was worth it for the smooth transition of the canopy to the fuselage. Now that I know what to do, the RIGHT side rework should go quicker.
July 9, 2004: Here is the latest news. Yesterday was the day I ordered a new engine from Penn Yan Aero Services. It will be a clone of a Lycoming O-320-D1A. That means that it has a 320 cubic-inch displacement and produces 160 HP at 2700 RPM. It has a carburetor (not fuel injected), uses one Slick magneto and one Light Speed Plasma III solid state ignition. That will improve the fuel economy of the engine by around 20%. Penn Yan Aero has been in business since 1945 and has a good reputation for rebuilding aircraft engines. This will be a new engine built with components supplied by Engine Components, Inc.
And to put yesterday into perspective, I also ordered the firewall forward kit from Van's aircraft, and the Hartzell constant-speed propeller from Van's as well. The back ordered wheel pants from the finishing kit are enroute here now and should arrive on Tuesday, July 13th. The firewall forward kit is scheduled to arrive on the next day. The engine takes about eight weeks, and the propeller around 14 weeks.
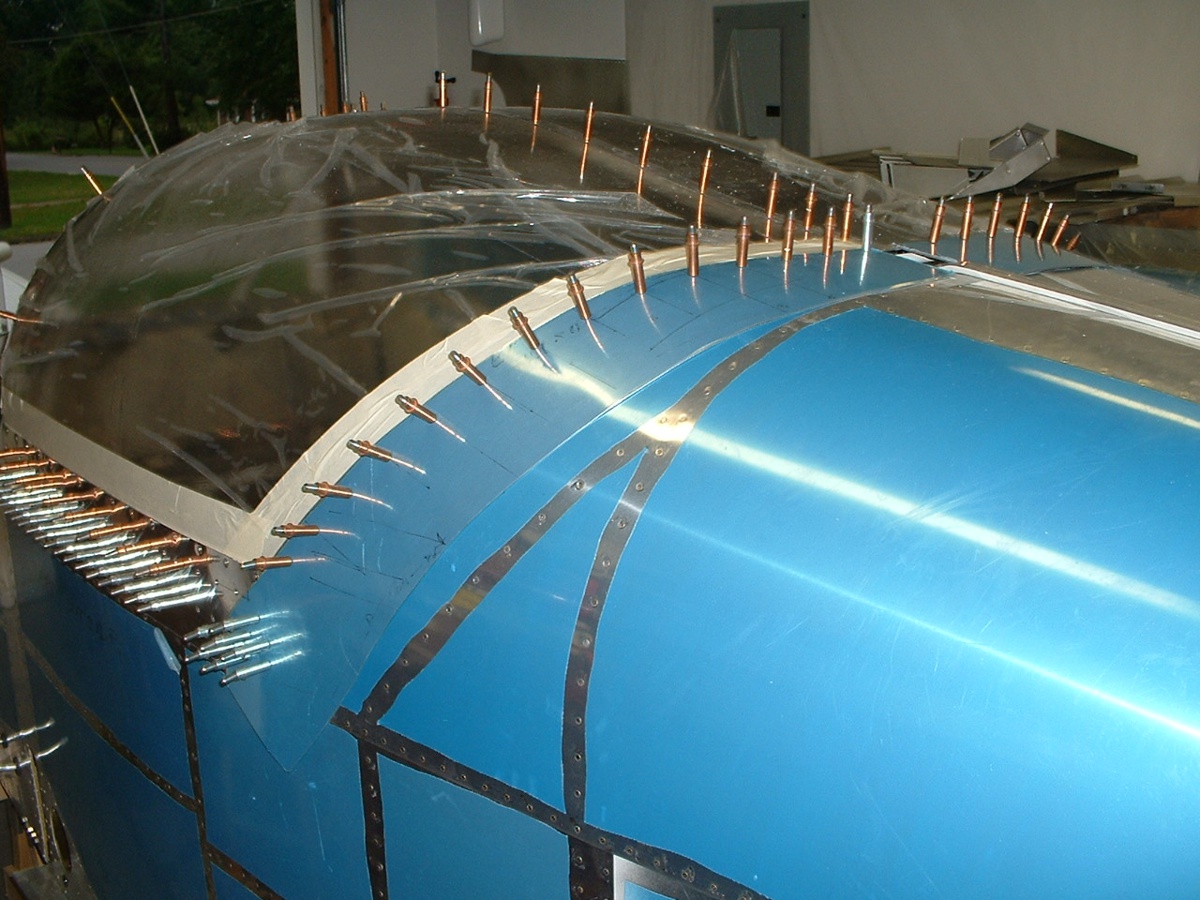
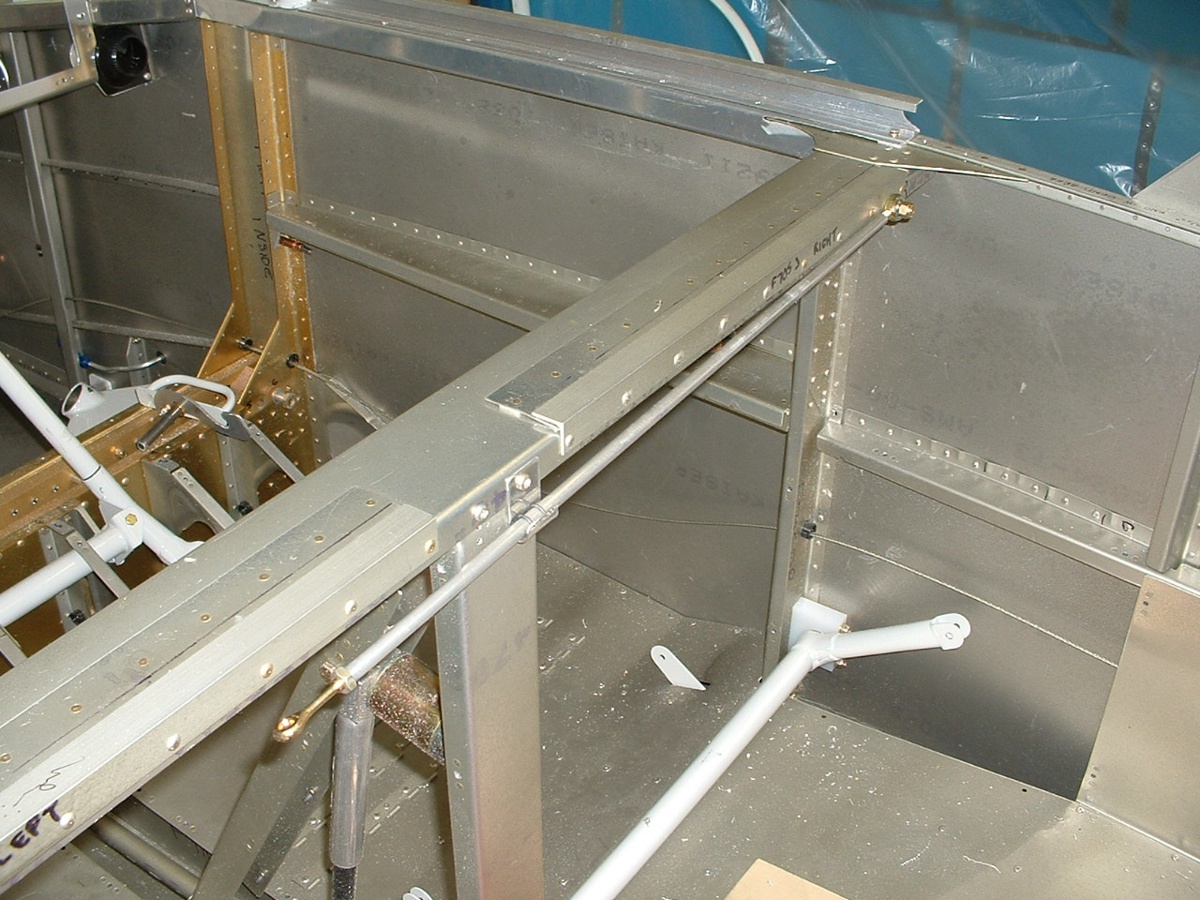
Here are the latest photos showing the end of the assembly and fit of the
canopy skirt and the Meske tip-up baggage access
conversion. This first photo shows how I re-drilled the RIGHT aft canopy skirt
using the same methods I developed on the LEFT side. This one only took three hours
to complete, but the precise fit is worth it! I cut the bottom edge of the aft
skirts even with the bottom edge of the canopy side skirts and dimpled all the metal parts
as needed. The plexiglass aft holes have been countersinked and opened up to the
final size of 5/32". I can see a spray-priming session coming soon before final
assembly of the sliding canopy.
The second photo shows a close-up of the Meske latch mechanism mounted on the
canopy frame. As you can see, the plexiglass is off the frame and stored in the
living room again.
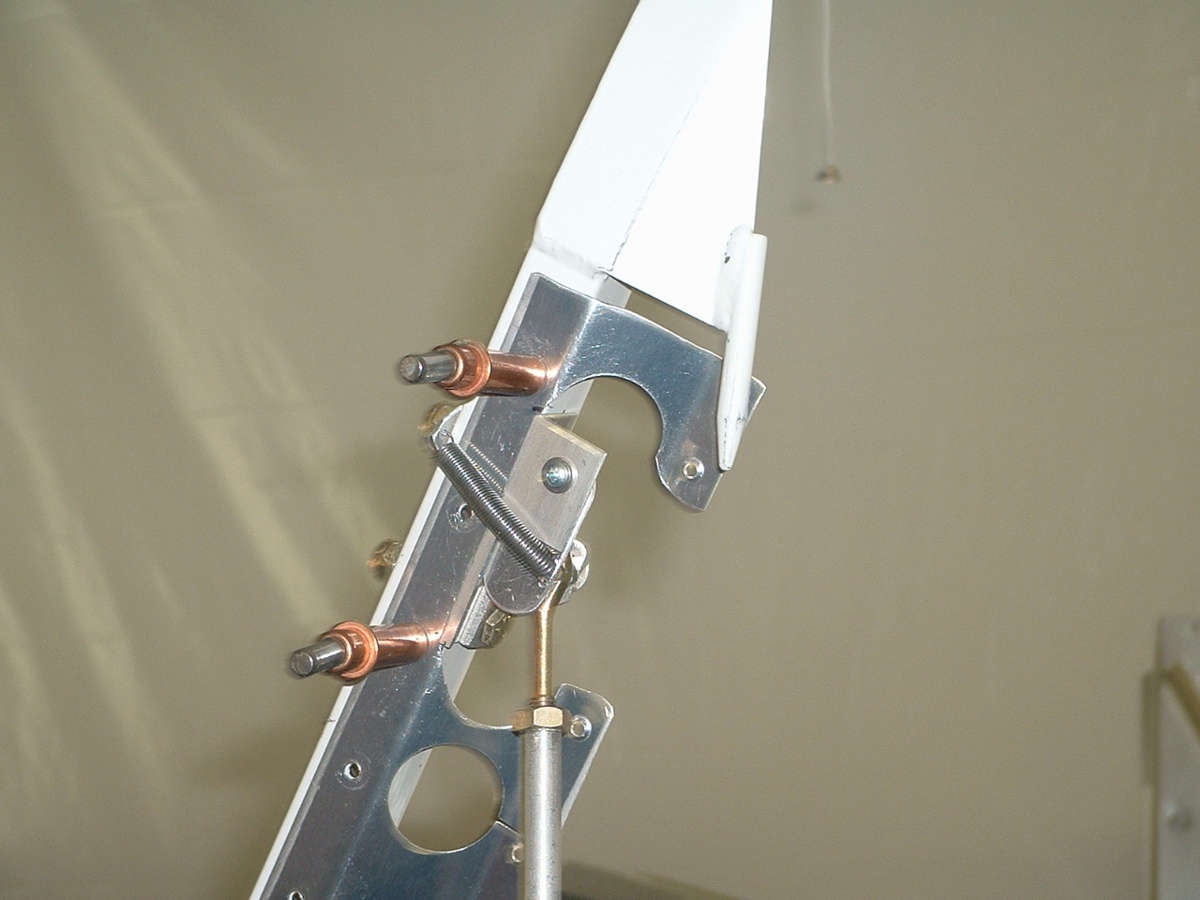
And the last shot shows the prop-up rod for the Meske modification sitting in
the stowed position. I made my own metal storage clip and put a pair of o-rings
around the brace tube to secure it and to keep it from vibrating.
| CLICK HERE for Finishing Kit page 49. | RETURN to MAIN MENU |