
Wendell Folks RV-8 Project - Page 84.
February 9, 2008: Here are the details of
the week for Wendell's project as of this Saturday. The bad alternator was sent back
to Van's Aircraft. A replacement unit arrived on Friday afternoon. The blue
trim paint was masked off for a Saturday morning paint session. And here is the
airplane with the blue paint on it waiting for the paint to harden.
Later in the afternoon, the masking materials are removed to reveal a single
tapering trim stripe running down both sides of the airplane. The new alternator is
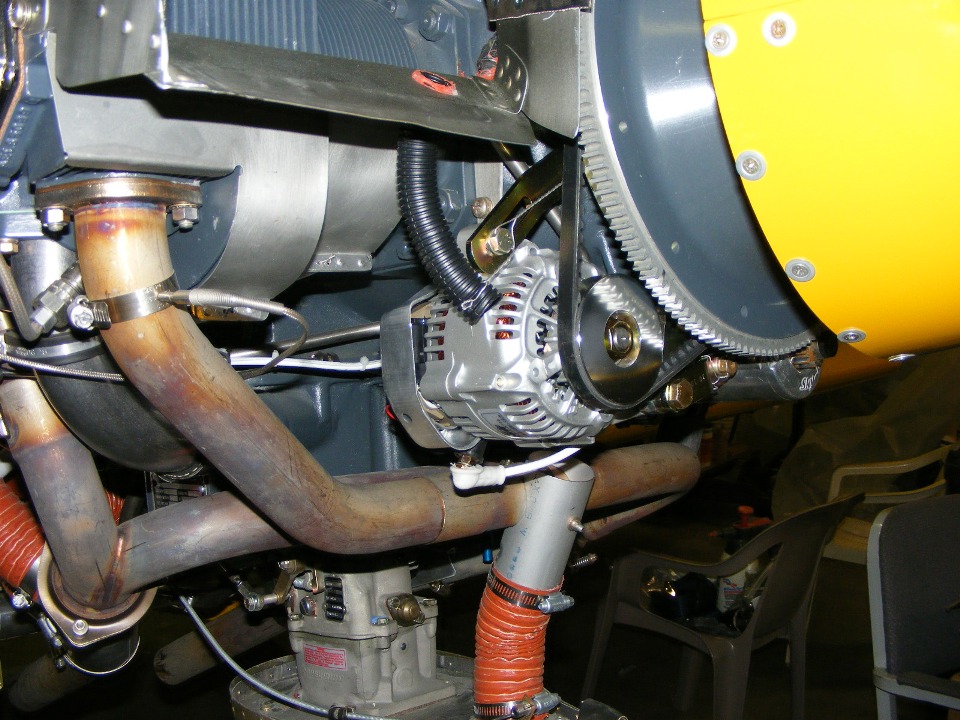
mounted on the engine ready to be connected to the wiring harness.
This alternator was different from the original unit. The output
connection is on the bottom, not the side of the alternator. It required a different
final routing of the large #8 power wire to provide the needed clearance from the hot
crossover header pipe running from the number one cylinder across to join the number 2
cylinder exhaust. This photo is shown after the completion of the installation.
Wendell had the unit in position when I arrived, including the safety wire.
The only problem was the way the field current and alarm wires were secured to the plug on
the back of the unit. The coil of wire had been secured from the factory by coiling
the wires then pushing the plug through the center of the coil several times. The
free ends of the wires were buried inside the coiled wires. The plug would have to
be removed from the alternator to get the wires loose. To do that, the alternator
had to be removed from the engine. Even with this one task, Wendell had to do it
twice.
With the alternator off the engine, it still required a pair of pliers to get the three-wire connector off the back side of the alternator. At that point it was easy to free the wires from the "shipping loop" prior to putting the alternator back on the engine. I reviewed the wiring diagram from the alternator instruction sheet and showed Wendell how the unit can drive an alarm indicator light when it is not putting out power. After last week's test flight, he agreed that an alternator warning light needs to be installed on the instrument panel, but not today.
I had brought along a rubber sanding drum for my drill that would allow me to spin the shaft of the alternator without cranking the engine. The alternator was temporarily mounted to the engine without engaging the drive belt to the pulley. With the wires temporarily connected, I had Wendell turn on the master switch, then the alternator field current switch/breaker. I put my drill with the bare rubber sanding drum up against the alternator pulley and spun the alternator. The red LED warning light went off immediately as power began to flow from the alternator. Mission accomplished! I also had my voltmeter attached to verify what was happening. I got out of the way to allow Wendell to finish the mechanical installation.
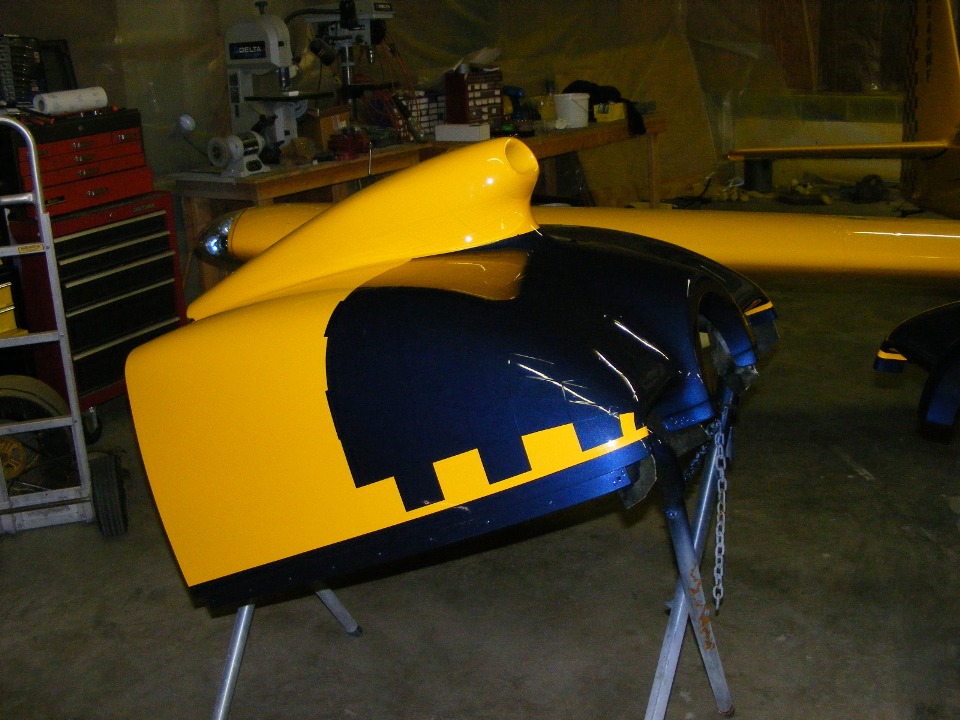
Here is a view of the lower cowl with all the protective plastic and paper
removed. A few of the masking squares have been removed. The painter decided
to let the other squares remain over night before removal.
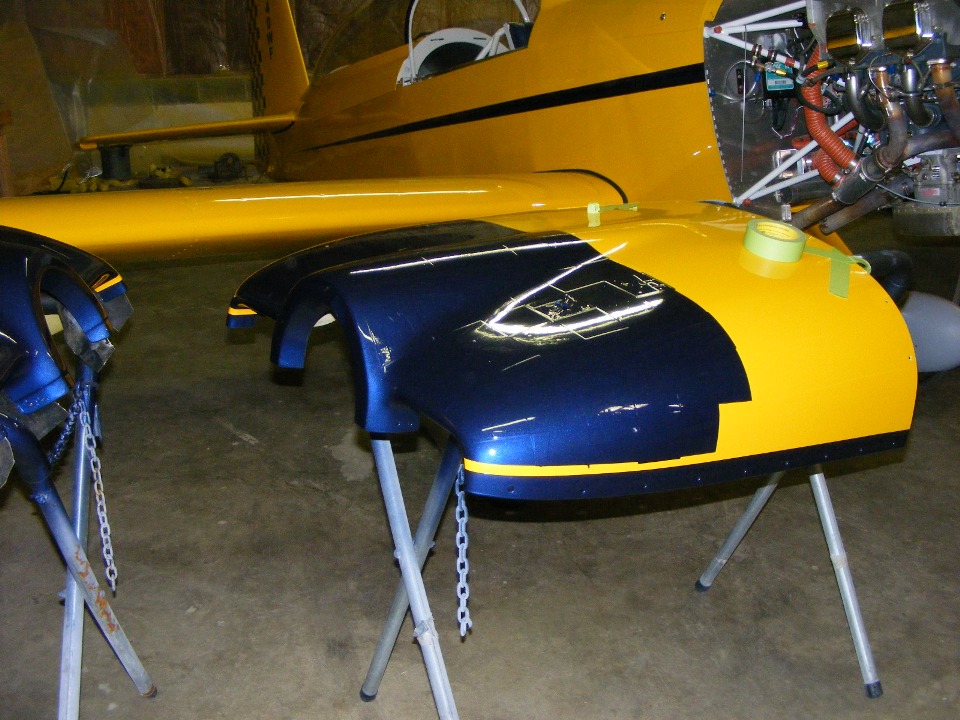
The upper cowl received the same treatment as the lower cowl. Note that
half of the horizontal blue trim stripe is on the upper cowl and half is on the lower cowl
where they meet at the sides. When all the protective squares are removed, the
checker board pattern will be revealed. The pattern on the front of the cowl
complements the patterns on the rudder and the lower side of the flaps.
The weather forecast for Monday is supposed to be good. Wendell is planning what he will do on flight number two. We agreed that I will fly with him again in a few weeks to get some air-to-air photos of the airplane now that it has the trim paint completed.
February 11, 2008:
Wendell has put in a few more flights with his Hobb's meter now reading just over
four hours. We had seen a small amount of "oil" on the windshield in the
first flight. A minor oil leak was found and secured, but there is still oil on the
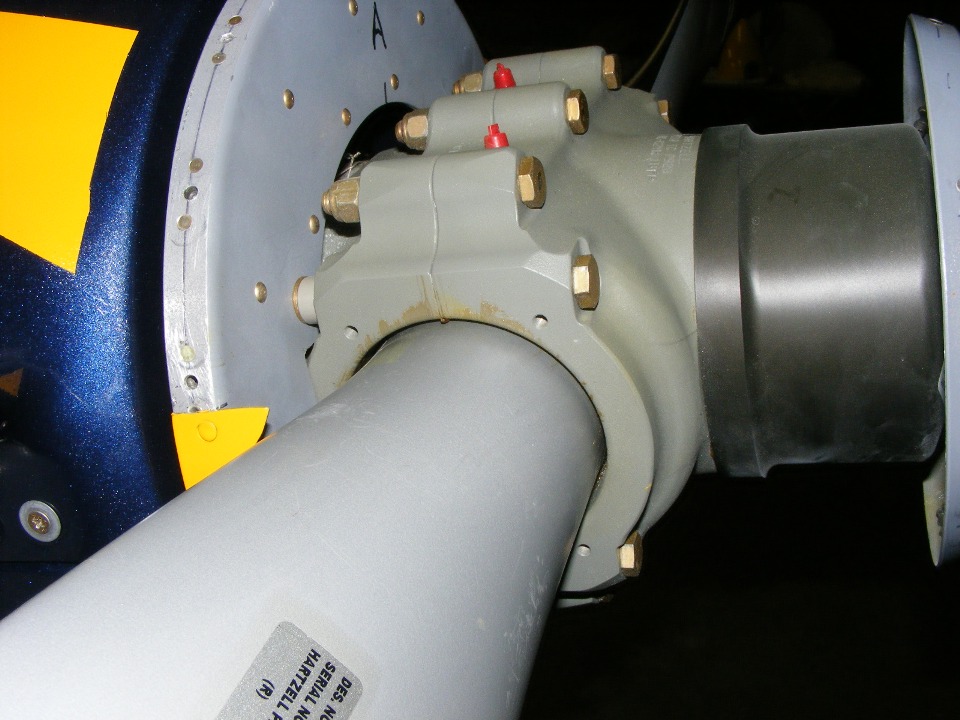
windshield after today's flight. I suggested Wendell remove the spinner for an
examination of the propeller hub and blades. A small amount of grease is seen on the
hub coming from both propeller blades. Wendell placed a call to Hartzell the
following morning and they pointed him to a prop shop in Atlanta to get the prop checked
under the warranty.
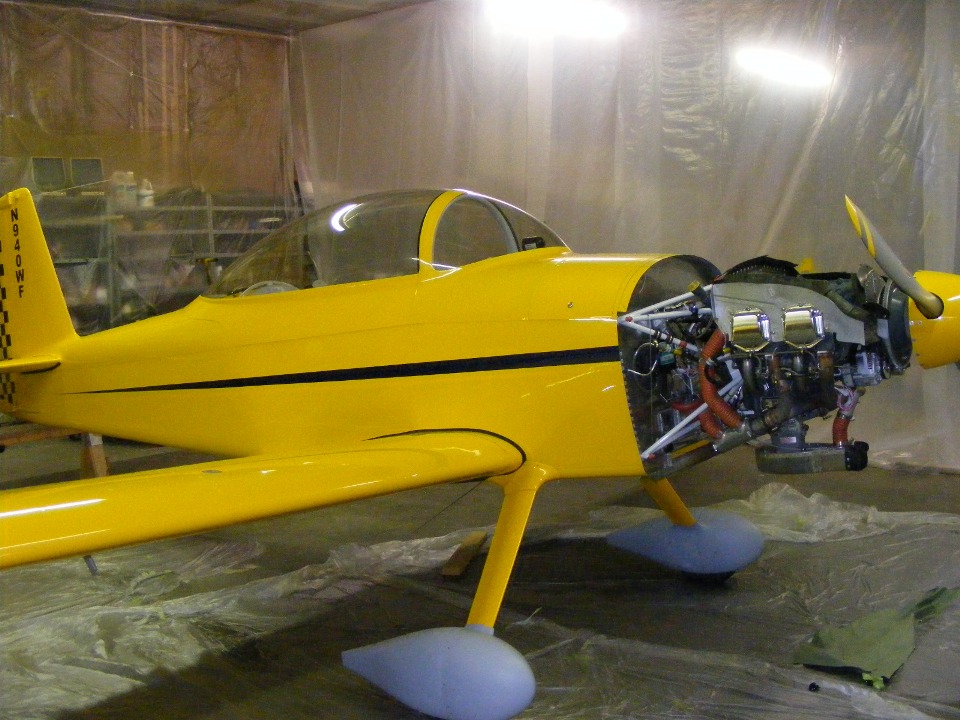
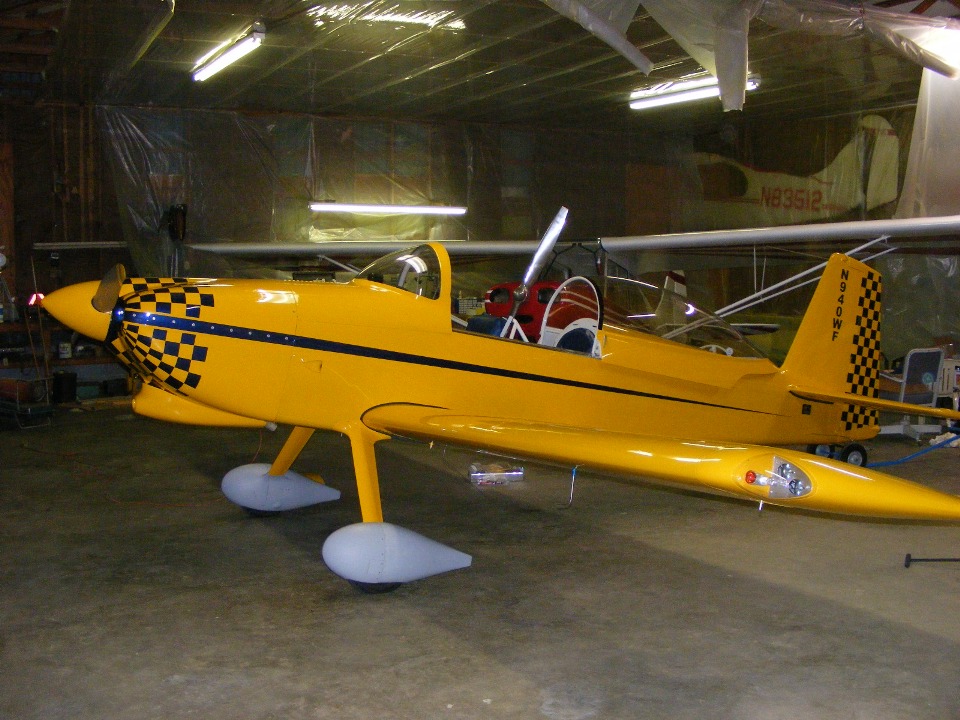
Here is the first photo of the airplane with the cowl painted in the
"Checker Board" pattern and the major trim stripe down the sides. More
trim may be added later, but for now, the flying comes first. The letters on the
tail are peel-and-stick vinyl and could also be painted on when the final blue trim is
completed.
| CLICK for Folks PAGE 85 | Return to Other RV Menu | Return to Main Menu Page. |