First Annual Inspection · · PAGE 211.
May 28, 2006: The second day of my annual
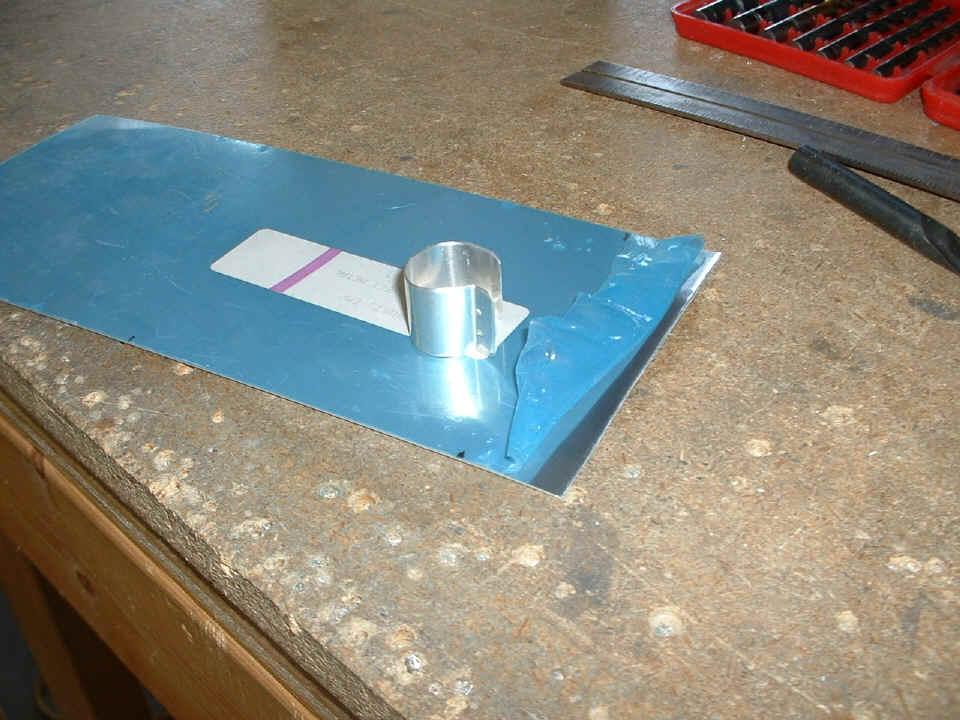
inspection, and there is no rush to finish this process. I made an aluminum
"shim" that wraps around the 3/4" tube that is one of four welded to the
nose gear leg socket. The purpose of this part is to provide a safety wire
"anchor" that secures the carb heat cable enroute from the firewall to the
filtered air box. The two holes drilled at the fold are for passing the safety wire
through on the way to the cable and wrapping around the part and the tube.
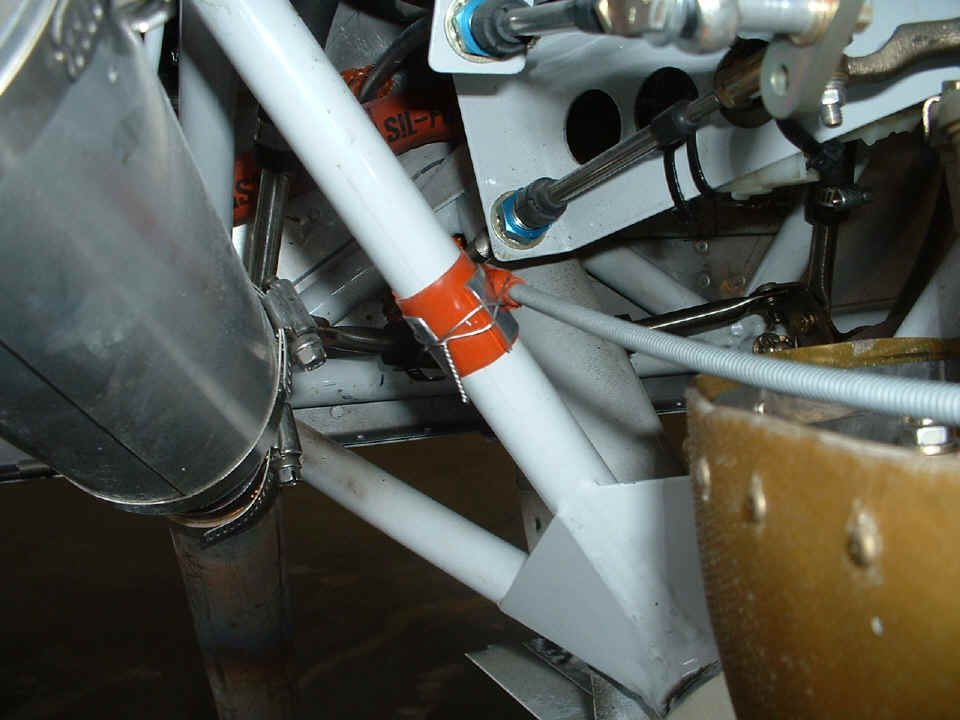
Here is the part installed behind the filtered air box with some silicone tape
to keep things from slipping around.
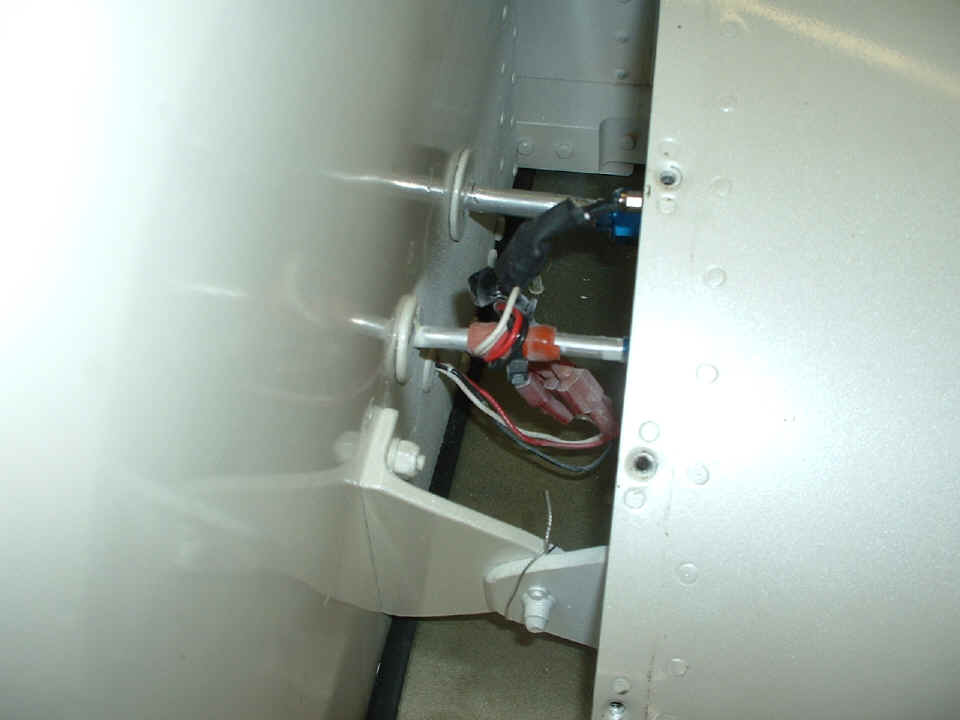
The wing root fairings were opened to check the fuel line and vent line
connections. I also put a mirror down there to get a good look at the end plate and
gasket seal and there are NO blue fuel stains to be seen here.
I also took off the main gear wheel pants, intersection fairings and the gear leg fairings. The right gear brake line looked to be "damp" with some dust clinging at the AN fitting where the tubing connected at the fuselage skin. I found that I could tighten it about 1/8 of a turn and it is now snug and the dust has been cleaned away. I polished all the fiber glass parts while they are off the landing gear. The tires both had 25 PSI when I checked them before pumping them up to 33 PSI. I had put them on and set them to 30 PSI last year with no air put in since installation. Tomorrow, I will jack up the airplane to pull the brake assemblies apart. Then I can remove the main wheels for bearing cleaning and repack with fresh axle grease. I have to order some AeroShell #5 grease to service my Hartzell constant speed propeller.
I had a chance to talk with David Edgemon tonight about the inspection. He gave me some good pointers on the process and may fly over for a short visit tomorrow if the weather is good. I also talked with Rich Nadig today, our local EAA technical counselor and A&P. He was surprised that I was already doing my first annual inspection. He may be dropping by this week to check on some things that Wendell and I have been doing on the RV-8 that also apply to the RV-4/Harmon Rocket Rich is building.
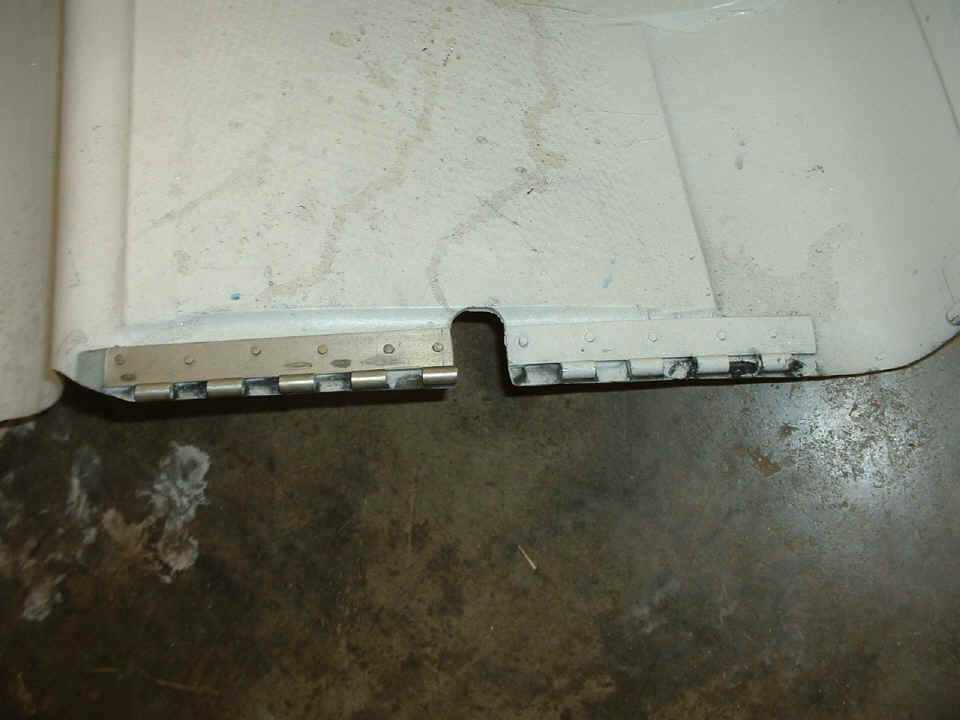
May 29, 2006: Monday (Memorial Day observed) and I worked on the airplane again, and had several visitors at Wendells air field hangar. So there was some hangar talk and I did my thing between stories. I finished cleaning the dirt and dust from the wheels, removed the brake pads and they look fine. Mike Seager told to me to expect to get 600 hours of flying before I would need to change them. The Van's factory training airplane, RV-6A N666RV, does so many takeoffs and landings, it gets new brake pads every 100 hours. I also covered the control cable rubber boots on the throttle linkage and the mixture linkage. Look at the picture up the page showing the carb heat cable modification and you will see the cracked rubber boots on those two cables. They are now wrapped in the same red RTV tape as seen in both the pictures above.
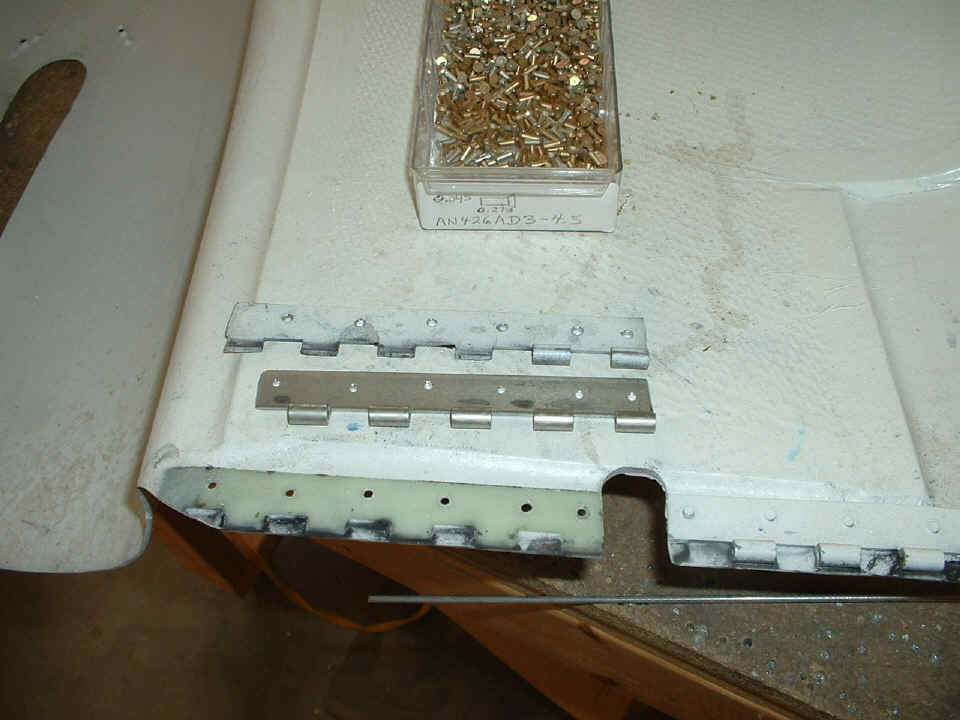
I also replaced the broken hinge on the lower right bottom of the cowl.
The guys at the paint shop did such a good job of hiding my rivets, I had to drill them
from inside to get the old broken hinge removed. I thought I was going to use
AN426AD3-4.5 rivets to install the replacement hinge, but quickly found them too short and
used -5 rivets instead. I used a long piece of hinge to line up the new hinge with
the old one since that was how the hinge was installed before I cut the notch to pass the
fuel drain from the gas colator down below the cowl. That worked just fine in
locating the short hinge replacement strip at the correct location. I clamped it in
place over the green fiberglass you see below, then back-drilled the hinge with a #40
drill bit though the empty rivet holes in the cowl. I made the replacement hinge one
eye shorter than the first one, since that eye was the first one to break off during phase
one testing.
Here is the end result with the new hinge riveted in place on the cowl.
If this new hinge fails again, I will match drill it to be a little further forward from
the aft edge of the cowl.
I also took apart the gas colator and found a small amount of debris in the bottom of the reservoir. The alternator belt was also re-tensioned and the clamping nut was safety-wired again. After filling the nose wheel yoke with axle grease, I put the wheel fairing back in position. All three wheels are now covered and ready to fly. I used my Dremel tool sanding drum to open up the inside bottom edge of the RIGHT main wheel fairings to give that tire a bit more clearance in the event of a hard landing or low air pressure.
June 5, 2006: I have been working slowly getting the annual inspection done since I did not have anywhere I really wanted to go right now. I put in some time over the weekend on Saturday and Sunday checking the empennage bolts when I had that fairing removed. I also had a potential RV builder up from Atlanta on Sunday afternoon. I left the empennage fairing and the cowl off until after his visit to allow him to see how everything is put together. When he and his wife departed, I put the bird in flying condition, then called it a night. I also took home the airplane log book and my flight limitations I received from my D.A.R. last year. I reviewed Part 43, section D to insure that I had lived up to the intent. That was when I realized I needed to take a flight to check all the electronics before I could sign the log book and complete my first annual inspection.
Today, Monday, June 5th, I completed the annual inspection with a short flight
over to Dalton, Georgia to practice an ILS approach. I had intended to do that ILS
option at Chattanooga. I was dialed up to KCHA ATIS and discovered the ILS RWY 2 was
OTS today on the GLIDE SLOPE. With that bit of news, I headed for Dalton (KDNN) to
practice the approach over there. I headed directly for the UWI NDB (Whitfield)
using the Garmin GPS 296 as my "NDB receiver" to get me on the localizer.
The NAV side of the SL-30 identified the localizer I-DNN and I headed down the slot for an
approach to runway 14. I had no intention of landing since it would have been
downwind. I had the pattern to myself and announced my ILS practice approach.
When the glide slope needle zeroed in on the VASI lights, I knew everything worked on the
SL-30 NAV side. I broke off the approach and headed for home.
At 3,300 MSL cruising over Interstate 75 just northwest of Dalton, I called Chattanooga approach on 125.1 and got a transponder code. The controller was a long time coming back to me after I entered the code. I guess he got busy with a landline or something else. I was the only one on the frequency at the time, so I called again. After an IDENT request from him, he finally came back with an altitude reading from my mode C encoded transponder signal. He agreed with the altitude on my instrument panel, and of course I knew what he would say since I could see the altitude display on my Garmin GTX-327 radar transponder.
All that was left was to see if my autopilot would track a course from the 296.
I punched in a DIRECT to FOLKS and engaged the Smart Coupler to get a green light
on course data from the GPS. I pushed the wing leveler switch on the NavAid unit and
the stick responded to the wing-mounted servo. I flipped the switch to the autopilot
side and the airplane followed the line on my Garmin GPS 296 just like it has for the past
year. And with that, I headed for the grass runway of home.
Wendell and his runway partner Jim had a crew working on the south end of the runway to get it back in shape. They were there when I took off with 2000 feet of runway ahead of me earlier. As I was lining up to use that same 2000 feet, I noticed two vehicles traveling north from the work zone on the runway. I made a 360-degree turn to allow them to get clear of the runway for my approach and landing. The wind was gusting a bit and I had to make some rudder and aileron corrections at the last minute before the flare to a good landing (no bounce). By the time I got the airplane parked on the ramp and shut down, the Hobb's Meter had another 0.6 hours added to it.
When the "Enterprise" was put back in the corner of the hangar, I finished the entry in the aircraft log book with today's date, the current Hobb's reading, and the duration of today's test flight. And with that, the annual conditional inspection was complete.
Wendell had been down at the other end of the field and was returning on his golf cart as I walked out to the edge of the ramp and the runway. I had moved his Cessna 182 out of the hangar, but I was hoping he would return since it is much easier for both of us to put the 182 away. There is a slight uphill grade from the runway to the hangar. The ramp is concrete, so it is not too bad rolling the 182 out, but gravity makes it a bit tougher to put it back in the hangar.
After that, I went with him to take a look at his recent work on the RV-8 quickbuild kit in the warehouse area. I have two new pictures posted and the story from this evening in his web section on THIS PAGE.
Last entry for today comes from an email I sent and received a reply from it. The email was to Jim Cimiluca, the Fly-In Director for the Rocky Mountain EAA Regional Fly-In at the Denver Front Range Airport (KFTG). It turns out that Jim is also building an RV-9A. I had asked about the possibility of parking my RV-9A at the fly-in site "early" using my tie-downs. Jim thinks he may be able to get me some hangar space. Since I have a trade show to attend in Denver, I am arriving on Sunday, June 18th. The fly-in big day is Saturday (24th) with early arrivals on Friday, June 23rd. My trade show ends on Friday and I am free to be part of the fly-in on Saturday. My return trip home will be on Sunday, June 25th. For details on the fly-in, CLICK on this LINK: http://www.rmrfi.org/ and plan to attend if you can. If you are flying your airplane there, be sure to download the NOTAM for the event by clicking on the link to "Pilot Info/Directions" from the web site menu. It is an eleven-page PDF file, so be sure you print all of it and bring it with you of course!
June 8, 2006: The new remote video camera was delivered yesterday. I tested it with my digital camcorder at home to learn its features and functions. Today after work, I came over to the hangar for a test in the airplane to check out the field of view inside the cockpit, out the windshield looking beyond the hangar door across the runway, and inside the hangar looking down across the front of the left wing. I tried out the various possible positions for mounting the manually-operated tilt/pan base and nothing excites me that I can be happy with. I held the camera in a few places near the windshield and the panel to visualize possible camera mounting techniques that I may be able to fabricate.
I put on my headphones and held the camera above one ear cup, then the other as I moved my head about. This is of course was a simulation of a "helmet cam" as used by some motorcycle riders. A friend of mine in Florida has one on a helmet and got some good video from a motorcyle road trip he took to California last year. It appears that mounting the "bullet cam" to my headphones may be the best option for now. I may soon get the chance to fabricate a mounting bracket for the camera that will work in my airplane, but for now I will try mounting the camera to my headphones with an Ansel clamp and see what happens. Wendell needed a few parts from Aircraft Spruce & Specialty, so we put together an online order that should be here soon. That should give me the time to try all this out before my trip to Denver that begins on June 18th.
As for the second part of the test in the airplane, it was not entirely successful. I never got good intercom audio to go into the camcorder while the external video was being recorded. The radio reception came through just fine, including a short voice test transmission I made on the air-to-air frequency. On one part of my test tape, I turned the audio up very high on my TV set and barely heard my voice doing the "hello test" chant that is so commonly used when hooking up audio circuits. I finally gave up and checked on Wendell's RV-8 project progress in the shop. I have one photo on his latest page. Before I went home, I dug out my Garmin GMA 340 technical manual and put it in the car in hopes that I can find out why my intercom audio is not getting to the camcorder at the proper level.
June 10, 2006: I had a "EUREKA" moment Friday night when I was reading about all the features and functions of the Garmin GMA 340 audio panel. It seems that I used the headphone audio output for the PASSENGER headphones for my audio connection to the camcorder. Since this is the first time I tried to use that connection, it has never had the audio output signal level adjusted. I found this little note that says pull the copilot volume knob to adjust passenger intercom volume. That knob has never been pulled and twisted in the past year. That explains why the radio came through fine on the camcorder tape, but not my voice over the intercom. Later today, I will be back at the hangar to set the passenger intercom audio volume in a follow-up video/audio test to the camcorder.
SATURDAY EVENING UPDATE: The audio level knob worked as published when I went by the hangar after dinner this evening. Wendell came out and watched as I set up the video camera, camcorder, and the audio connections. I made a short test recording and adjusted the audio level coming out of the GMA 340 audio panel. I also managed to catch a radio message from the Chattanooga Approach frequency to compare against my intercom recording. When I got home and played the tape on my television set, both levels were fine and compared nicely with a recording I made using the built-in microphone on the camcorder.
I also explained to Wendell how and where I wanted to mount the camera. By the end of the session in the cockpit, I had decided where I would mount the camera to get the view angles I want. I also envisioned the design of the mount and how to fit it to the forward top skin above the instrument panel. I even checked out the available aluminum in my surplus box in Wendell's shop. I also reviewed with Wendell the next steps he will be doing to install the flap on the left wing of his RV-8.
| CLICK HERE for PAGE 212 | Return to MAIN MENU. |