Wendell Folks RV-8 Project - Page 32.
October 23, 2006: It was a short evening to
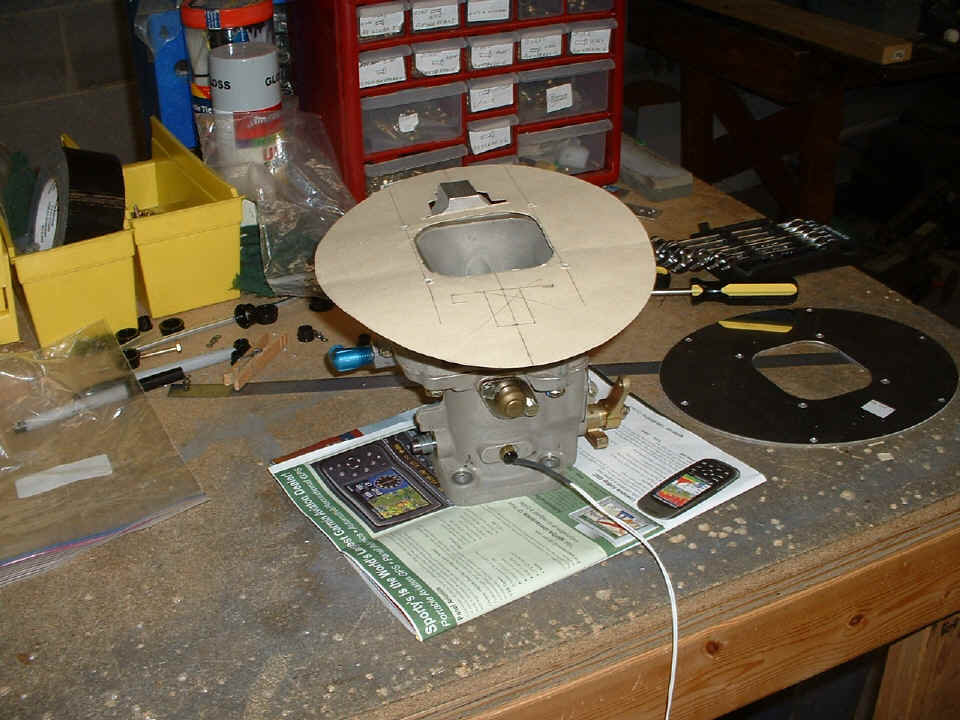
check on Wendell's recent work. I had assigned him the job of creating a template to
determine the shape of the cutout on the mounting plate that joins the carburetor to the
filtered air box (FAB). I found that Van's has a different design now from the one
that is on my airplane. I first thought the differences were for an O-320 vs. O-360,
but then I saw the new drawings in the kit of the current version of the FAB for the
O-320. You can see he is beginning to trim the cardboard template made from a manila
file folder. We also installed the carburetor temperature probe into the front of
the throttle body section of the carb. I was looking at a photo of the carb on my
engine and realized I can put the same probe on my engine.
October 25, 2006: Back inside the cabin,
Wendell has installed one of the brake lines and the carb heat control cable gets mounted
into the gear leg tower near the engine controls. Still to be installed are the
control cables for the cabin heat door and the parking brake. The space inside the
LEFT gear leg tower has the fuel vent line running UP and DOWN inside there, plus the
brake line is now in there. The control cables for the throttle, mixture, and
propeller governor run through as you can see through the lightening near the center of
the photo. The long green elevator trim cable sits out of the way for now. The
instrument panel is laid into position to give Wendell the feel for reaching each of the
controls while seated.
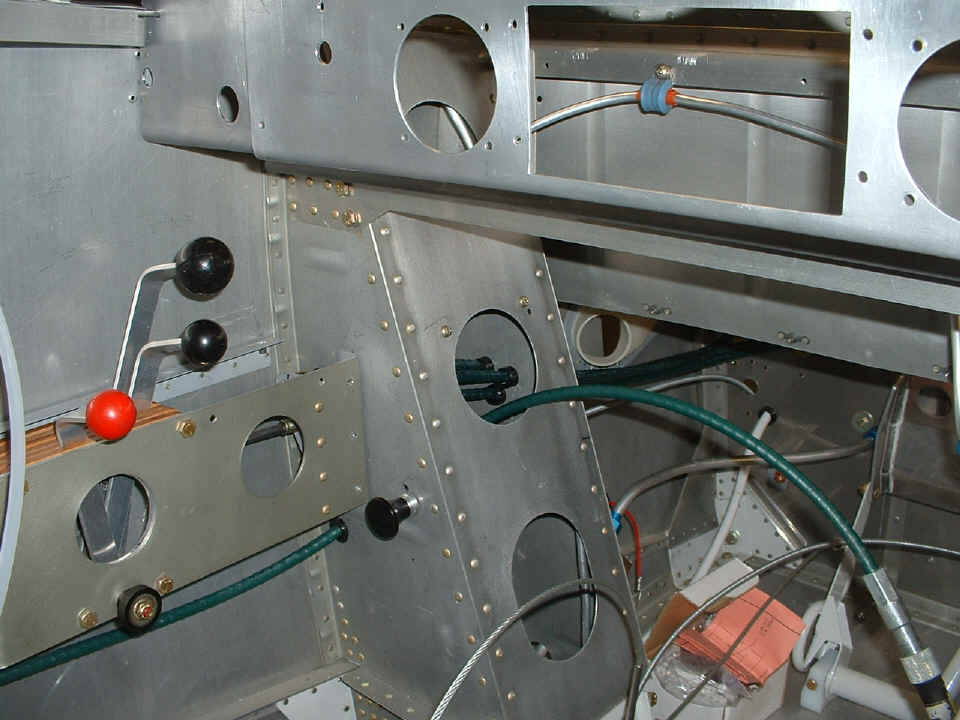
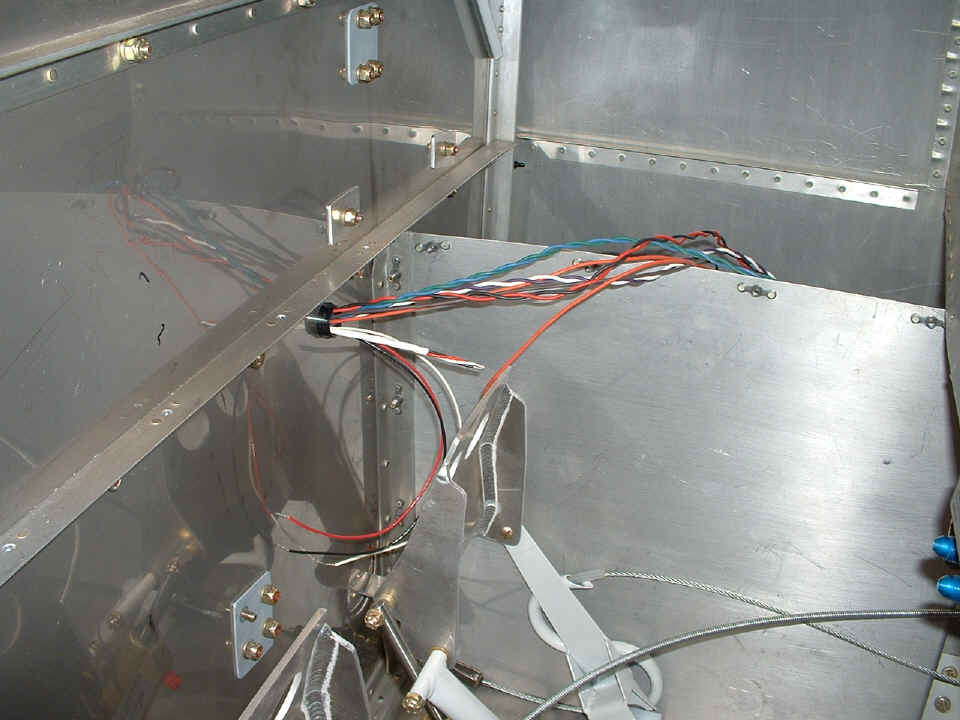
Additional electrical cables (other than the master power cable from the
battery to the starter solenoid) have now breached the firewall. There will be many
more coming through as the wires from the CHT and EGT probes make their way to the
panel-mounted engine monitor. The two blue AN-fittings at the far right edge of the
photo are attached to the hydraulic parking brake valve.
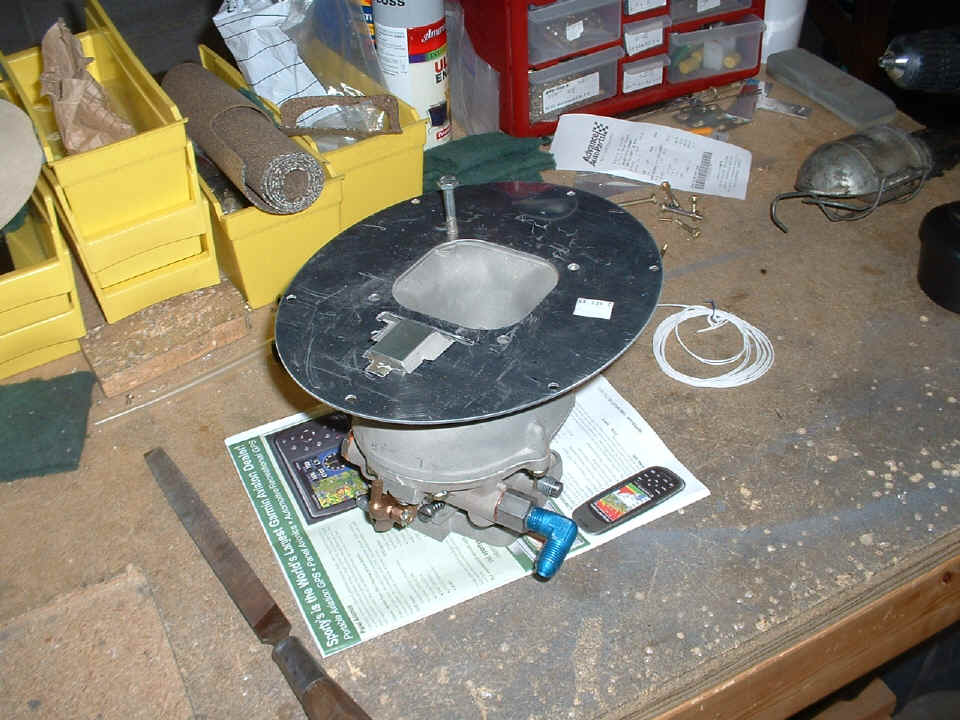
Back on the work bench, the VA-131C carburetor mounting plate for the FAB is
just about finished. Some additional filing on the shape of the cutout remains to be
completed. Wendell has already made a gasket for it from the material you see rolled
up in the yellow box.
We finished the evening at the computer placing an online order to Aircraft, Spruce & Specialty. We also reviewed an order that needs to be called into Van's Aircraft since one particular item is not on the online ordering pages of their web site. I also got out an aluminum plate and some angle stock to demonstrate how the elevator servo will be mounted near the elevator bellcrank. One pre-installed angle from the quick-build fuselage will be removed temporarily to aid in the construction of that mounting plate. You will see more about that in future reports.
November 4 & 5, 2006:
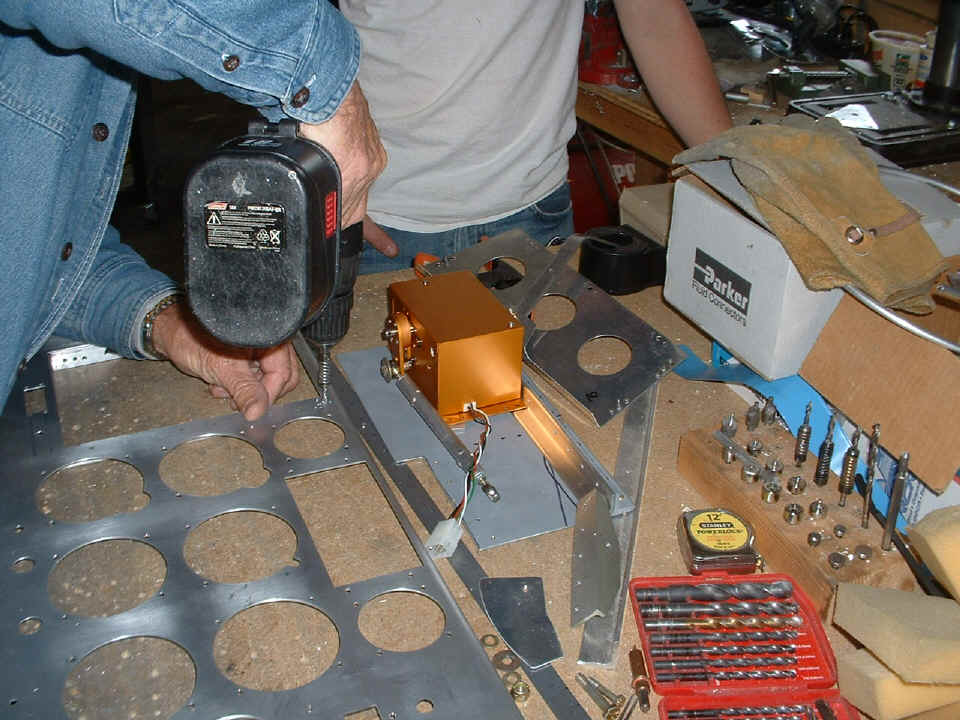
I took this first photo on Saturday when I was over at Wendell's field to make a
test flight in my airplane with the new Dynon software installed in my D10-A.
Wendell was sending his instrument panel and other interior parts to the paint shop.
Here he is changing one rivet in the panel before it goes for paint. You can also
see the servo and mounting plate we created for the Trio altitude hold.
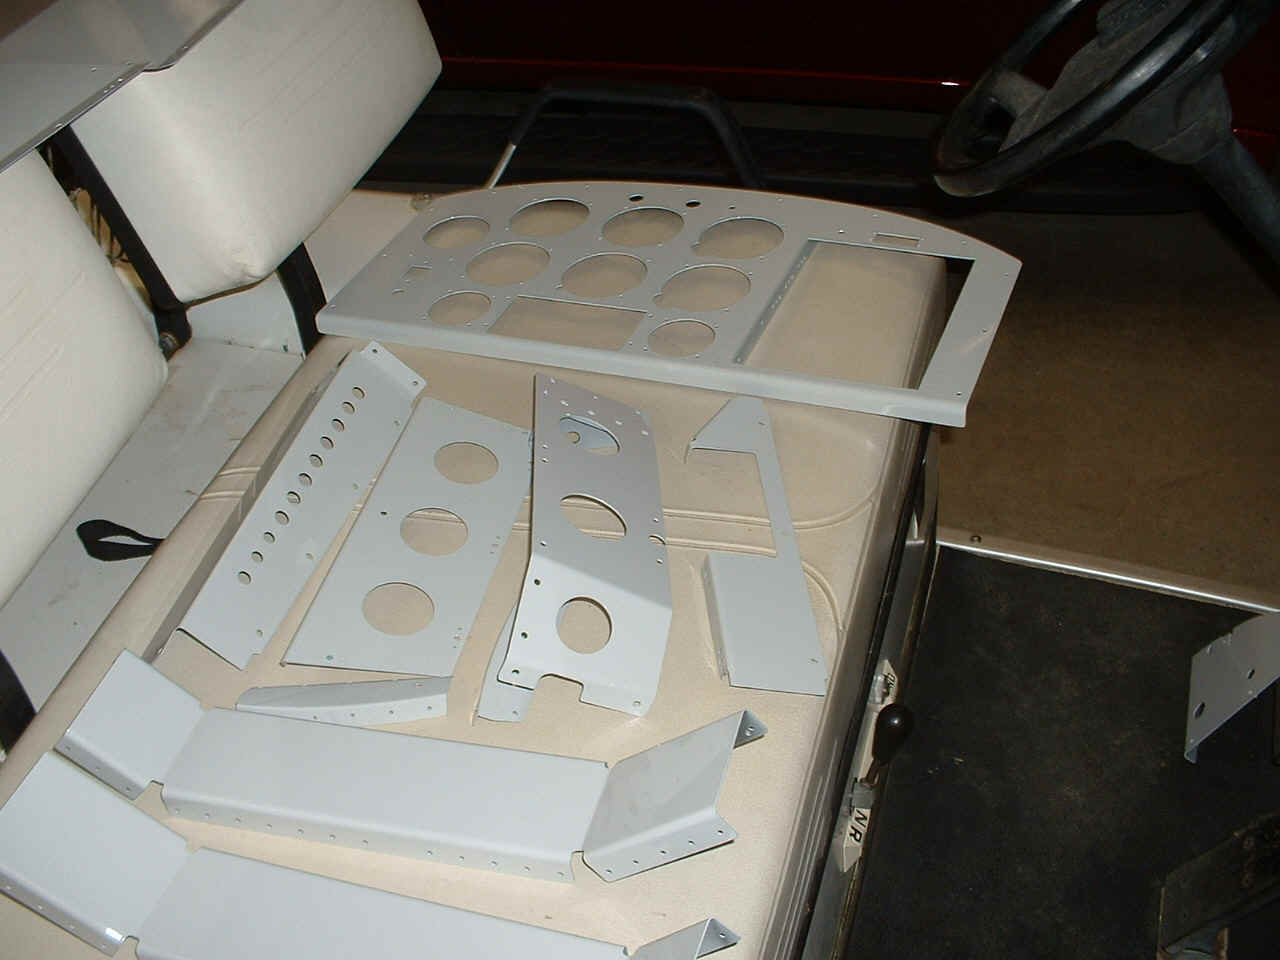
When I went back on Sunday (Nov 5) to clean my airplane, the guy from the paint
shop returned with all the parts he received on Saturday. Here are some of the parts
laid out on the seat of Wendell's golf cart. The paint color matches the
factory-provided powder-coated roll bar and joy sticks. The paint was baked on to
make it more chip-resistant.
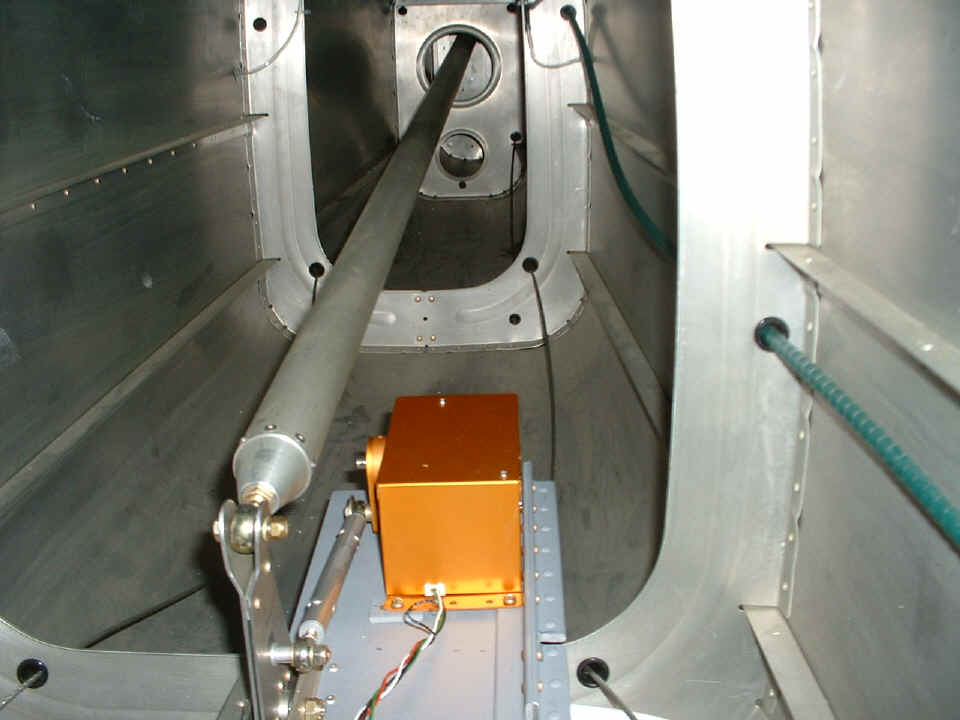
November 21, 2006: The
altitude hold servo has been installed and connected to the elevator bellcrank. This
required the horizontal stabilizer to be mounted again, along with the elevators.
The elevators were then locked into the "neutral position" with the
horizontal stabilizer. This alignment process was done previously to calibrate the
control sticks to the vertical position, the length of the pushrods, and the position of
the elevator bellcrank. One of the angle brackets for the elevator bellcrank had
been removed to aid in fabricating the servo mounting plate. Now that it and the
mounting plate are installed with Cherry Max rivets, it was time to re-check the elevator
neutral calibration at the same time the servo control arm gets calibrated for the first
time.
This was another "milestone day" for Wendell as the altitude hold servo mounting and alignment is now complete. He pushed me at the end of the session to begin more wiring in our next session. And with that goal for the next session, we go to page 33 for wiring.
| CLICK for Folks PAGE 33 | Return to Other RV Menu | Return to Main Menu Page. |