N2PZ in the Paint Shop - Page 149.
July 21, 2005: The control surfaces have all
been installed and connected again. The elevators are connected to each other and
the elevator pushrod. The empennage fairing has been installed for the first time
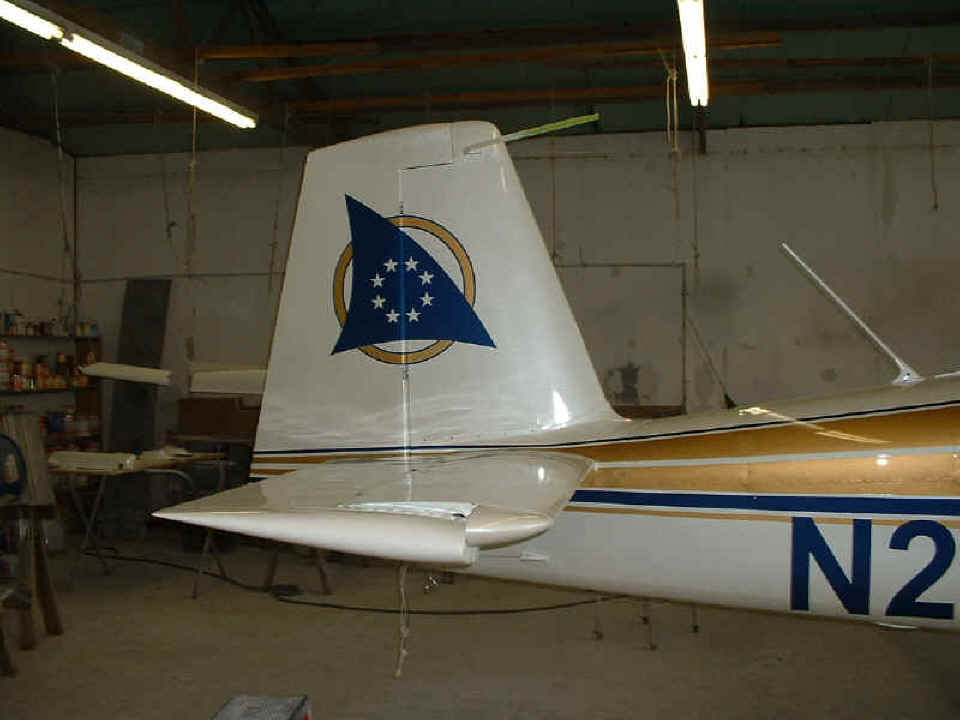
since painting. This side looks really good. When the elevator is neutral, the
trailing edge of the elevator aligns at the center of the white stripe between the gold
stripes on the rudder. The "circle and stars" measures 24 inches from top
to bottom. As you can see, the circle fit nicely between two of the three rudder
attachment bolt access cutouts in the rudder.
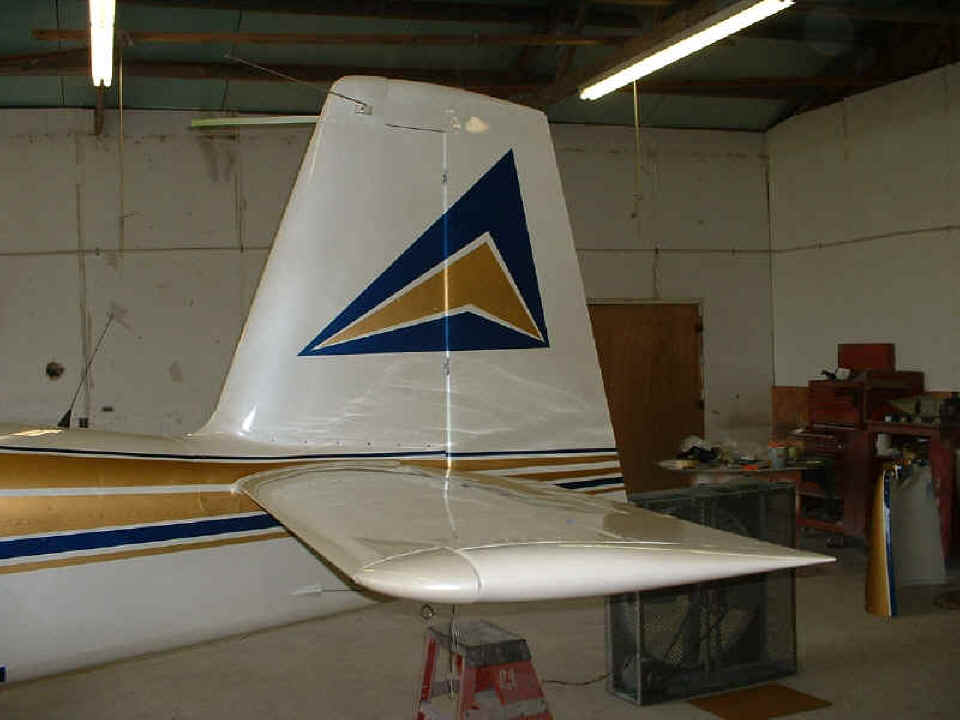
The other side has a pinstripe matching problem that Bill says we can fix
tomorrow without removing the empennage fairing. The rudder cables are connected
along with the elevator trim tab linkage. The "Delta Triangle" is also 24
inches from base to Apex.
The view of the wing walk on the passenger side is pristine except for where I
put my knee on it when reaching inside the cabin. I have already tracked up the
pilot side wingwalk when I was getting inside to connect the flap linkage for both flaps.
The upper cowl was on the airplane earlier, but has some rework to be completed
early tomorrow.
I was down on my creeper installing the clear UHMW tape on the wing overhang above
the flap positions. The tape prevents chafing of the flaps against the upper wing
skin when the flaps are UP. I also installed the clear tape on the upper and lower
cowl directly behind the prop spinner backplate to protect the paint there when putting
the cowl on or taking it off to service the engine.
Here is the view of the right wing tip with the marker light/strobe unit
installed, and the clear lens installed. The upper cowl is waiting in the
background. The spinner, along with the rudder cap, and the gear leg fairings are
all in the back curing overnight after painting and clear coating. The wheel
fairings are completed and a will be ready to install in the morning.

I am satisfied that I have the ailerons and flaps secured with the linkages adjusted properly once again. Both wing tips are on and the tip lights and strobes have been tested. I may actually get a chance to install some of the interior tomorrow while the touchup work to the paint is completed. We will decide if the airplane is ready to fly out tomorrow based on the paint hardness, etc.
July 22, 2005: What a day!
I really thought we would get out of the shop today, but there is always something
else needed. This is the nose gear leg fairing. I put a couple of layers of
the clear UHMW tape on it to prevent scratching of the paint when the cowl goes on and off
for engine maintenance, oil changes, etc.
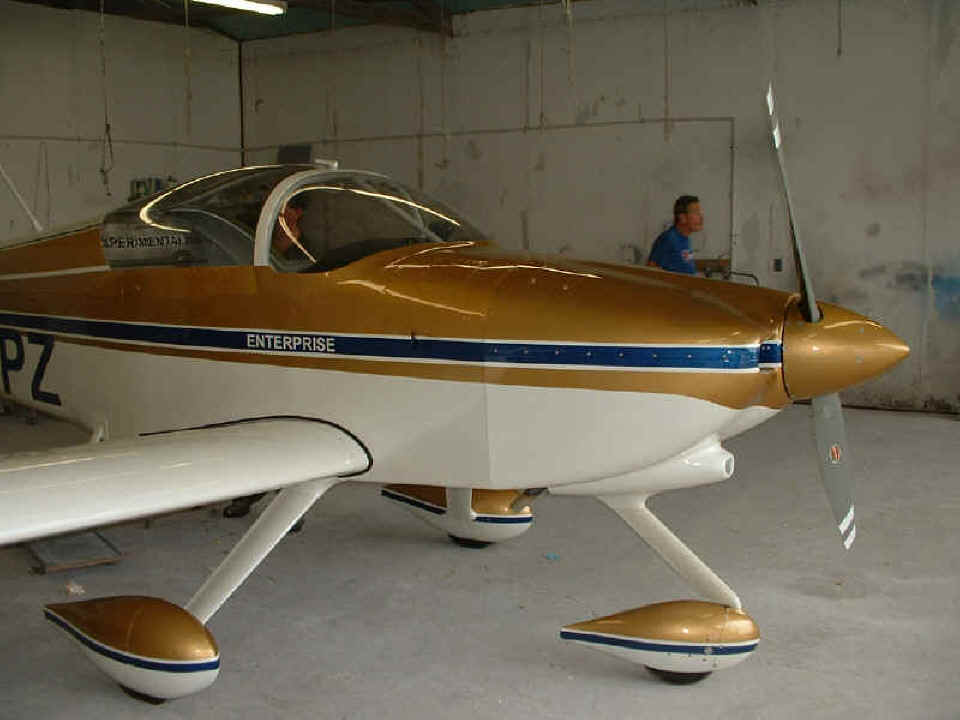
The gear leg fairings and the wheel fairings are now all in place as is the top
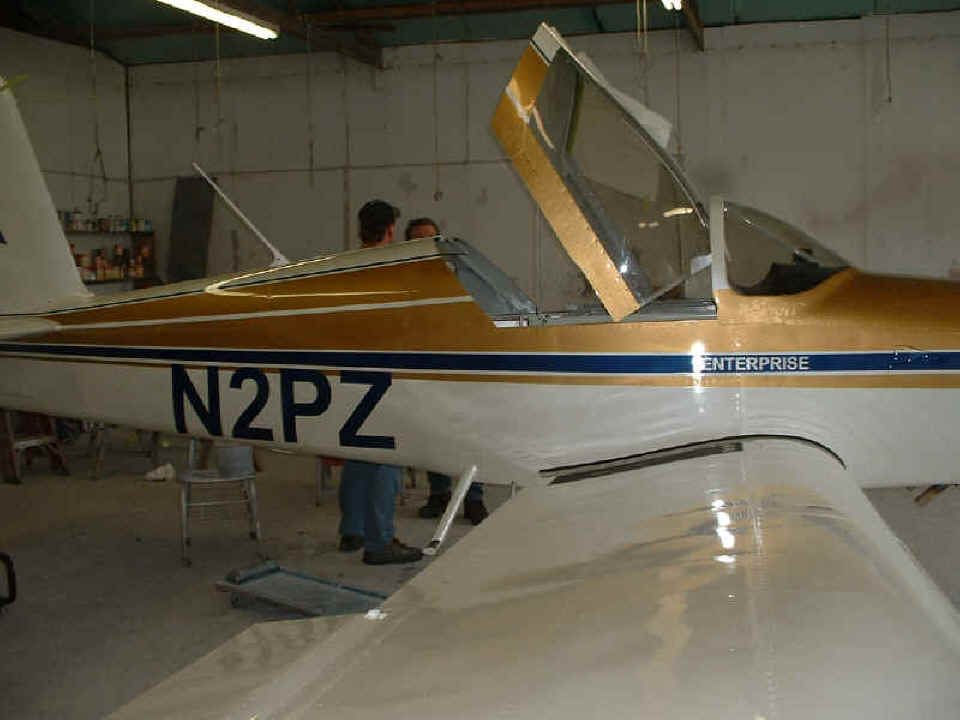
of the cowl and spinner. This is the first picture of the canopy installed and
closed. The white and blue pinstripes on the side matched the canopy as planned on
this side, but not on the other side.
After the corrective actions for the other side were decided upon and suitable
wet-sanding and taping were accomplished, the prep work to fix the paint stripe
misalignment began with the canopy in the Meske tip-up position.
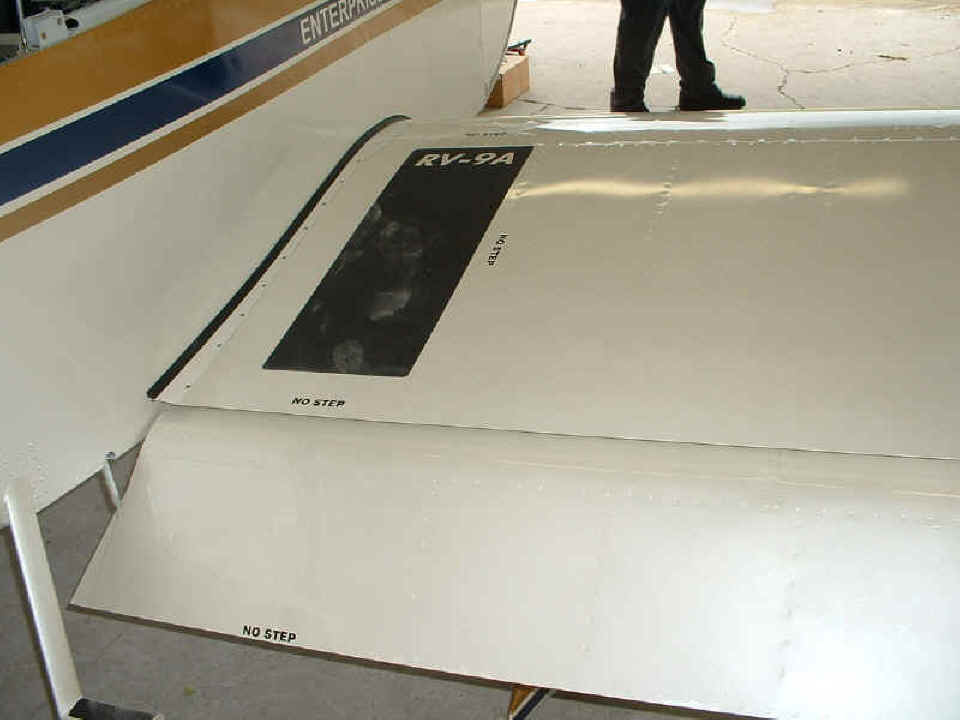
Here is the wing walk with suitable "NO STEP" warnings attached to
the wing and flap. The LEFT wing and flap got the same treatment.
The last photo of the day shows Bill putting on the first coat of paint to fix
the stripe problem on the left side. The plastic painter's "drop cloth"
and some taped-paper cover all the areas against overspray. He said he will have all
three colors repaired and clear-coated before he quits tonight. We agreed I would
return at 9 AM tomorrow, giving him an extra hour to "sleep-in" before I arrive
to get the airplane.

| CLICK HERE for Freedom - PAGE 150! | RETURN to MAIN MENU. |