Airport Assembly - Page 133.
June 4, 2005: I was on the move through the airports at Portland, Oregon and Cincinnati on Friday, June 3rd coming back home. While I was at the Portland airport, I placed a call to John Burgin. The airworthiness inspection is going to be Wednesday, June 8th. That gives me time to finish up some things on the airplane, and maybe do an engine test and some taxi testing before the airworthiness inspection. I went out earlier today to see Larry Champion and to deliver some wing spacer blocks to him. He will be using my oak spacer blocks during the assembly and riveting of his fuselage wing bulkheads to the fuselage skins, lower longerons, bulkheads, ribs, etc.
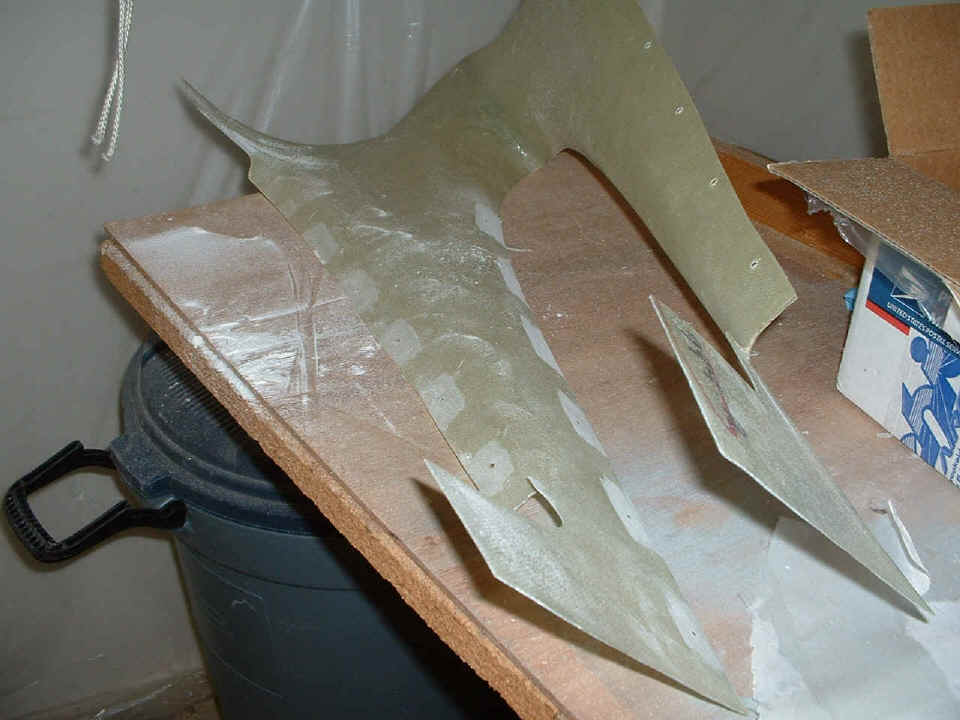
I had a short session at home this evening on the fiberglass rework of the
empennage fairing. I repaired the holes on one side of it so they can be re-drilled
at the airport tomorrow. Here are the three pictures from the 1.2 hours of work
tonight. The first picture shows the grinding of the inside surface of the fairing
around the holes that are to be filled and reinforced with two new layers of fiberglass
and epoxy resin. I ground away about half the thickness of the existing fiberglass
around the holes that need to be "moved" about 1/2 a hole width to get a good
fit at the leading edge of the horizontal stabilizer.
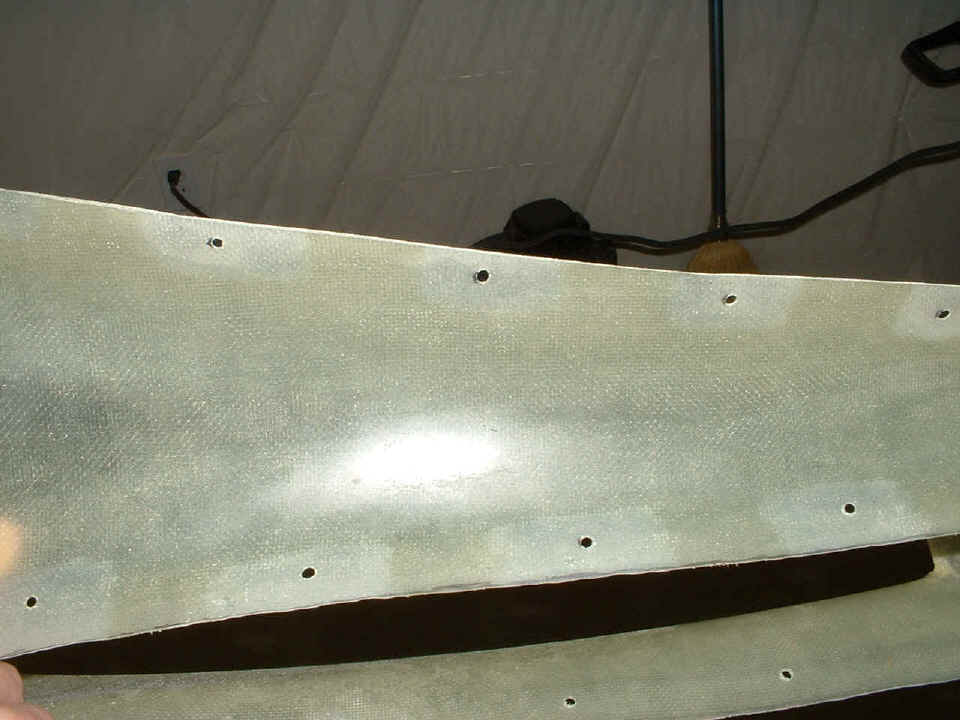
The second shot shows the piece after cleaning off the dust and clearly shows
how much the existing fiberglass has been "thinned" in the areas where I will be
applying two layers of fiberglass and epoxy around the holes that are drilled in the
"wrong locations". When this piece is mounted on the airplane, the holes
are on the right side of the fuselage. These are the screw holes that align with the
plate nuts on the RIGHT horizontal stabilizer and the RIGHT side of the vertical
stabilizer.
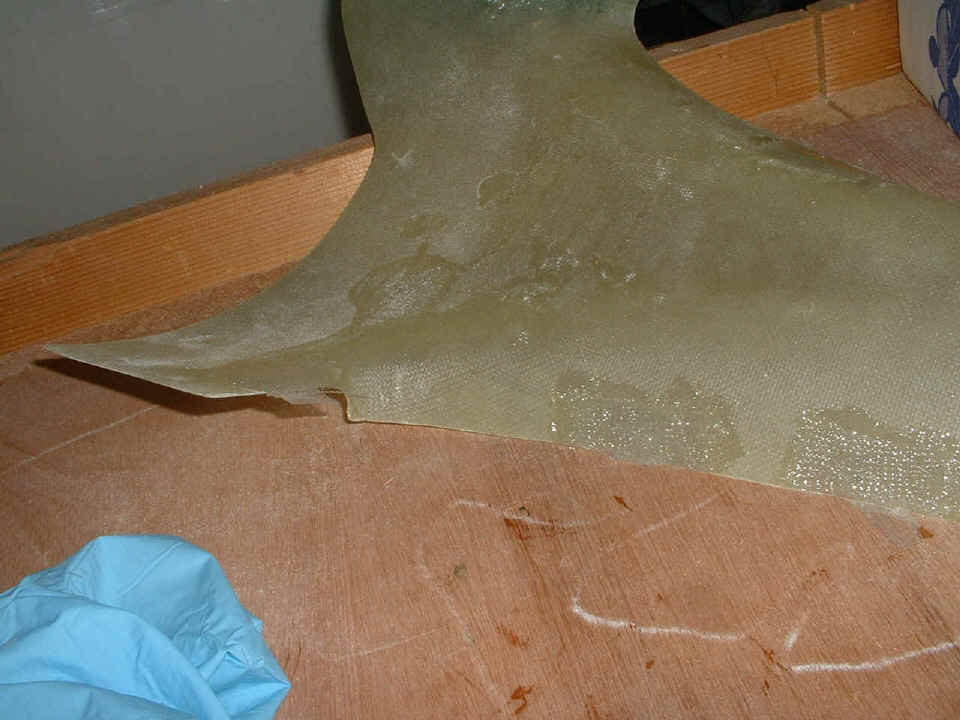
The last photo of the evening shows the end result after the glass patches and
epoxy are in position to cure overnight. There is some cellophane tape covering each
hole on the smooth "mold" side of this fiberglass piece. Since I ground
the existing fiberglass to about half thickness, the holes should fill up nicely with the
first coat of epoxy I put on before placing the glass cloth patches in the wet epoxy
around each hole. I will have to sand the edges and some surfaces of the patched
areas with my Dremel tool before this fairing is ready to be installed back on the aft
fuselage and the empennage pieces. The cellophane tape will also have to be removed
and the remaining adhesive will need to be cleaned away.
I spent some time this afternoon doing additional weight and balance calculations on my spreadsheet. I also spent about half an hour reading the Van's instructions regarding flight testing and preparations. I absorbed the information with a new appreciation after my RV-6A flight training earlier this week.
June 5, 2005: You have seen enough of the fiberglass fairing. I fixed it yesterday and put it on today and finished drilling all the holes, etc. I also put in some new holes and plate nuts back there to finish securing this thing, then promptly removed it all to leave it open for inspection this week. I also found a brake fluid leak on the right landing gear. It was the blue AN fitting that needed a bit more torque on it. I dried up the leak and moved the airplane about a foot ahead of where it was to be sure I had "clean" concrete under the wheel.
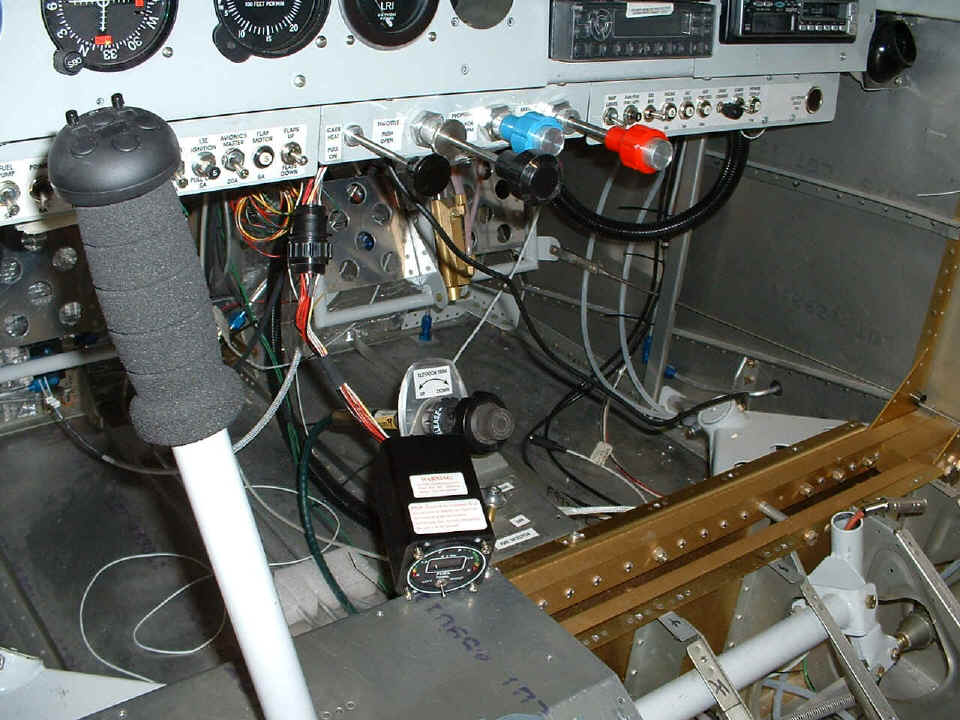
The only things I have to show in the first picture are the new labels on the
engine controls, elevator trim control, and the fuel tank selector valve. These are
just temporary labels for now to pass the inspection on Wednesday. I will have time
to trim things up, add some paint and the permanent labels during the test flight time
over the next few weeks. I have a little bit of wiring to do in the next two days,
but nothing vital, just the side lights, and a diode to power the Hobbs meter off the
master bus or the avionics bus. That should prevent me from leaving either of those
independent electrical circuits ON accidentally as I did a few weeks ago. I still
need to print labels for the parking brake and the cabin heat controls.
The spread sheet work I have been doing the past few days on weight and balance issues has prompted me to consider modifications
to the passenger seat back to be able to use it as a baggage shelf. The first part of that
involves adding a second hinge at the "bottom" of the seat back that can be used
to interface the wing spar bulkhead cover at its front edge. I will have more on
that in the weeks ahead as I get into it. On those occasions when I fly alone and
want to fill up the passenger seating area with baggage, it might be better to have a
"flat area" to secure baggage. I will post the results here as the project
goes forward.

The day was a long one with a 7-hour session. I departed the hangar at 8:30 PM tonight.
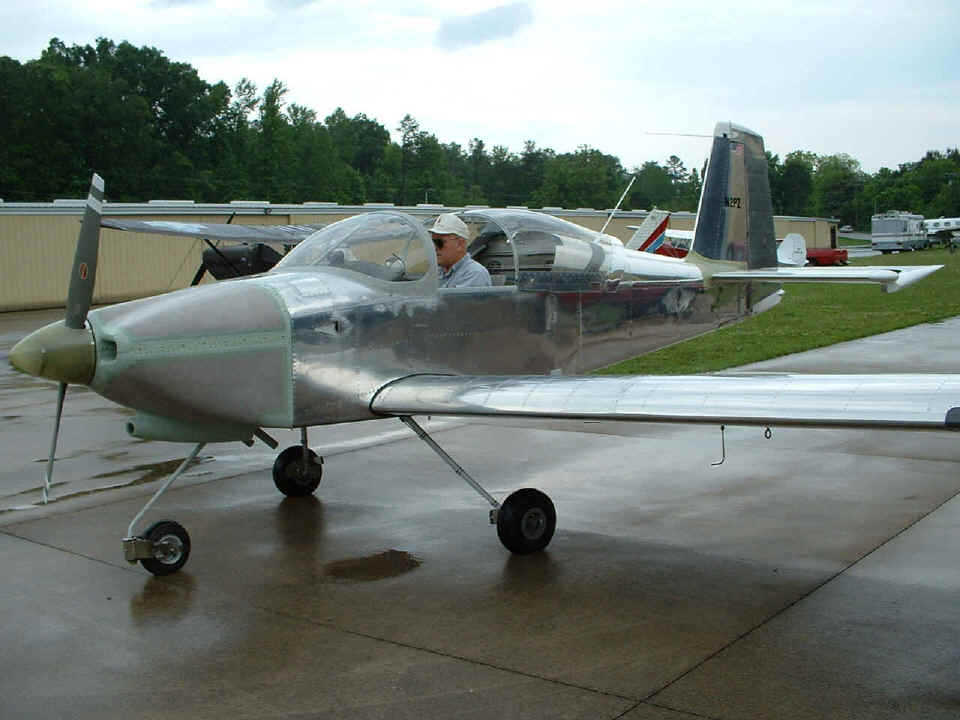
June 6, 2005: D-Day plus 41 years. When I got to the airport, the hangar doors were already open, and the AT-6 "Texan" pilot had just started his big radial engine. All the other planes except mine were out on the ramp in the heat. With a big empty hangar to call my own for a few minutes, I quickly moved my airplane back to the position it occupied on moving day back on April 27th. When the Texan returned, I helped to spot all the airplanes back in the corners, leaving me a route to the outside without having to move any airplane but my own.
I spent about two hours in the morning session getting some things finished up. I adjusted the linkage on the wing leveler servo to center the ailerons. It only needed a few turns of the rod-end bearings to finish that up, and a second try to get it zeroed in. The trim pot on the NavAid controller is now at 12 o'clock as it should be. You have seen the inside of the aileron inspection area before, so no picture of that again today.
I called Rich Nadig and he asked me when we were going to start the engine. I said why not today, and he said OK! He came down to the hangar and we went through the preliminary fuel pressure checks using the boost pump and the primer solenoid and found some seepage in the primer system and that was quickly fixed. (I really have to tighten those blue AN fittings better.) Then it started to rain. Rich went off to do other things, promising to return after the rain stops. I realized that if we did get to run the engine and a rain shower came by before I could get back in the hangar, that it would be a good idea to get the empennage fairing secured to protect the Dynon remote magnetic sensor. While the rain fell outside the hangar, I was busy buttoning up all the inspection ports and the empennage fairing. I also had time to cut the wing tie-down bolts 1/2" shorter and put them in the wing tie-down blocks and secure them.
Rich returned around 4 PM during a break in the showers that cooled things down
nicely. We had a visitor drop by and they had a conversation while I finished
putting on the last elevator inspection plate. The rain finally stopped just after
4:30 PM. Knowing how Rich likes to head for home around 5 PM, I decided it was time
to roll out "Enterprise" and bring her to life. Rich had the fire
extinguisher and the camera. After all our earlier checks, he only needed my digital
camera. He took this first picture as I am getting settled in and putting the GPS in
its position on the panel. I would hate to get lost on the way to the FBO ramp.
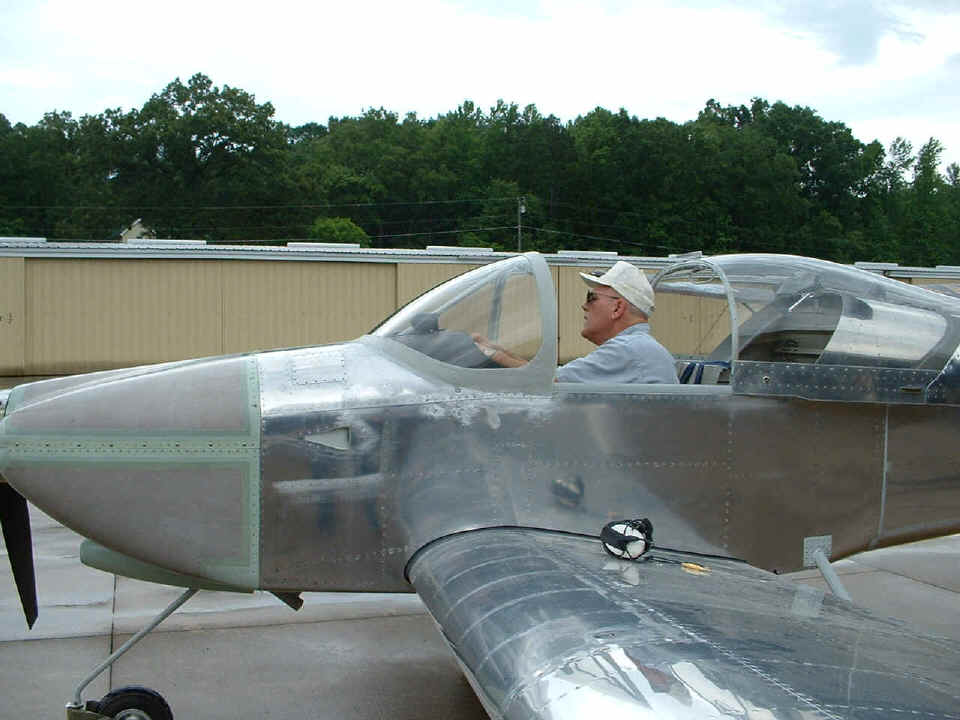
Headphones plugged in and getting them ready for radio check, etc.
| CLICK HERE for Airport Assembly - PAGE 134. | RETURN to MAIN MENU. |