Airport Assembly - Page 129.
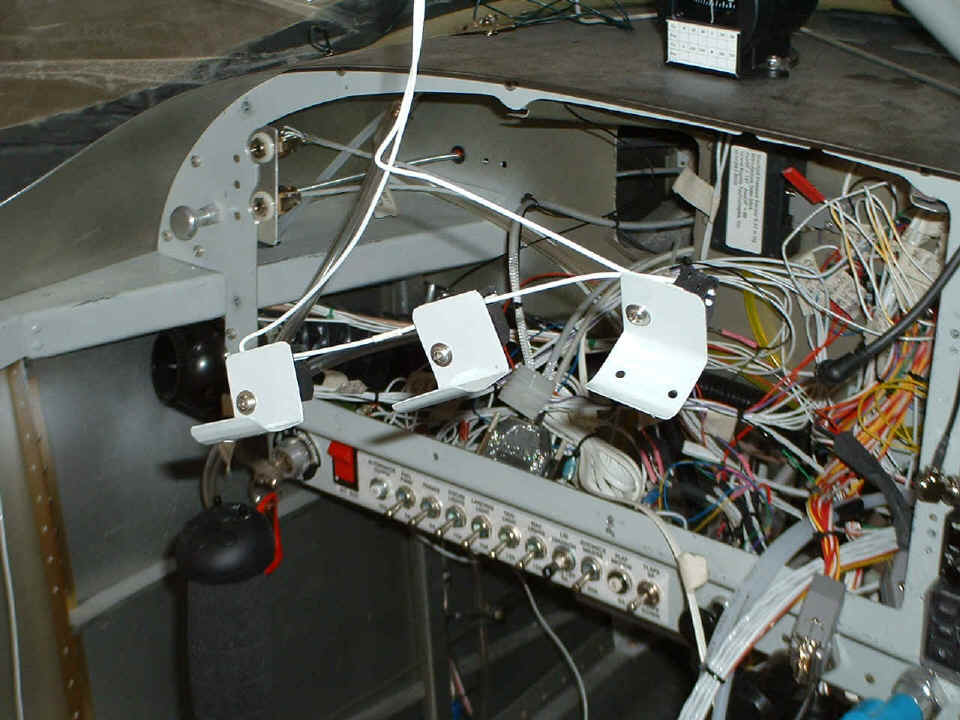
May 22, 2005: A 5.6-hour work session this
afternoon. I stopped by Ace Hardware and picked up some additional 6-32 stainless
hardware. I used some of it and some Scotch adhesive foam pads to secure the white
LED's to the brackets I made. Then I realized I would have to wait until dark to be
sure that I could mount them with proper illumination of the instrument panel. They
hung like this all day until I could get in the cockpit around 9 PM with the hangar lights
OFF to see where they would be pointing. That time of night also gave me a chance to
see where the landing and taxi lights are pointed - they looked pretty good also.
OK, let's get back in time sync with what really happened since I could not
finish the work on the LED lighting. I started on the hinges and the fiberglass gear
leg fairings. I first cut the hinges to the correct length, then marked, and drilled
all the rivet holes in the hinges using the drill press. After that it was easy to
see through the fiberglass to drill the holes to line up with the holes already in the
hinges. The rivet squeezer made quick work of things after countersinking the
fiberglass for the rivets.
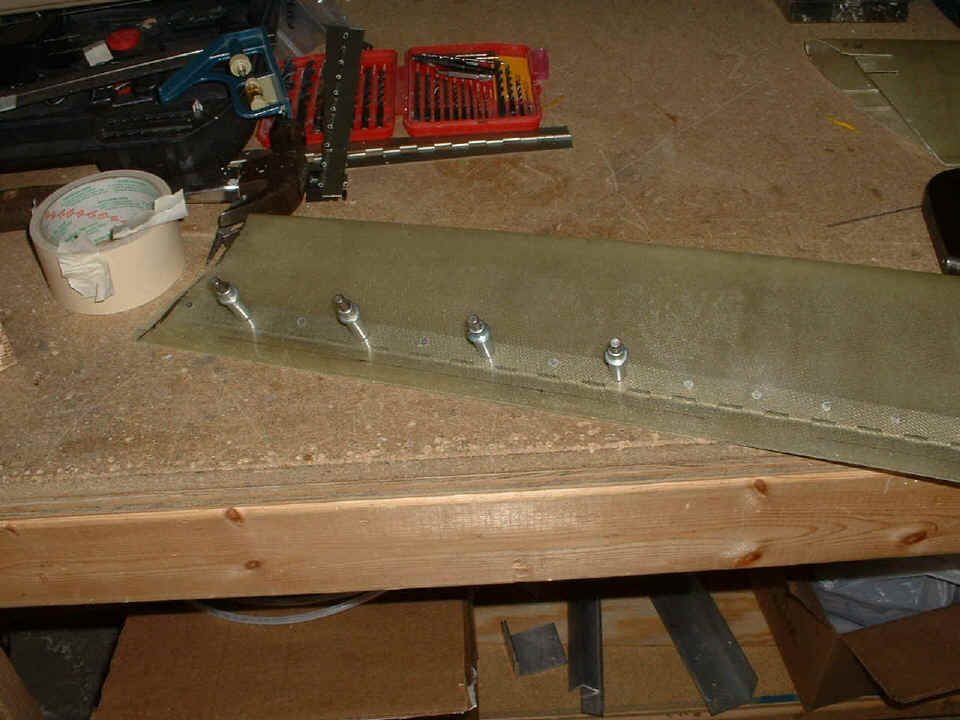
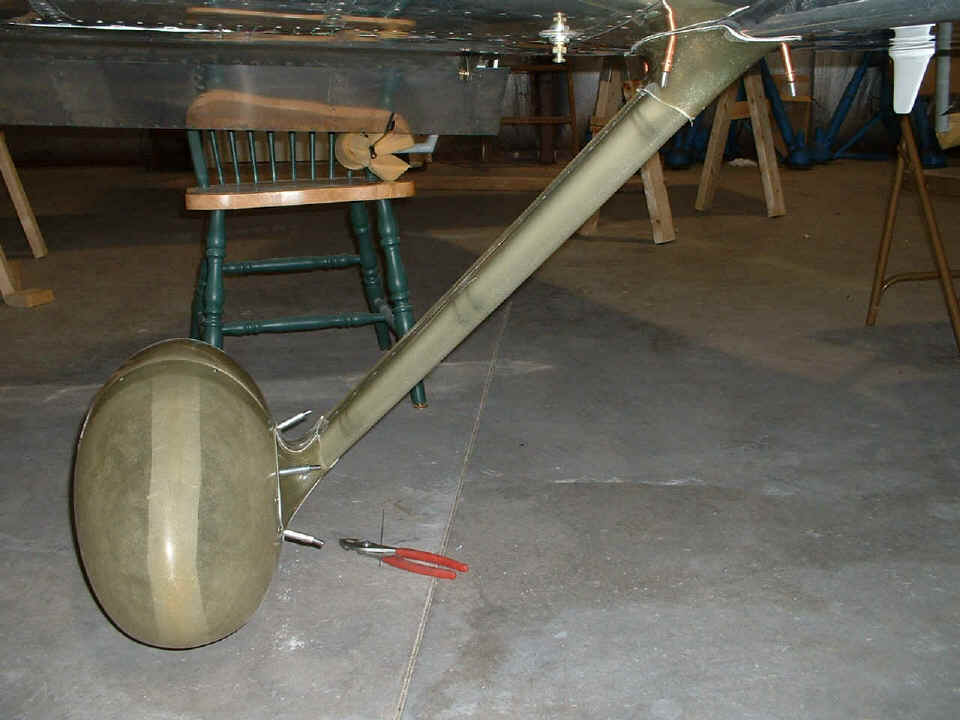
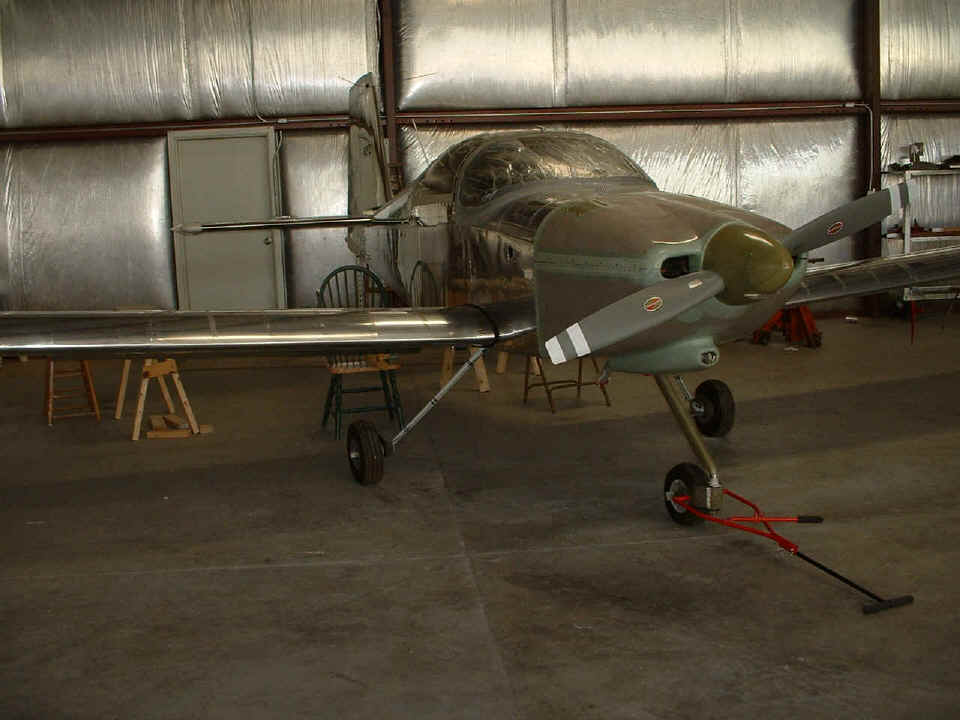
After all that, it was time to put the upper intersection fairings in place to
align the gear leg fairings with the air flow. You can see that clecoes hold
everything in position for now. The other main gear leg looks almost like this, with
only the lower intersection fairings to be put on over there. The next session will
be about fiberglass bonding to the wheel pants for the lower intersection fairings.
Of course, ALL of this stuff has to come off the airplane for that process. Those
clecoes at the upper intersection fairing will be getting platenuts installed in the wing
root fairing and inside the fuselage to secure the upper intersection fairing for flight.
While the epoxy and fiberglass work cures in my next working session, I will get a chance to pump up the brakes with fluid and bleed any air out of the lines. I will be putting the fluid in from the bottom UP as David Edgemon did a few months ago. I like having the resources of someone who has "been there, done that!"
May 23, 2005: Monday and
a shocker for the guys at the airport, I showed up before lunch time to get in early and
get out "early" instead of my late night mosquito invasions, etc. I
finished up with the lower intersection fairing work I was doing last night after several
sanding and fit trials using my Dremel sanding drum to do the job on the fiberglass parts.
When all was said and done, I removed all the fiberglass from the gear legs and
wheels to bring them home. I will do the fiberglass work here instead of feeding the
mosquitoes at the hangar.
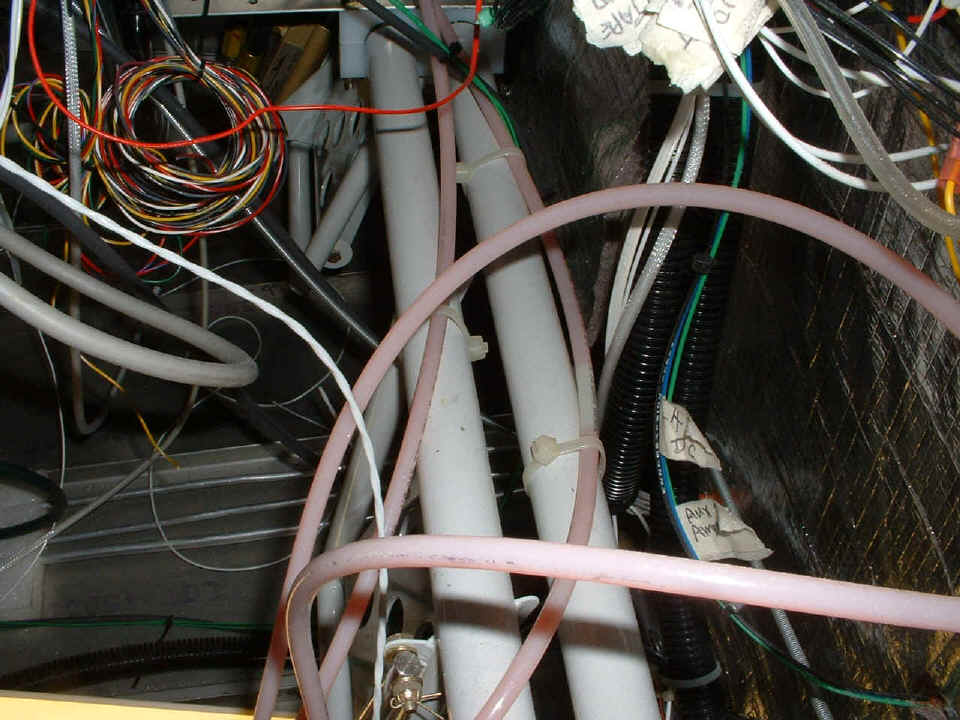
Next on the menu for today was the pumping of brake fluid up from the bottom of
the system. Here is a photo looking through the hatch on the passenger side at the
brake lines secured to the rudder bars. The high-pressure nylon tubing is now PINK
between the master cylinders and the small brake fluid reservoir. The SOLID COLOR of
the tubing tells the tale - NO AIR BUBBLES in the lines. I climbed into the left
seat and pushed on the brakes and they were firm! Thank you David Edgemon for a good
time-saving tip setting up the brake system.
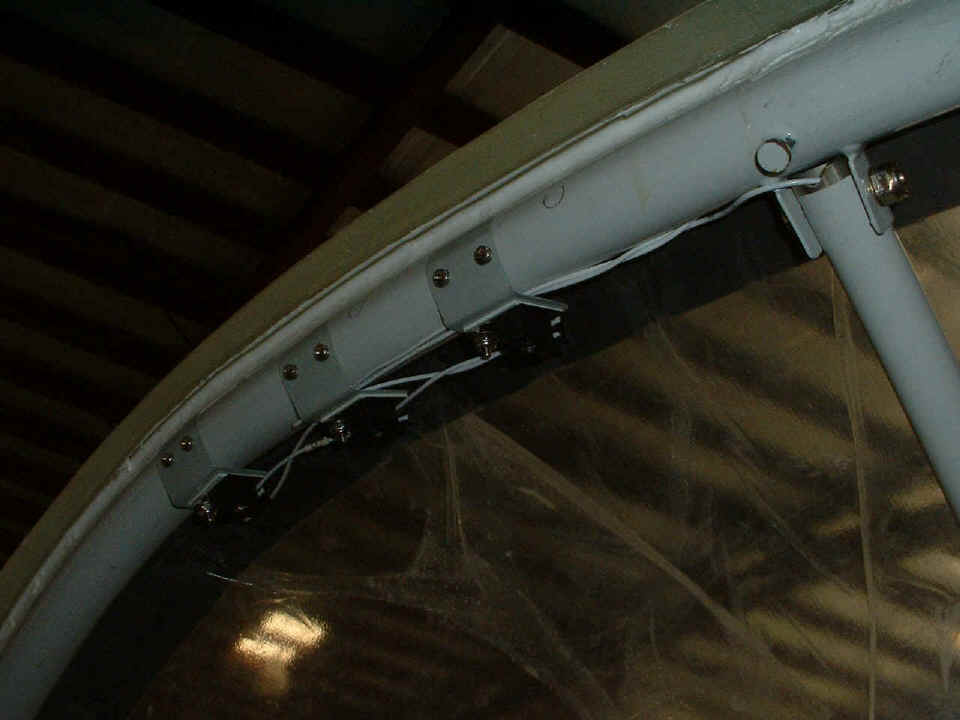
Then it was time to secure the LED night lighting on the roll bar above the
instrument panel using 6-32 hardware in tapped holes in the steel. I twisted the
wires near the center support bar to keep them away from the canopy latch post.
I torqued the main prop bolts the other day, but just got to the safety wire
installation today on all six bolts, two at a time. There are still a few more that
get safety wire at the front of the prop inside the fiberglass spinner nose cone.
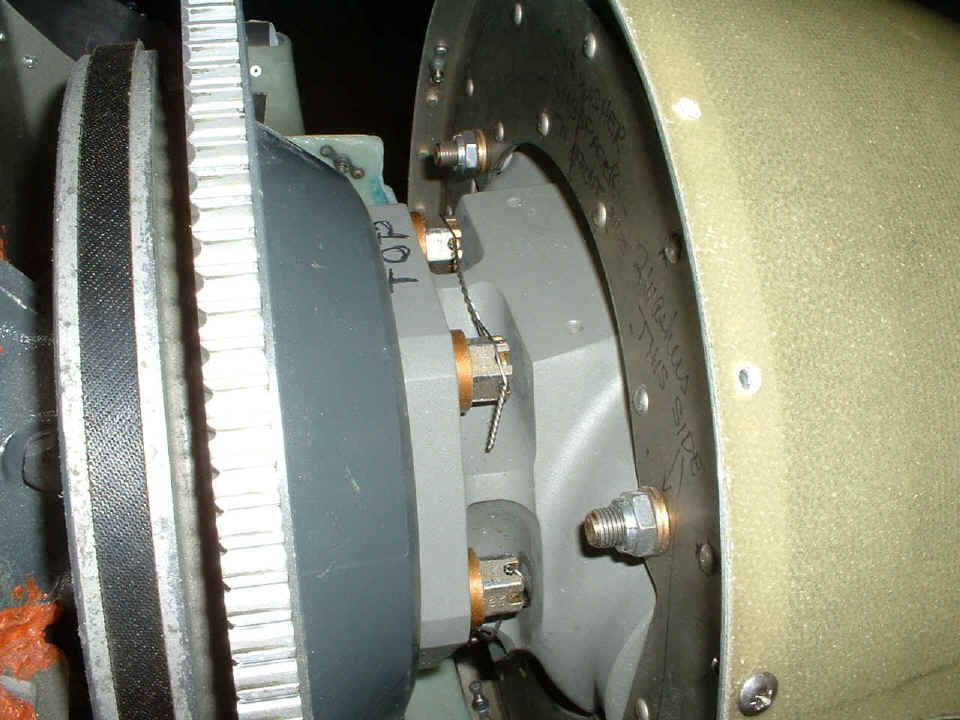
I also got out my grease gun and loaded it up for the first time to fully load
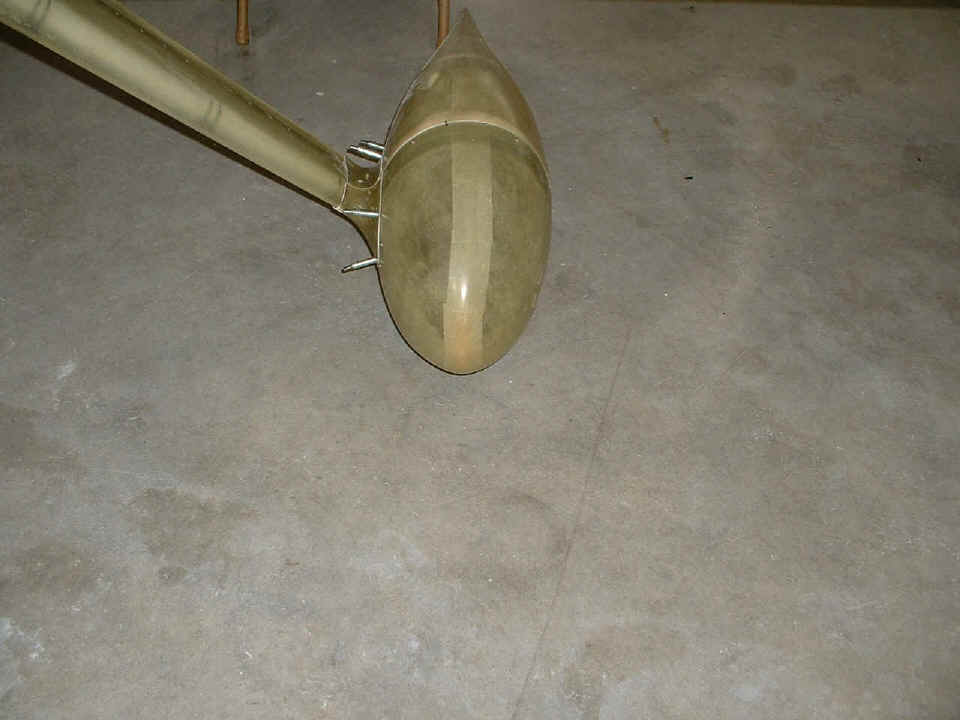
the nose wheel assembly where it pivots on the nose gear leg. The grease fitting
that got all that slippery goo hardly shows up in this picture, but the absence of wheel
pants and main gear leg fairings is evident. The wheel pants are in my car ready for
the ride home for some additional layers of fiberglass and some bonding with the lower
intersection fairings.
It was a day with all my goals for the 5.5-hour session met and I still left the airport at 6 PM! I made it home in time for the NBC Nightly News and had dinner finished by 7:05 PM. It just felt good today, and so do I!
May 24, 2005: I used up the last money in my flying account with the local flight school today. I put in 1.2 hours in a Cessna 172 with a touch and go at KDNN where the wind was right down the runway with very little cross wind to deal with and no turbulence. As I was climbing above 2000 MSL out of 3M3, the tail wind looked like 30 MPH or so. When I reached 6500 MSL, it got smooth at the top of the broken cloud layer. That was just in time to start down directly over KDNN.
On the way back, I did some turns around a point near my old high school football field in Dalton, GA. I flew up to the south side of Chattanooga's Class C airspace to look at a couple of grass fields that I have driven into in the car. The turbulence off a nearby hill at one, and the big trees near the second made for an interesting flyby at both locations. When I returned to 3M3, the turbulence off the ridge west of our 4,700-foot paved strip made that landing one that I was not too proud of. After the unexpected bounce, I had enough runway remaining that I could power up a bit, then land again and still make the taxiway cutoff at the north end of the hangars.
After I got the 172 tied down and settled my bill of $4.86 more than I had in my account, our local EAA advisor and A&P, Rich Nadig came by and I asked him if he would check my propeller work on the RV-9A. I mentioned that I was not too sure of my torque wrench settings. He offered to bring his "calibrated" torque wrench and we got started all over again. He showed me the error in my safety wiring that another web site viewer had written an email about. That email was waiting for me when I got home this evening.
The bad news was that at least one of the six prop bolts had been over-tightened enough that the ends of the roll pin in that bolt showed signs of distortion. The others were on the high-end of the 45-55 foot-pounds called out in the Hartzell propeller manual for my "L" flange prop. Rich and I agreed the prop would have to come off to replace the roll pin on that one bolt. I found the right diameter pin, but had to grind its length down from 3/4" to 5/8" to put it into the bolt. I put the prop back on the engine with the bolts just barely snug for the evening. Tomorrow morning I get to fabricate a NEW torque extension that uses a 1/2" square drive socket welded to the 5/8" open-end wrench to fit Rich's calibrated torque wrench. We had used his wrench with a 1/2" to 3/8" adapter on it that just barely fit into the area between the prop back plate and the ring gear.
The total time of about 2.2 hours was another of those "back step" days, but the result will be a safer propeller installation with the safety wire installed in the correct direction.
I also got an email reply from the Van's factory CFI, Mike Seager. He confirms that we are still on for next week in Oregon and indicated we should be able to get my needed five hours of transition training time in over the two days I planned on June 1 & 2.
May 25, 2005: I was out at the airport a 8AM this morning to meet Rich. He gave me one of his older Craftsman 5/8" wrenches to use in a new torque wrench extension that I would fabricate this morning. When I bought the roll pins last night, I also picked up a 3/4" socket to fit a 1/2" square drive ratchet. With the calibrated torque wrench in hand, I went down to the hangar and put the socket on the torque wrench, then held them both up next to the 5/8" open-end wrench on a prop bolt to decide at just what point I would cut the socket open and notch it for the wrench to be welded in place. I finished the cuts to the socket in just 45 minutes and was on my way to the local welding shop. When I returned, the torque wrench did its thing easily and I secured the bolts with the 0.032" safety wire the way Rich had shown me. I presented the new torque wrench extension to Rich as payment for his assistance. Since it won't fit my questionable torque wrench, I knew he should have it. I hurried back home hoping to be back in time to take delivery of my case of AeroShell 100 oil, but UPS had already been there and left the sticky note on the door. I called the number and will be picking up the oil after 6:45 PM this evening. As for pictures of the new safety wire installation, you have to wait until my next session.
When I was returning the torque wrench and the extension to Rich, he asked about a schedule of tasks for the rest of the week. I told him I needed to be back home this afternoon to work on my computer project for a few hours. We agreed that I would be at the airport early on Thursday to put the oil in the engine, remove one set of spark plugs to lower compression to zero, then use the starter to circulate the oil throughout the engine and up to the oil pressure sensor. Rich also wants to get the weight and balance measurements completed before we put any fuel in the airplane. When that is done, we will put one gallon of 100LL fuel in each tank, one at a time, then use the electric fuel pump to pump each tank "dry" of all USABLE fuel. Any that remains in the tank will be noted in the aircraft log book and the pilot's operating handbook that I will be creating for this RV-9A. After that is done, the fuel can be put back in the airplane, the cowling attached and the engine can be started for the first time. It won't take long to burn the two gallons of gas.
| CLICK HERE for Airport Assembly PAGE 130. | RETURN to MAIN MENU. |