Airport Assembly - Page 119.
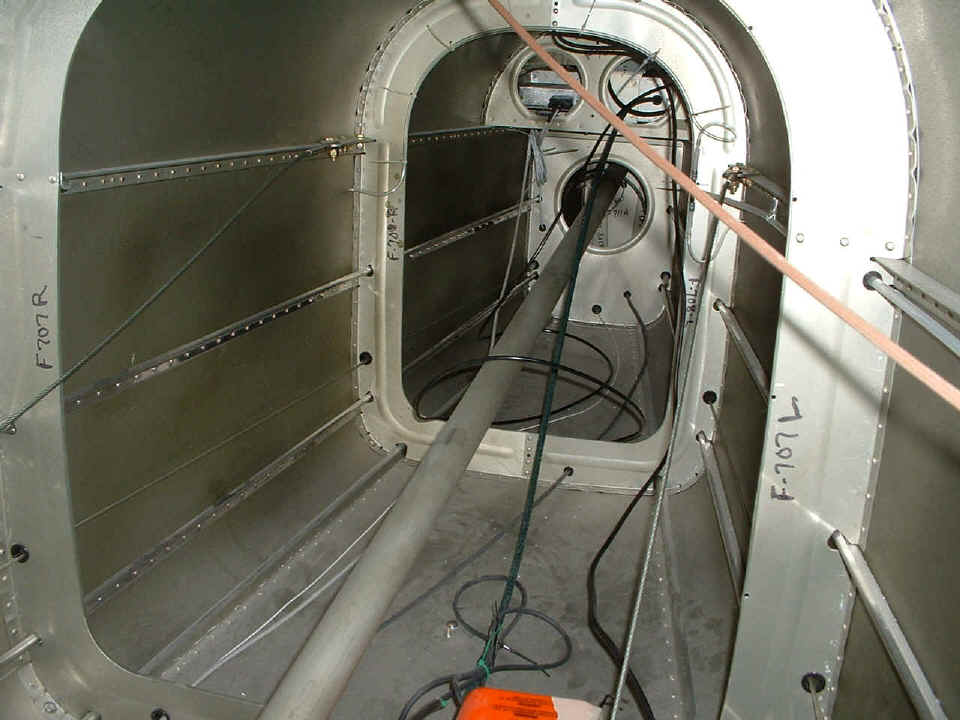
April 29, 2005: I had to crawl inside the
tail cone again to re-route the high-voltage strobe cable away from the low-voltage tail
light wire and the RS-232 cable going to the Dynon remote magnetic sensor unit. The
passenger seat was removed to allow me to stretch out my legs in a prone position when I
access the area back there. I will have to get in there at least one more time to
grab the RG-58 cable and pull it through the plastic bushings with the RS-232 cable
keeping it away from the strobe cable also. That will be when I put in the flexible
black conduit to keep those wires together and safe from chafing on the bottom skin.
I also have to put some tie-wraps in places where the conduit will not be
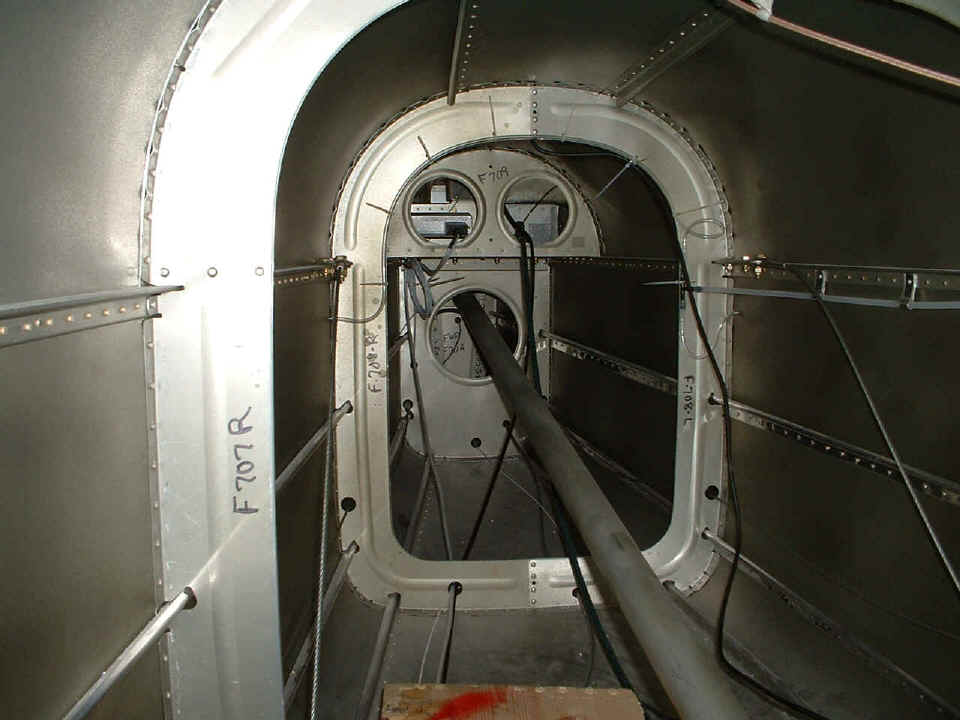
placed. Notice the bulkhead labels? Just another reminder that the RV-7 and RV-9
share many of the same parts in the fuselage.
This picture shows the bottom fiber glass cap on the rudder with the tail
light assembly mounted in position with clecoes for now. The saw horse is underneath
the F-707 bulkhead, just ahead of the marker beacon antenna, just in case I get too far
aft when I am lying on my "work board" inside the aft tail cone. It would
be a shame to break something on the tail by tipping this thing on its butt! Maybe I
should put the tie down eyebolt back in position. I pulled it out to allow easy
recovery of dropped washers when I was putting the empennage parts on the fuselage.
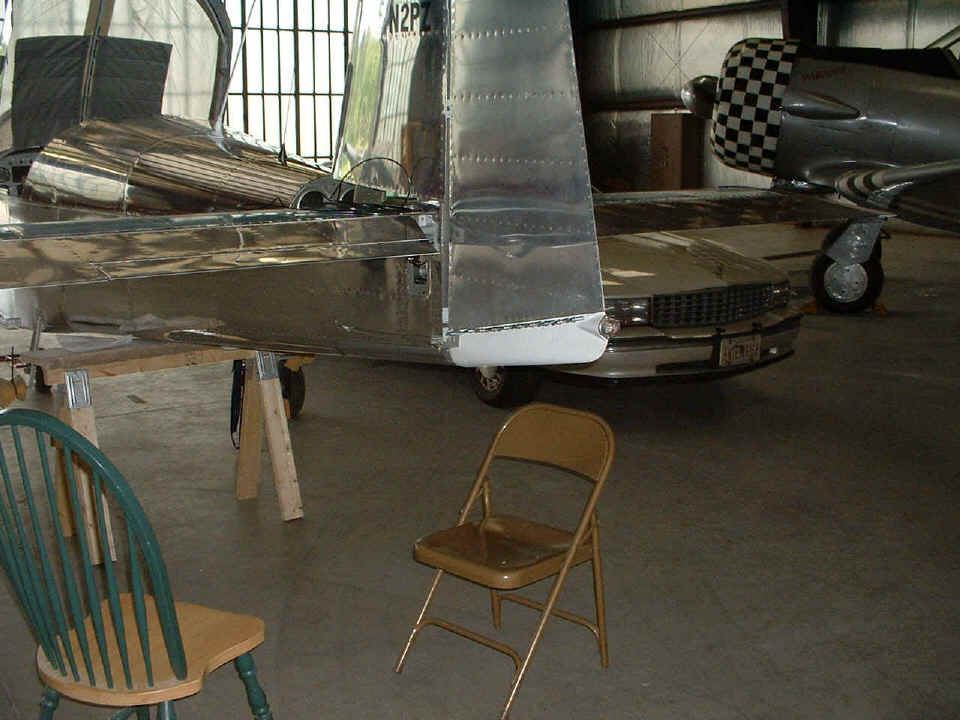
You can see that I brought one of my kitchen chairs to the hangar for easy access to the cockpit area. It is Saturday morning as I post this page around 8 AM with rain moving through the Chattanooga area. The weather radar shows the line of showers ready to clear our area about now, so the day should not be too soggy. More pictures when I finish today's trip to the AIRPORT!
April 30, 2005:
Saturday's are usually days when I get a lot done on the airplane, but today was
different. I started the day by helping another EAA 150 Chapter member with his
project. You can see that project HERE. As for my
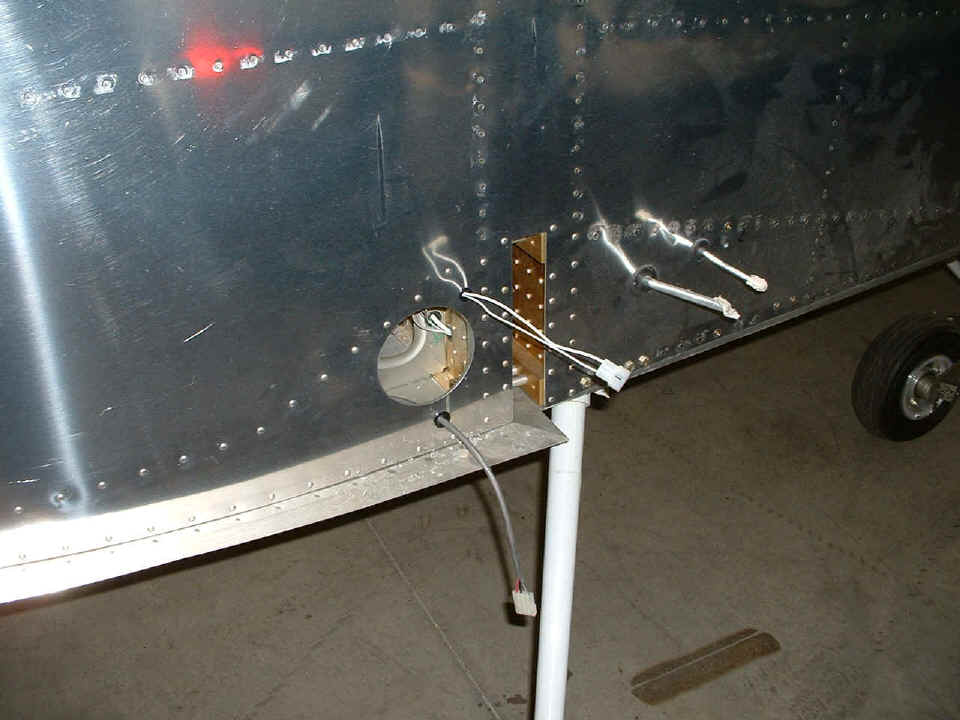
project, here it is. In a move to further separate the high-voltage strobe wires
from everything else, I drilled a new hole in the RIGHT side close to the point where the
wires will enter the wing conduit. I spent some time looking for my brass tube that
I use to remove the pins from that Molex connector you see in the upper hole. I
could not do this change until I located that hand-made tool. During that search, I
removed one wing from the cradle and the flaps from the box. I noticed that both
flaps had identical "hangar rash" on the inboard aft edge. I think I can
repair it, but that will have to wait until I bring the air compressor to the hangar.
The flaps are too big to put in the car and take them to the garage.
I climbed back inside the tail cone to pull the RG-58 cable from the VOR/Glide
Slope antenna through it's plastic inserts at the various bulkheads. I got it all
the way through the wing bulkheads before needing to end my day. The conduits will
go around the groups of wires the next time I climb back in the tail cone.
The Meske canopy modification can be raised without bumping into the ceiling in
the garage anymore. I can get into the baggage area and the tail cone with it up
like this. The red reflection off the side of the airplane is the side marker light
on my car reflecting the flash from the camera that bounced off the side of the fuselage.
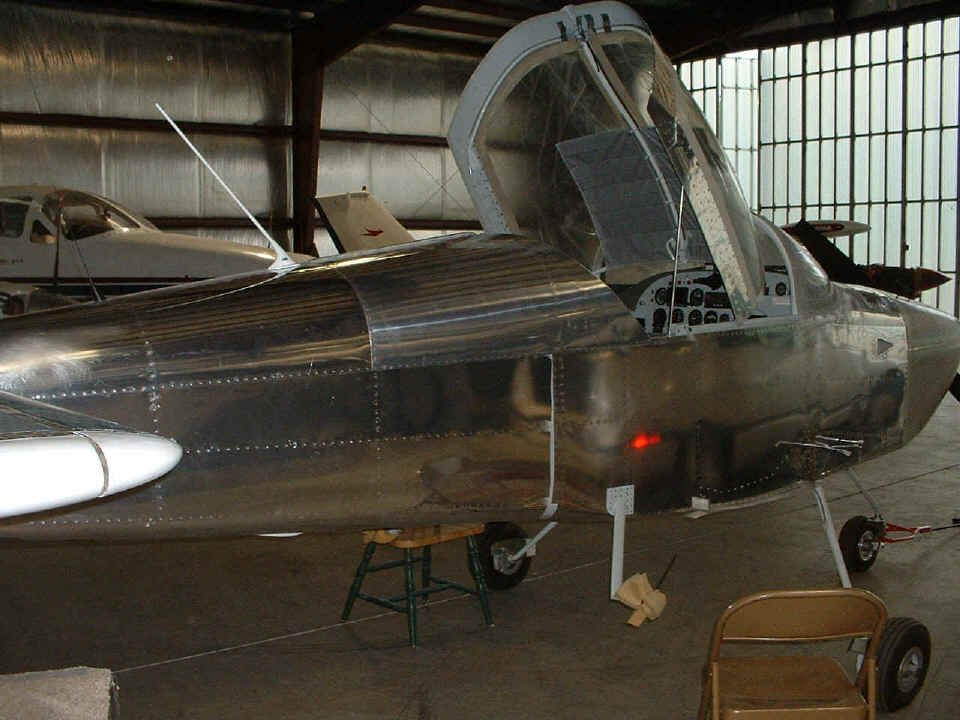
I also finished wiring the tail light strobe circuit plug and will be thinking about whether I want to use screws and platenuts or blind rivets to hold the rudder cap in place. I should be able to get in a good, long day tomorrow. Check with me then to see what else gets done.
May 1, 2005: My month is
here at last! Here we go on a Sunday when I woke up at 6:15 AM without setting the
alarm clock. I got to the airport around 9:10 AM this morning and began unpacking
the car of tools to begin work at 9:35 AM. The first thing done was to secure the
green elevator trim cable to the F708 bulkhead on the LEFT side of the airplane.
That is just out of sight near the top right corner of the picture below. This
prevents the elevator push rod tube from rubbing against the trim cable. The other
thing to note in this photo is the black flexible conduit seen below protecting a bundle
of cables including the serial cable from the Dynon remote magnetic sensor, the RG-58
cable from the VOR/Glide Slope antenna, and the low-voltage tail light wire.
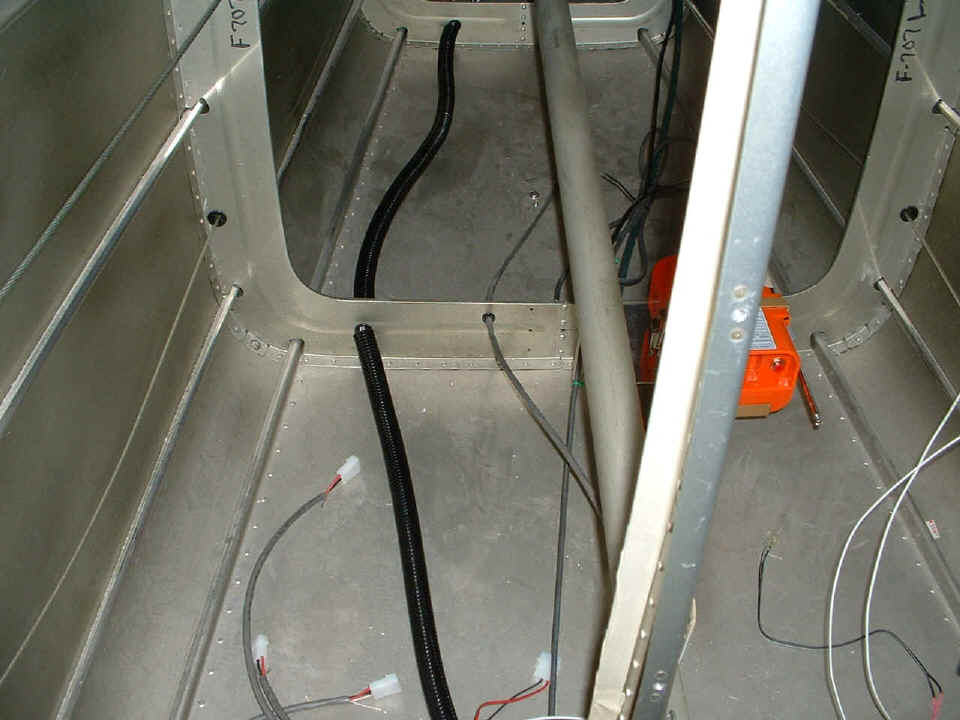
I also installed another piece of conduit on the wire bundle in the tunnel
under the baggage area. My left foot shoe is seen at the left side of this
photo with my right leg in gray pants is visible on the right side of this
image.

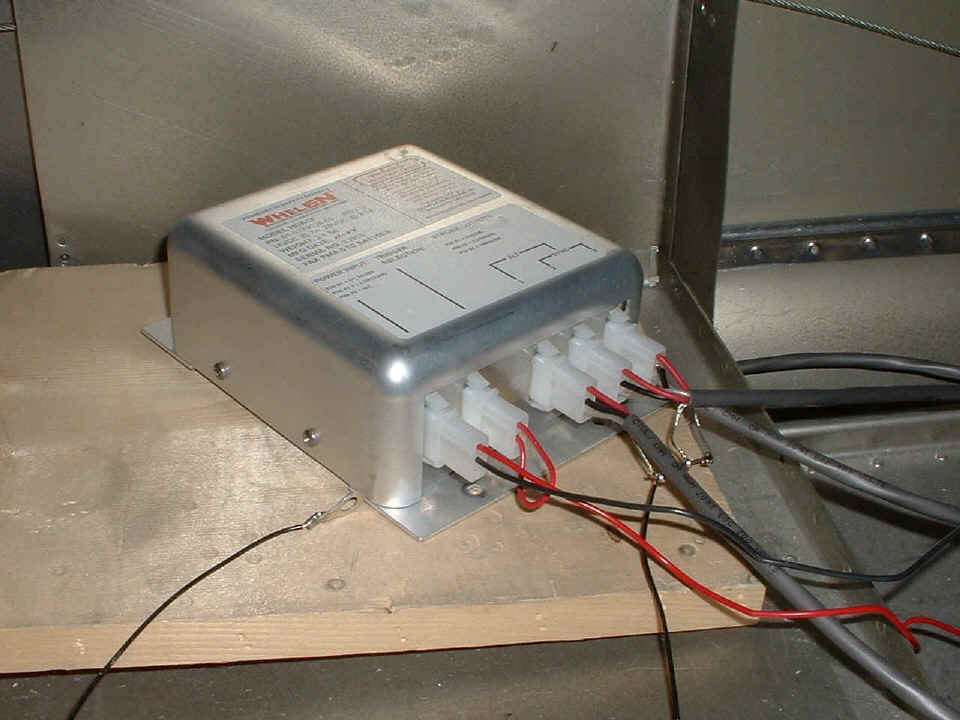
You saw me stringing the high-voltage wires for the strobe
lights a while back.
Today, I connected them all to the Whelen strobe light power supply. I also
grounded all the shield wires together and secured the ground wire to the airframe.
This photo was taken right after I crimped and soldered the ground lug on the black ground
wire. It was right after this that I secured the black wire to the airframe.
I will mount the power supply to the back of the lower baggage bulkhead when the
airworthiness inspection is completed. For now, the strobes will be ready to test
when I put the wings on and plug in the light wires in the wings.
We've had our eight pictures for this page, so let's go to PAGE 120 at the Airport.
| CLICK HERE for Airport Page 120. | RETURN to MAIN MENU. |