FUSELAGE CONSTRUCTION - Page 24.
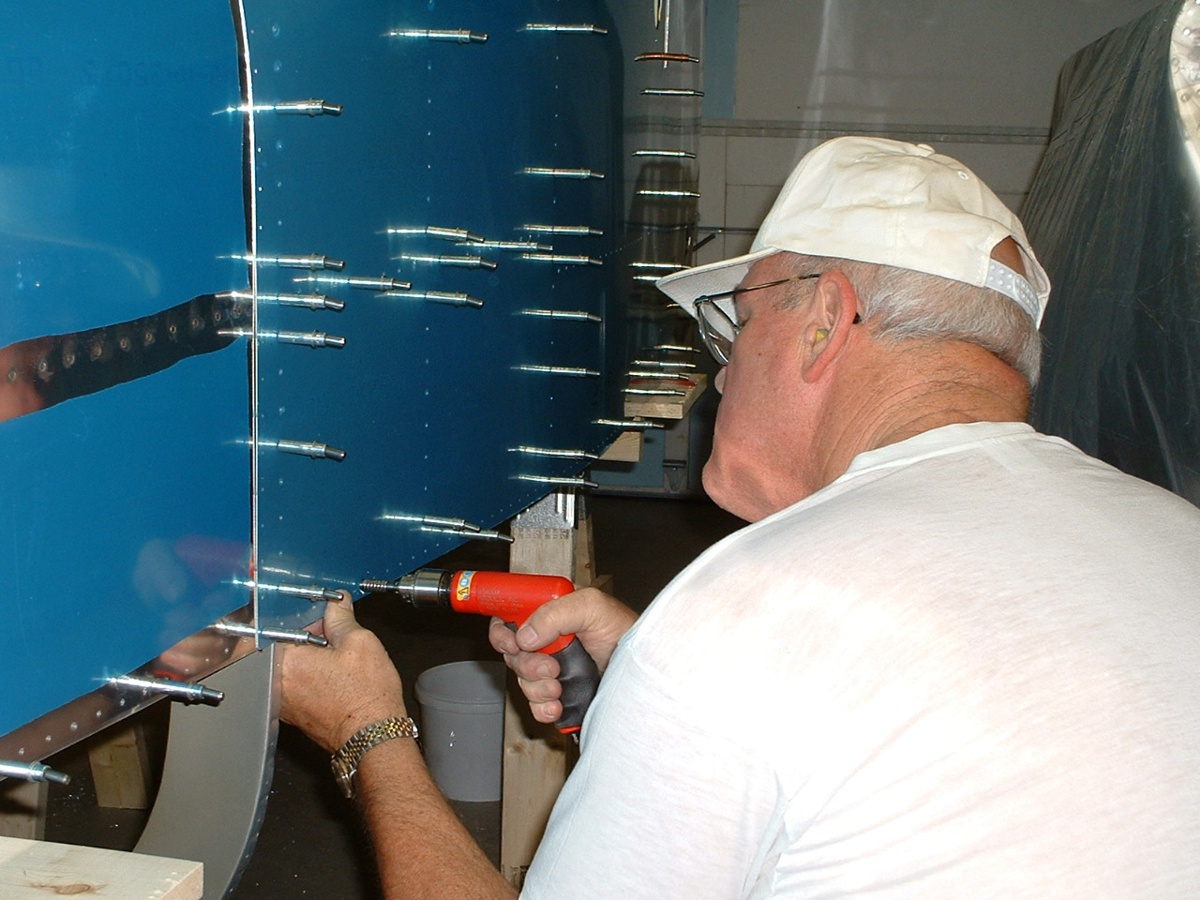
September 12, 2003: I drilled the longerons
to the side skins first thing today. I set the self-timer on the camera with it on
the tripod to take this shot. You may be able to see that I am wearing my yellow
foam ear plugs. The air drill is very fast and loud, and so is the air compressor.
Then I moved on to getting ready to mount the firewall to the rest of the
fuselage. That required the forward bottom skin to be clecoed to the main wing spar
bulkheads, center bottom skin, and the side skins forward of the wing spar bulkheads.
With the firewall clecoed together, I was able to line it up with the skins and
longerons, and then drilled the forward mounting flange of the firewall to the side
skins. Sorry, I got so busy, I forgot to take a picture with it up there. Here
is the fuselage after the firewall was removed. You can see the clecos on the side
skins to the longerons at the "bottom" of the picture. Remember the
fuselage is upside down.
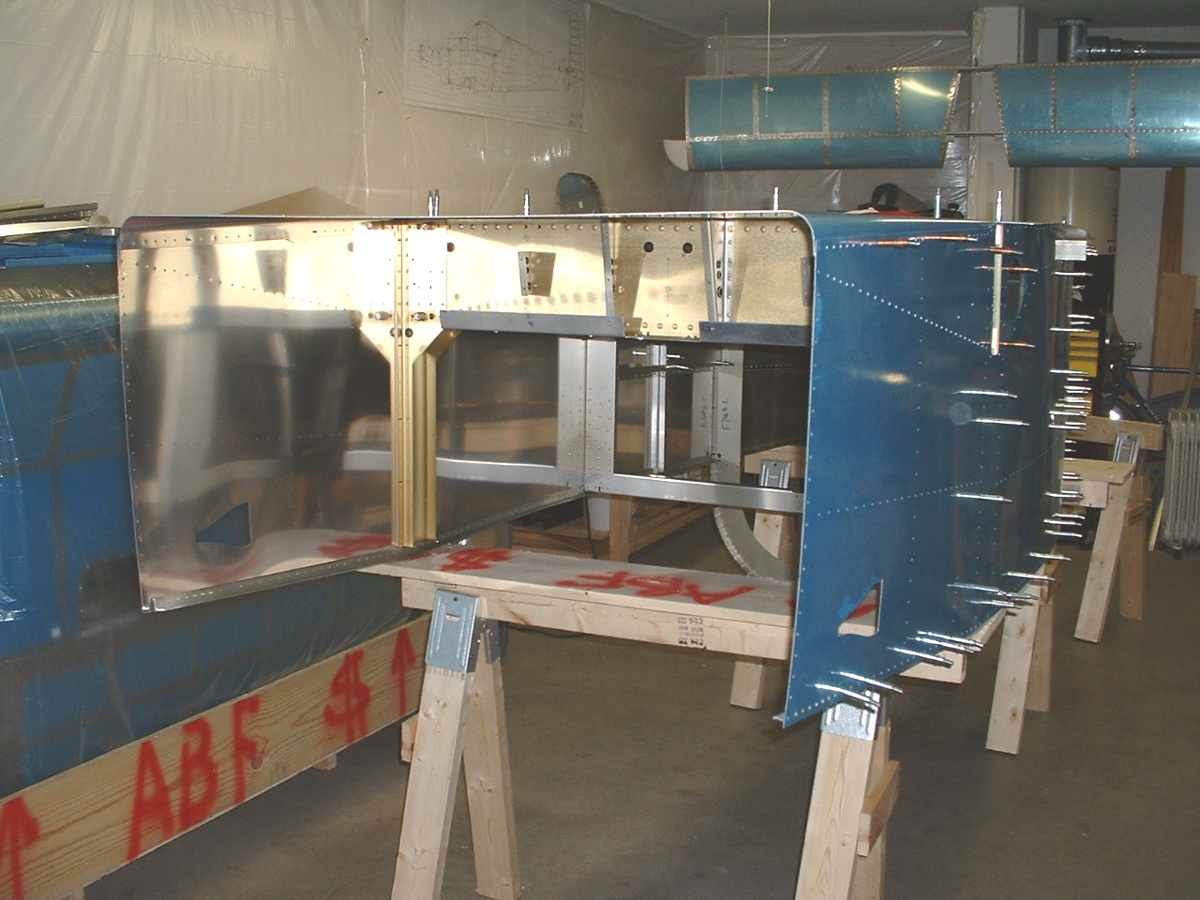
And the last picture shows the firewall as I shut down for the night. It
shows signs of the rivet gun, and still needs one more parts fabricated and installed
tomorrow. Then it goes back on the fuselage and the remaining braces and stiffeners
get installed between the wing spar bulkhead and the firewall. I will get a picture
of it when it is re-installed on the front of the fuselage!

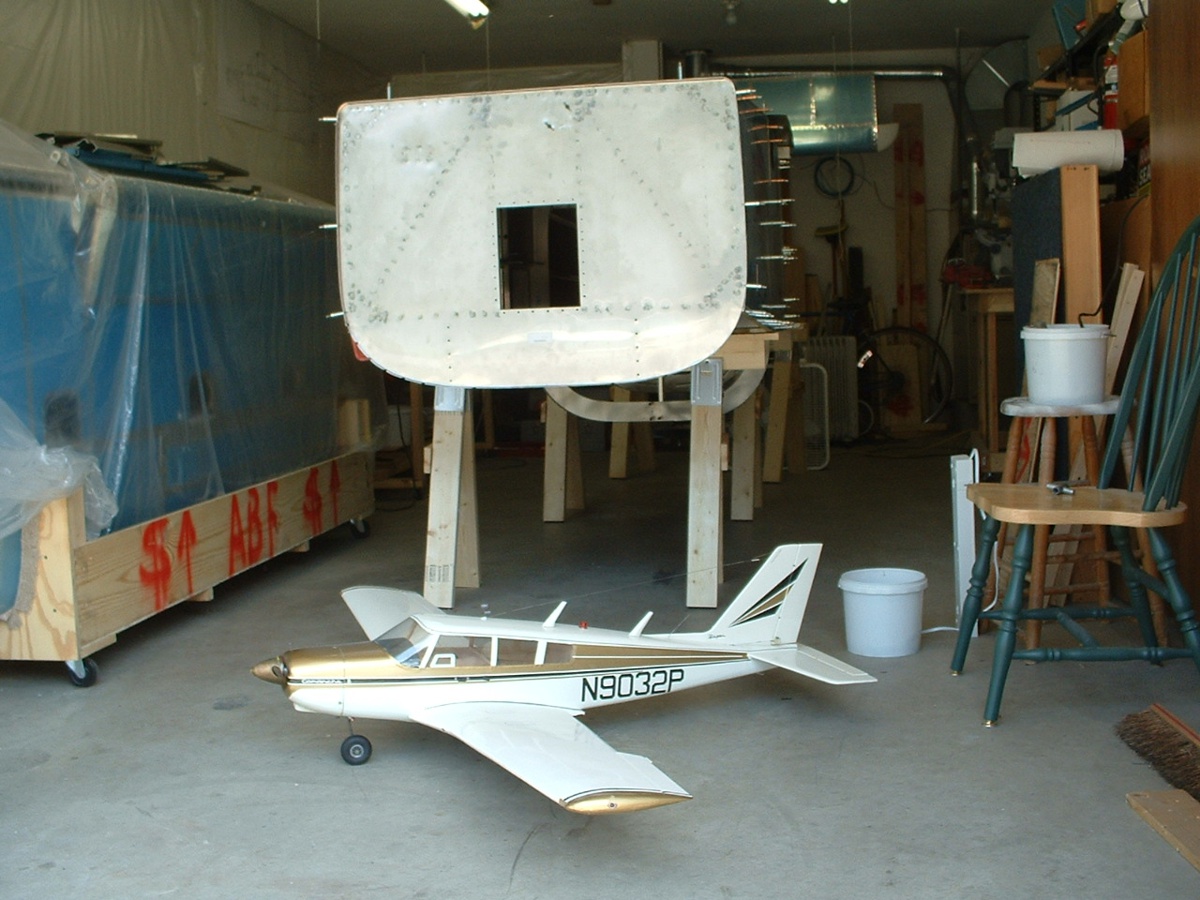
September 13, 2003: I finished the work on
the firewall this morning and put it back on the fuselage. I decided it was time to
photograph my RC-model Comanche B airplane since I have mentioned it in the past. It
has the Piper color scheme from 1966, on which I am basing my RV-9A color choices.
You can see that I put the flaps down part way.
I spent most of the day fabricating parts for the forward section between the wing
spar bulkheads and the firewall. Not much exciting to photograph about that. I
did take the forward skin from the underside off and cut in the holes for the clearance of
the main landing gear. I will have to custom-fit those holes to the welded steel
structure as I re-install the forward bottom skin.
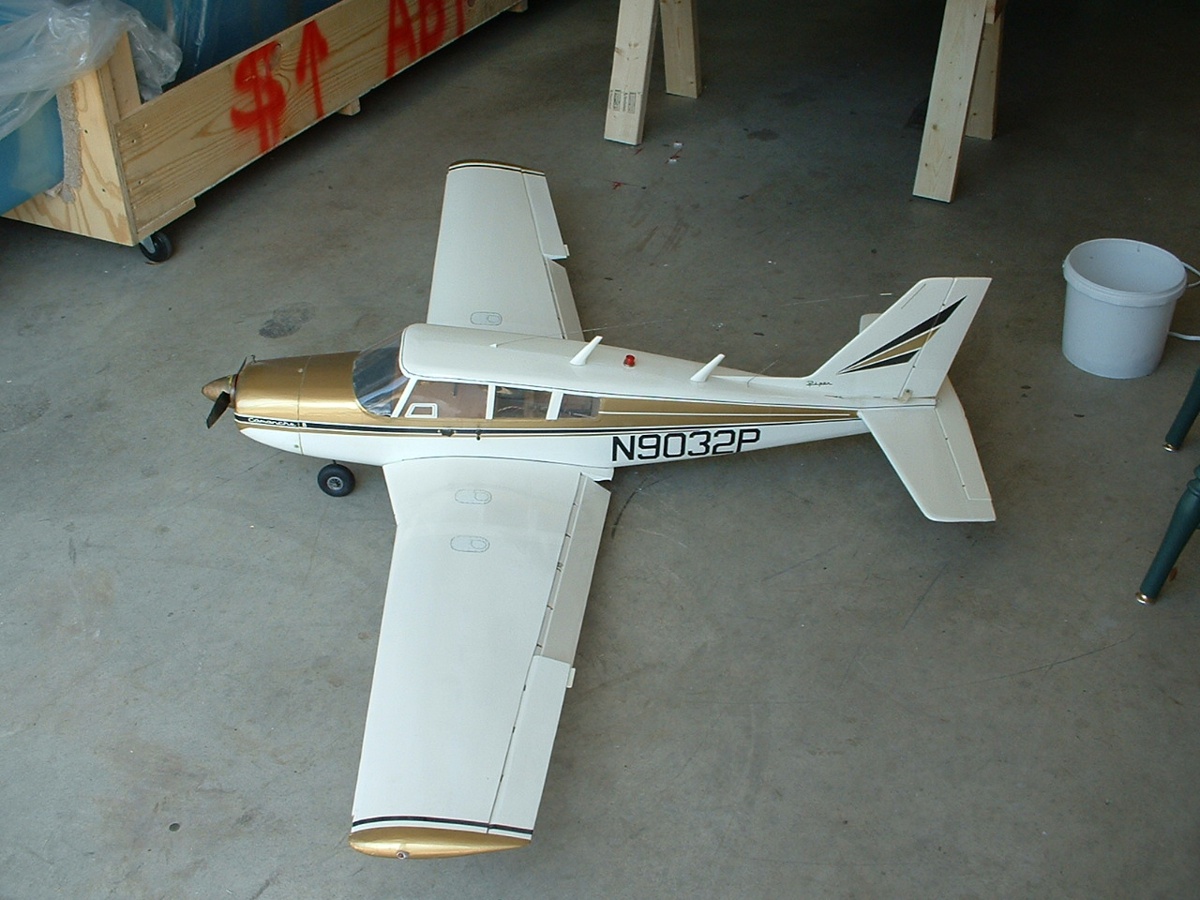
You can't see it in this photo, but there is a wing walk area that is on the other
side of the fuselage of the model. Those Piper's only have one door on the passenger
side. This model was built using the Dave Stafford kit in
1986, which has a fixed horizontal stabilizer that uses an oversized trim tab as
the elevator. The real Comanche has a full flying stabilator with a trim tab that
has half the chord depicted here. I modified the kit with the third side window to
look like a "B" model Comanche in 1/6th scale, although it is 1 inch too short,
since the kit I used was a standard Comanche kit. The full-sized Comanche B is 6
inches longer than standard Comanche single-engine airplanes. The wing span of the
model is 72 inches, with flaps, wing tip and tail lights, strobe lights, and landing lights
that come on when the landing gear is extended. The flying weight with all batteries
is 10 pounds, and it cruises at 120 MPH using an OS Max 61 Schnuerle-ported engine turning
an 11x7 prop, fitted with a custom-built Pitts-style muffler with dual exhaust pipes.
It uses a 6-channel Airtronics radio to run everything. And no, I have not
flown it in a number of years -- it is a trophy of my time before getting my pilot's
license. Besides, I will probably use it as a paint scheme model when I take the
RV-9A to the paint shop.
| CLICK HERE for fuselage page 25. | RETURN to MAIN MENU |