"Lazy B" Ranch Airport · · PAGE 3.
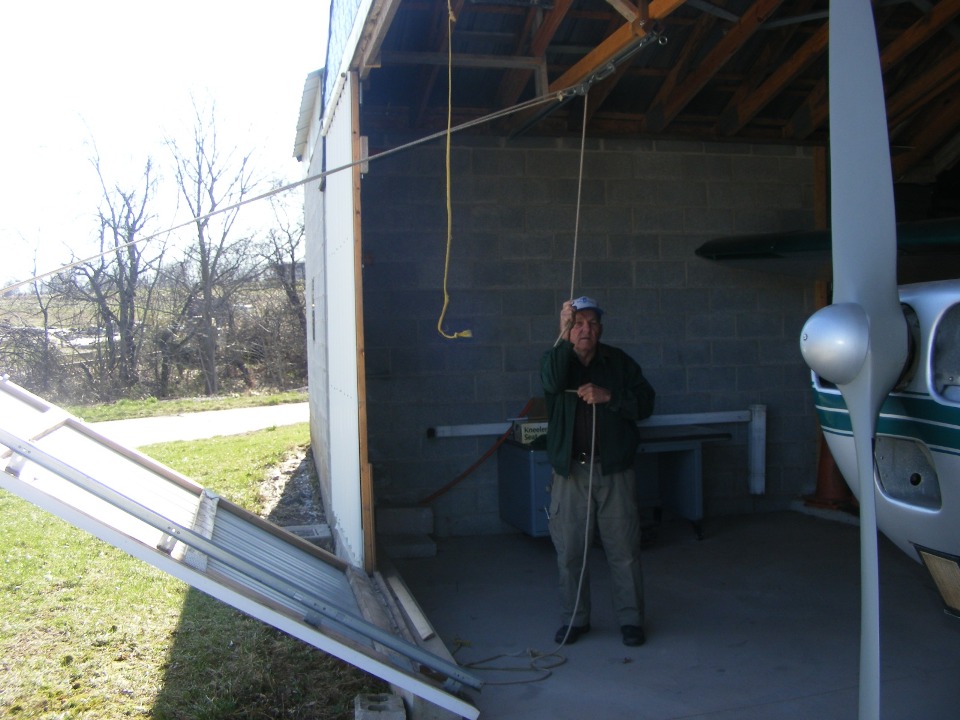
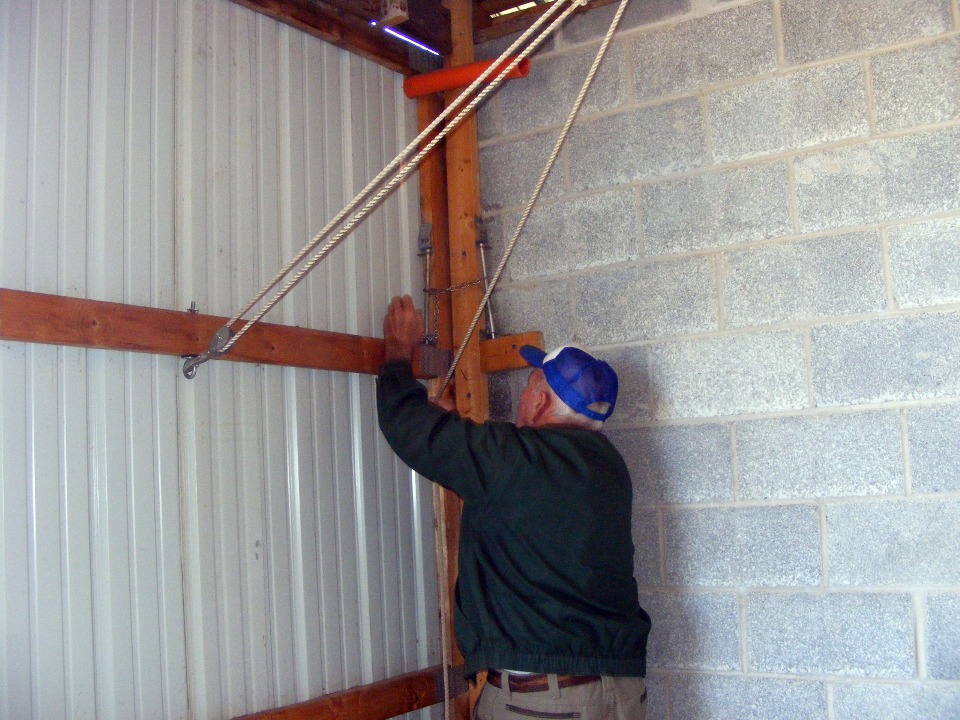
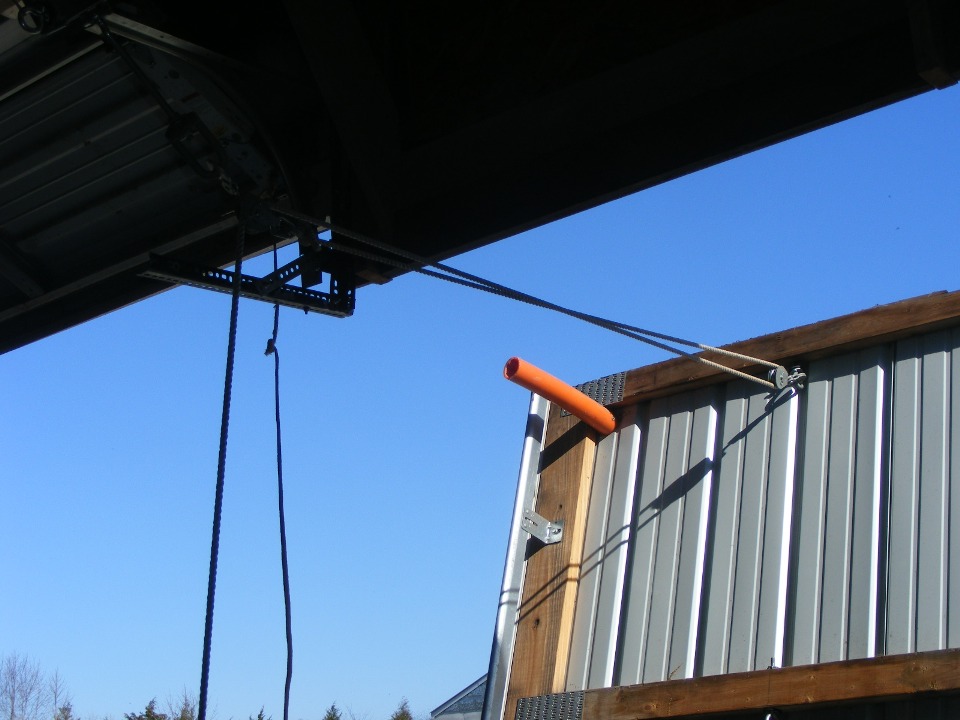
April 5, 2009: This is the hangar adjacent to
"Hangar 2-P" where Irv shows us his later design for hangar doors. The
center overhead garage door is already up there. Irv is demonstrating his rope and
pulley system for lowering the side doors. You can see that part of the overhead
door track is mounted on the door that is being lowered in this photo.
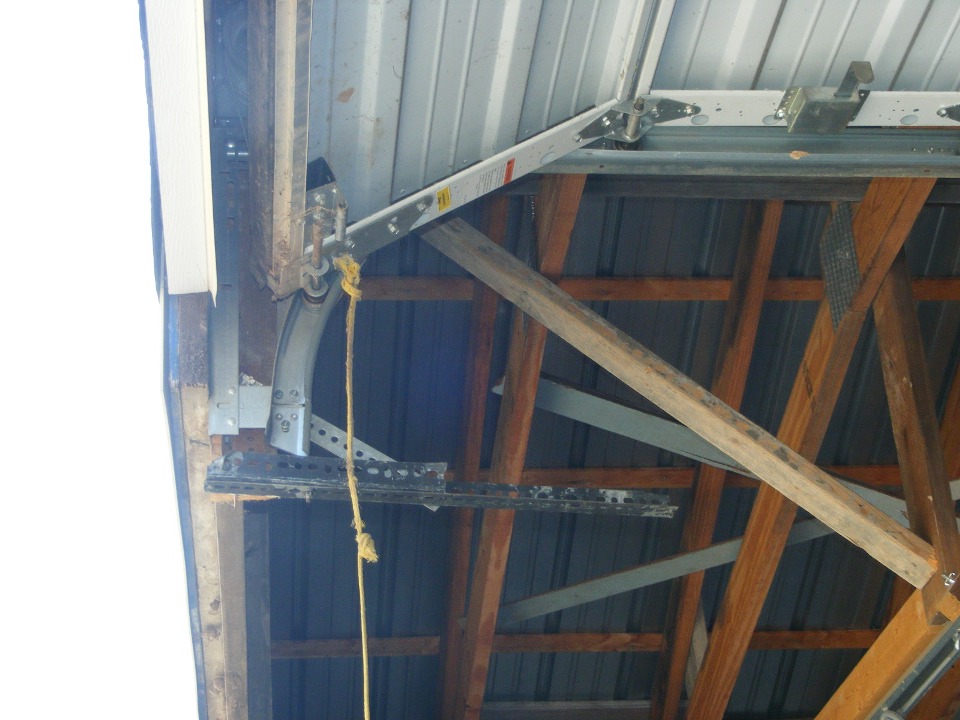
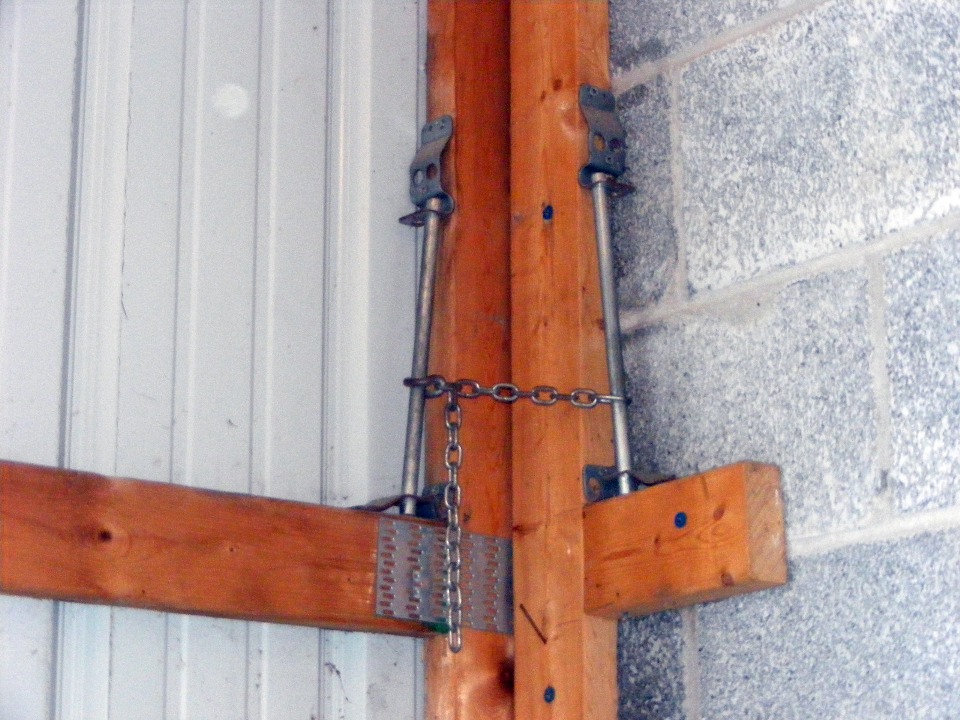
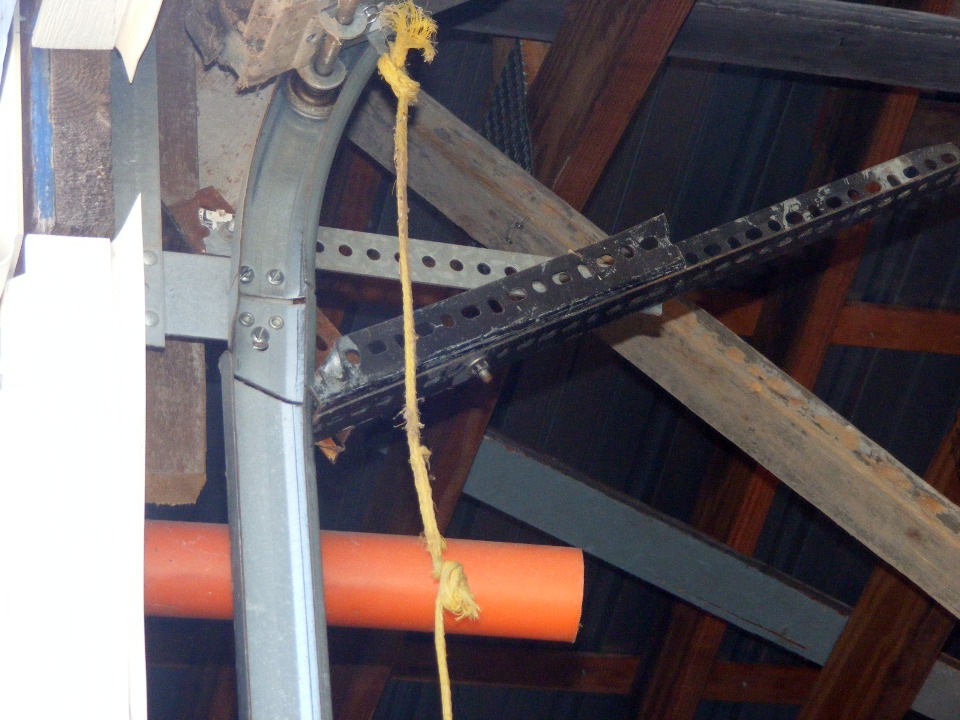
Irv wanted to make sure I would see the overhead door locking mechanism.
Those perforated steel angle pieces fall into place when the side door is let down to the
open position. The angles block the overhead door rollers from running off the track
if someone tries to lower the overhead door before the side doors are locked in the closed
positions.
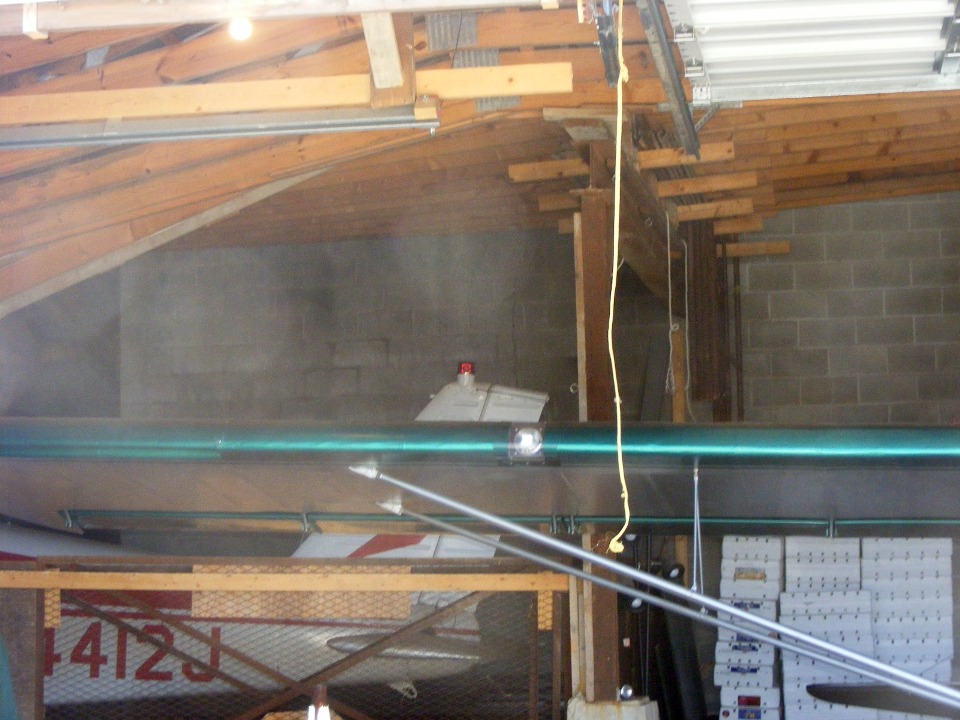
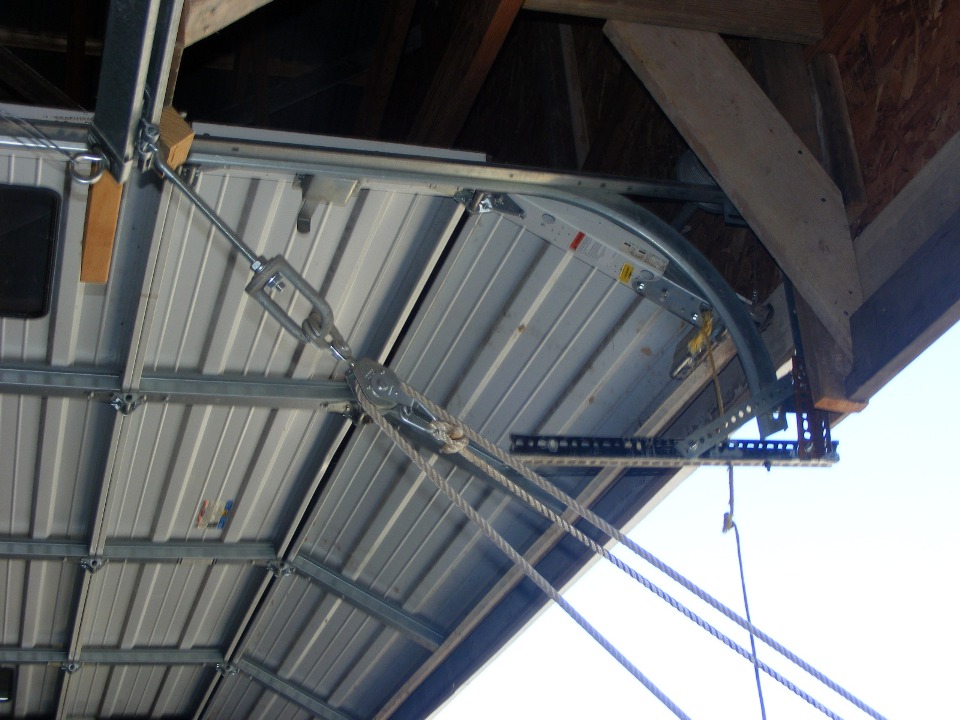
The thing to see in this photo is the channel in the upper left of this photo.
It holds the "upper end" of the rope and pulley that lower the side doors
on the south side of the overhead door. This is the same channel seen in the first
photo at the top of the page. You can see that Irv does not waste any hangar space.
There is another "hangar door" on the south side of this building with a
1968 model of the Piper PA-28-140 parked there.
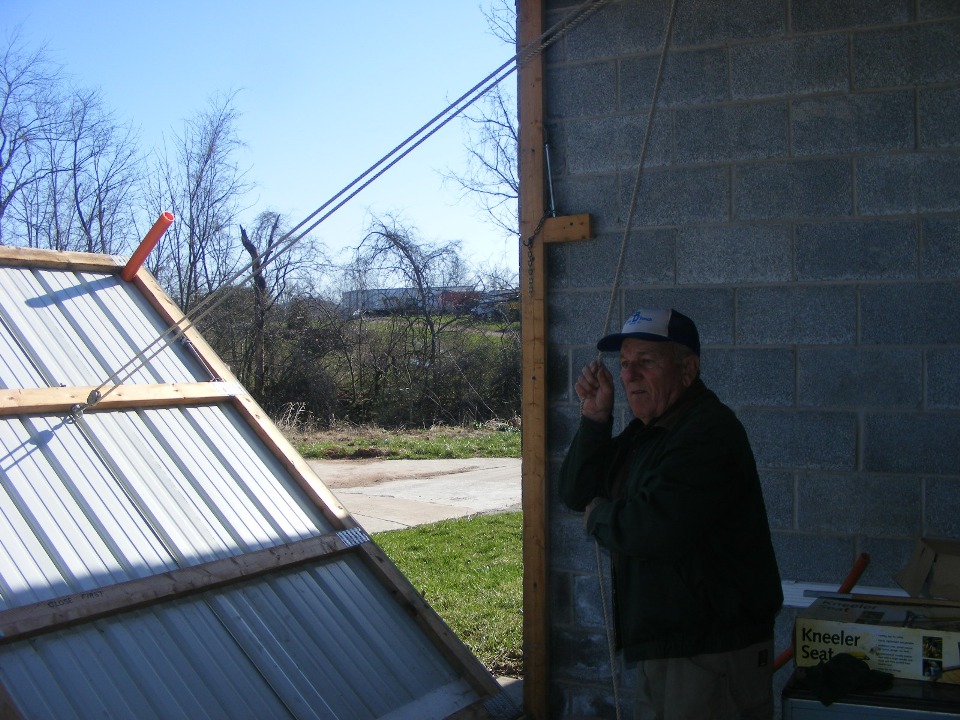
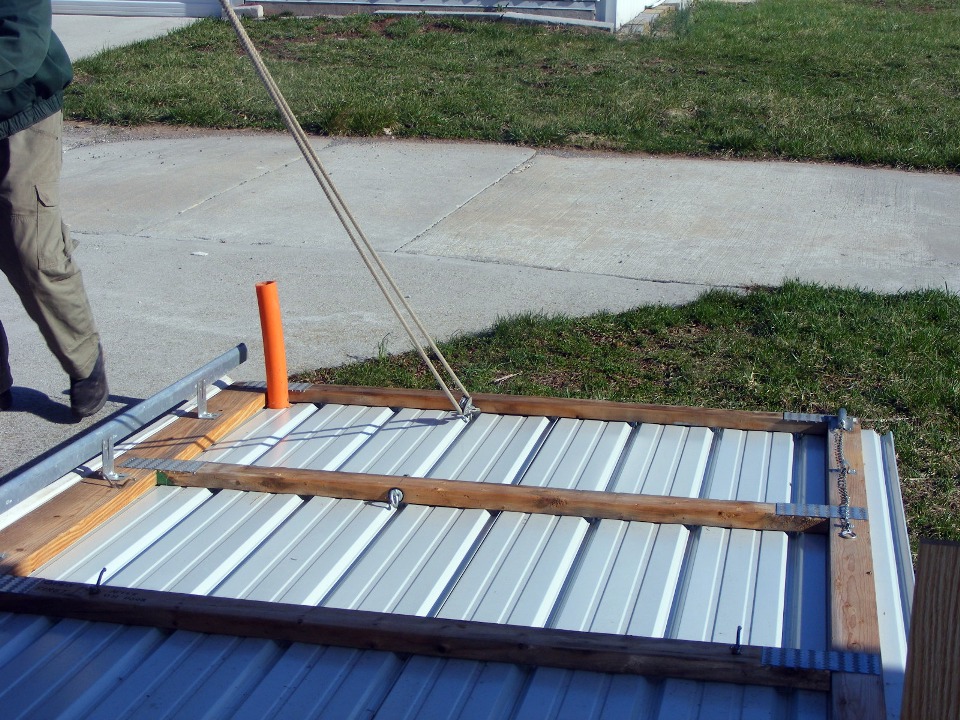
Irv shows just how easy it is raise the door panels back to the closed
position. When the door is in the down position, the pulley at the door end of the
rope gets disconnected via the hook that is bolted to the pulley. At that point the
rope is used to pull the upper pulley to the south wall out of the way of the airplane
wing as it is pulled out of the hangar. In case you missed it, look at the top photo
on this page and notice that there are TWO door panels that lay down out of the way of the
wings. This is the second door adjacent to the south wall. The one rope and
pulley on each side of the overhead door operates both lay-down side doors. This
design is repeated on the north side of the overhead door. Just to be sure you get
the count correct, there are FIVE parts to this hangar door. The center section is
the overhead garage door. Then there are two hinged, lay-down door panels on each
side of the center door.
With the southern-most door panel back in the upright and closed position, you
get a better look of how the pulley is hooked to an eye-bolt on the door. Irv was
also proud of his locking chain that pulls the door even tighter if the wind rattles the
door panel.
A closeup shot of the "lock" shows a pair of steel rods mounted to
the wooden door frame and jamb. The right side shows how a link of the chain floats
up and down on the rod by the hangar wall. The other end of the chain has a hook in
a chain link that is hooked around the other steel rod. When gravity pulls the chain
down, the lock gets tighter.
And here is a view of the rope and pulley bringing the "inner south side
door" back toward the "upright and locked" position. This photo shows
the detail of how Irv secured the upper end of the rope pulley to the track and the roller
inside it. This is what permits the single pulley system to operate both doors on
this side of the overhead door one at a time.
Here is the inner door ready to lift back into the upright postion.
Notice the concrete taxiway outside. More of Irv's patchwork concrete work.
The door adjacent to the overhead garage door comes back toward the closed
position.
Finally, the overhead door tracks come into alignment at closure. The
angles are pushed back at the same time, allowing the overhead door to be lowered and
locked.
| CLICK for "Lazy B" - PAGE 4 | Return to Other RV Menu | Return to Main Menu Page. |