The Roof Leak over the kitchen · · PAGE 8.
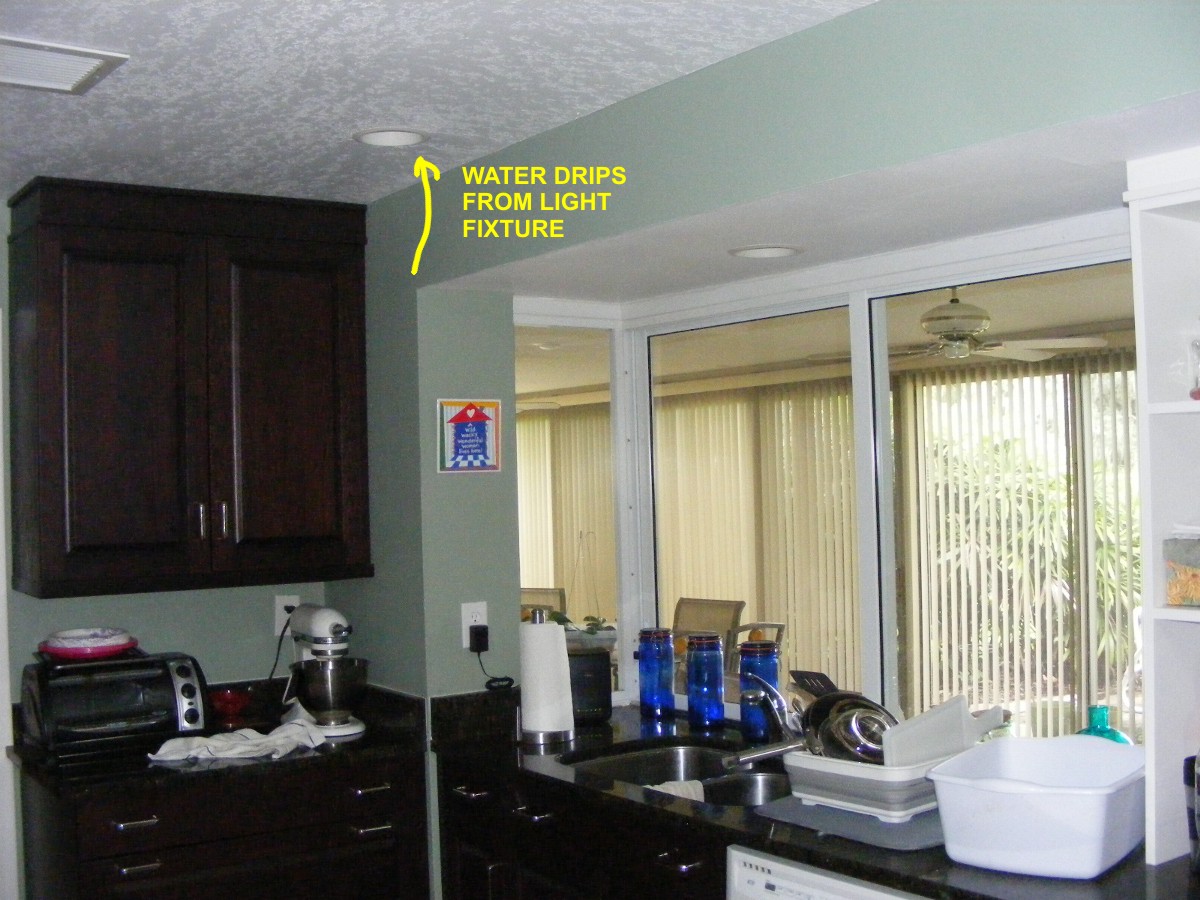
August 3, 2014: The roof leak dripping into
the kitchen was discovered during a recent heavy rain storm. If the dates seem out
of sequence from the previous page, I am grouping the photos by subject as some of this
stuff has been occurring simultaneously. There has not been enough leaking to stain
the dry wall that is the ceiling seen here. I found the white plastic pan seen at
the bottom right corner of this photo had caught the four ounces of water that leaked in
today when I was away. My step son discovered the leak and put this plastic pan down
to catch the rain water. This page has new photos below that were added on Friday,
August 15, 2014.
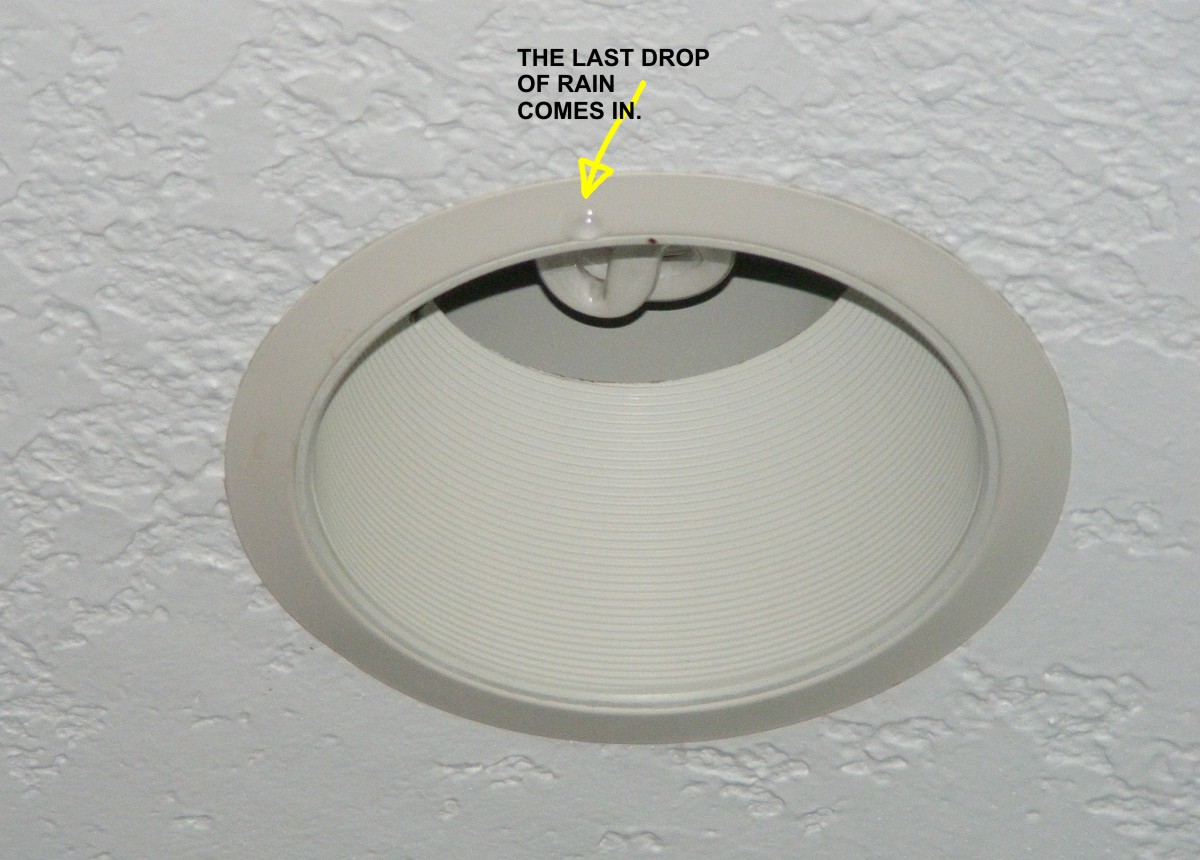
This close-up photo shows no water stains around the light fixture. I
took the photo below on August 15 after some heavy rain brought more water into the
kitchen area. It replaced the photo that was here on August 3. I placed a
plastic tub under this light fixture before any water dripped down. I could easily
hear the water hitting the plastic from my office about 15 feet away.
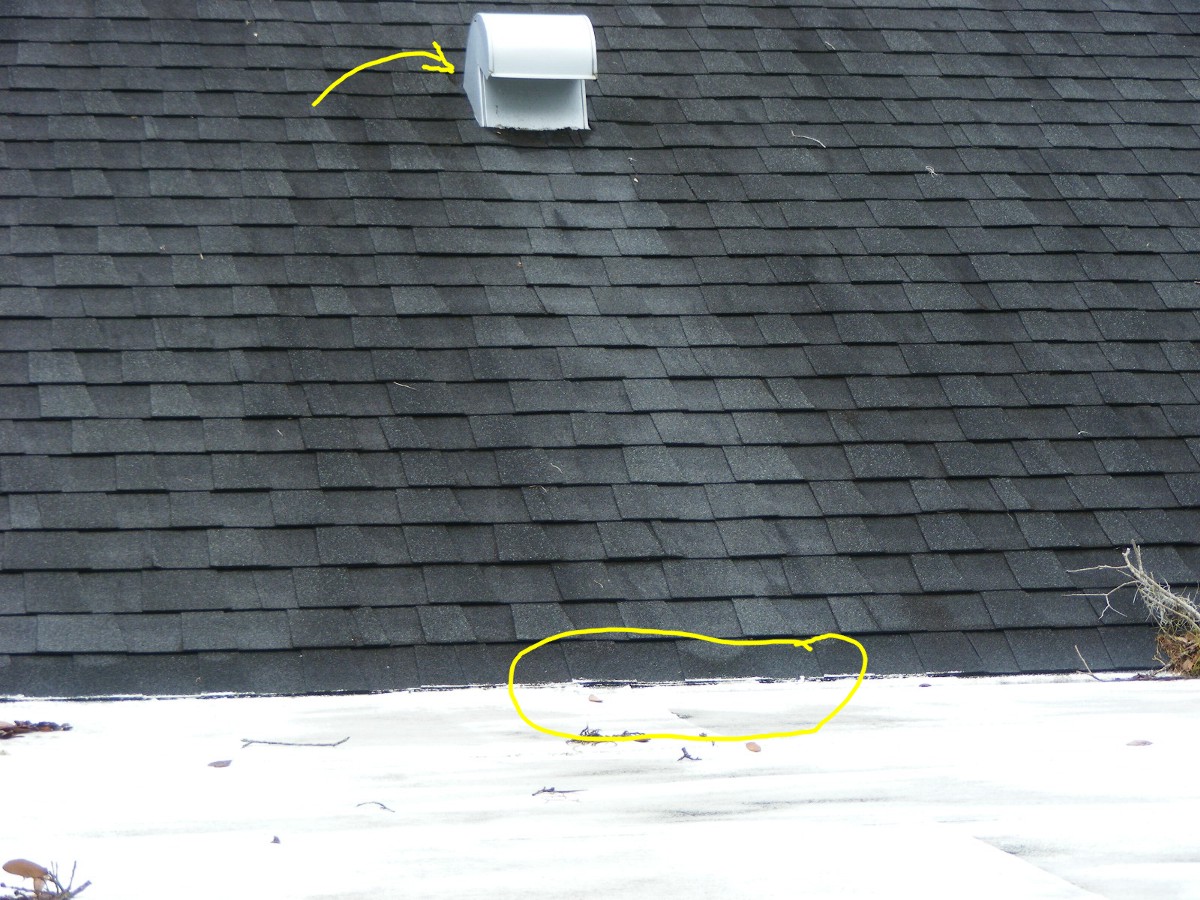
August 3, 2014: I climbed up on the roof of
the Florida Room to get to the place that should be above the ceiling light in the photos
above. The outlined area at the bottom should be directly above the light fixture in
the kitchen. The aluminum vent up the roof could also have a leak that could be
running down the rafter inside the 1x12-inch boards that are under the shingles. This
all will be investigated when a roofer comes to inspect this problem.
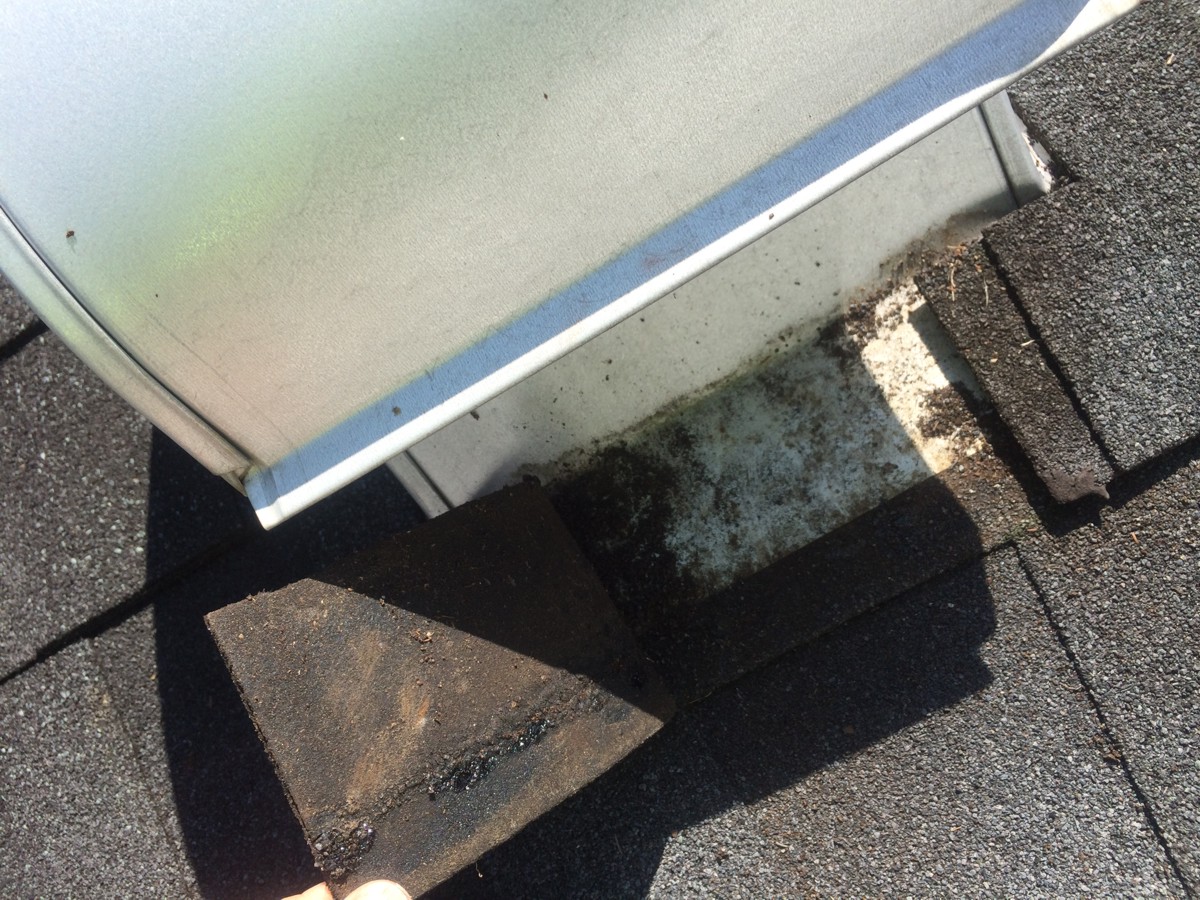
August 22, 2014: E.C. Haas came to check on the
roof and offer an estimate. Here is his photo showing how the roof vent seen above
is not sealed. HE peeled back one shingle on the "down side" of the vent
to take this photo.
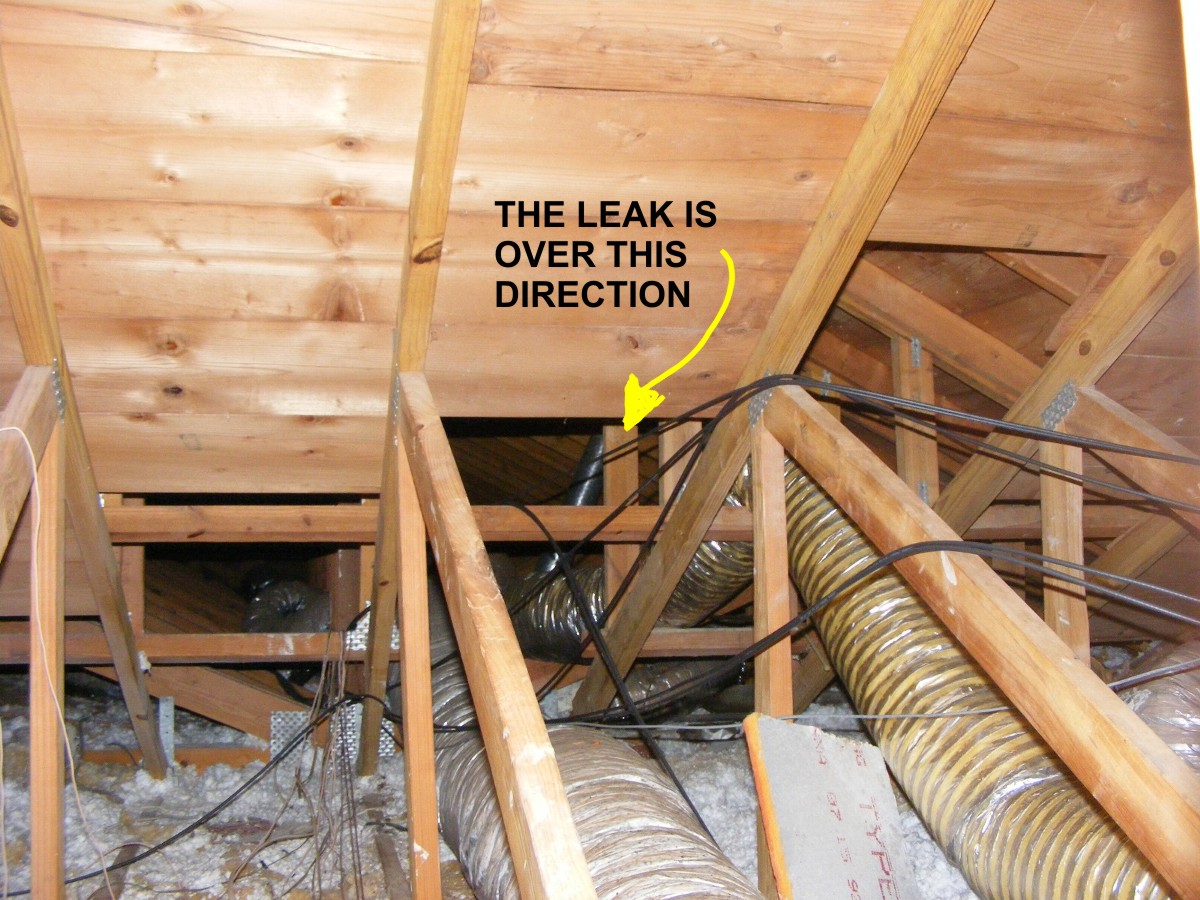
August 15, 2014: Here are two views added from
inside the attic with photos taken from the top of the attic stairs. The two HUGE air
ducts up here are for cool air to the rooms in the west side of the house, and the return
air from the master bedroom. The vent on the roof seen in the photo above is
connected to the pipe seen in the next two photos.
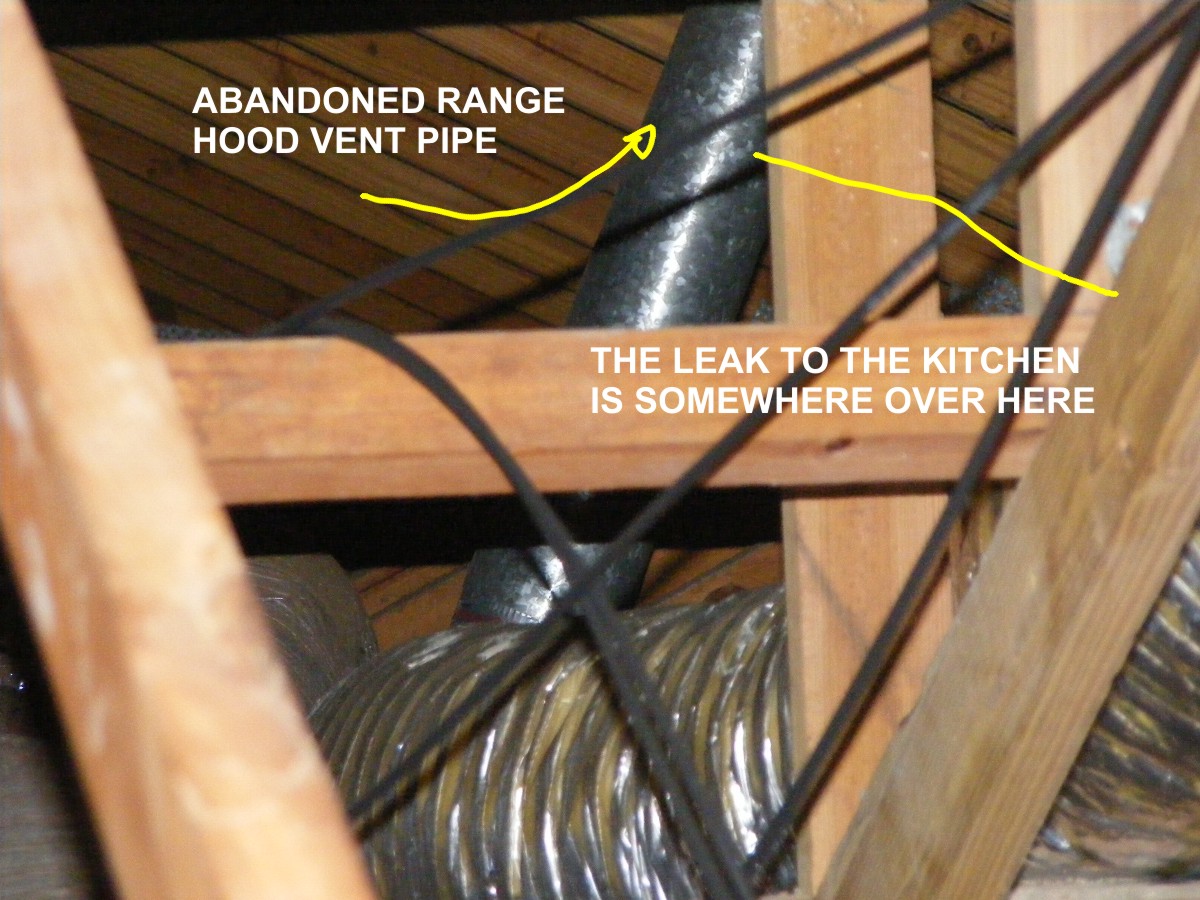
The photo below is a zoomed in view of the area over the kitchen. That
abandoned vent pipe was apparently put there to service a range hood before the modern
microwave oven was mounted under the kitchen cabinets above the new glass top range.
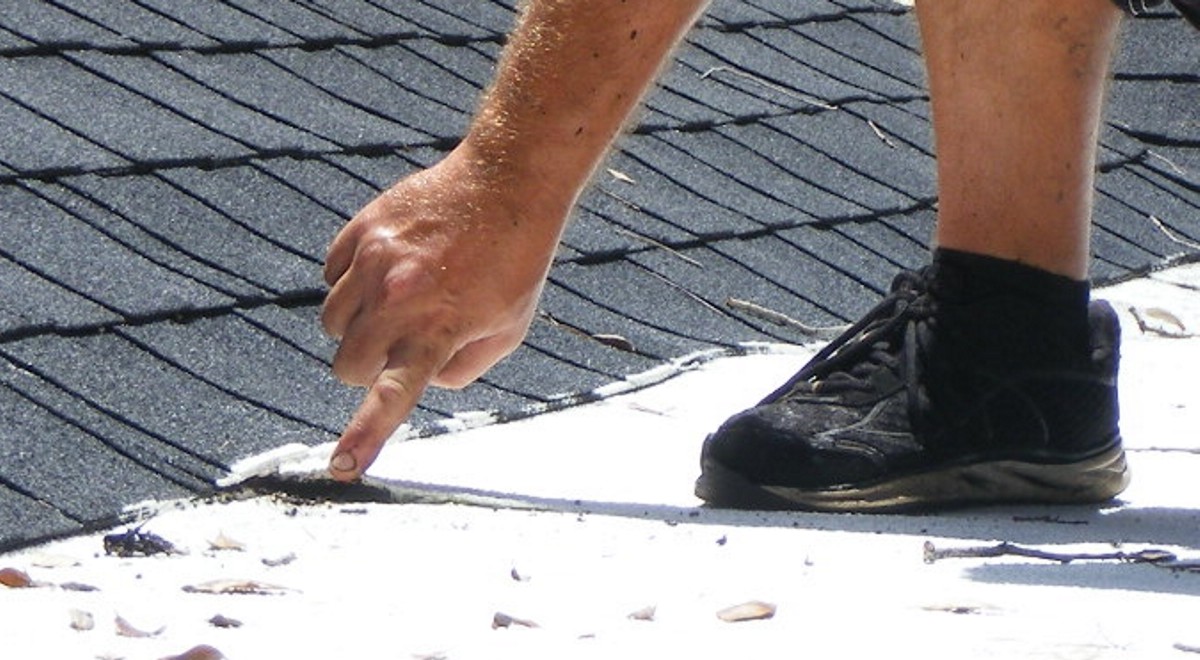
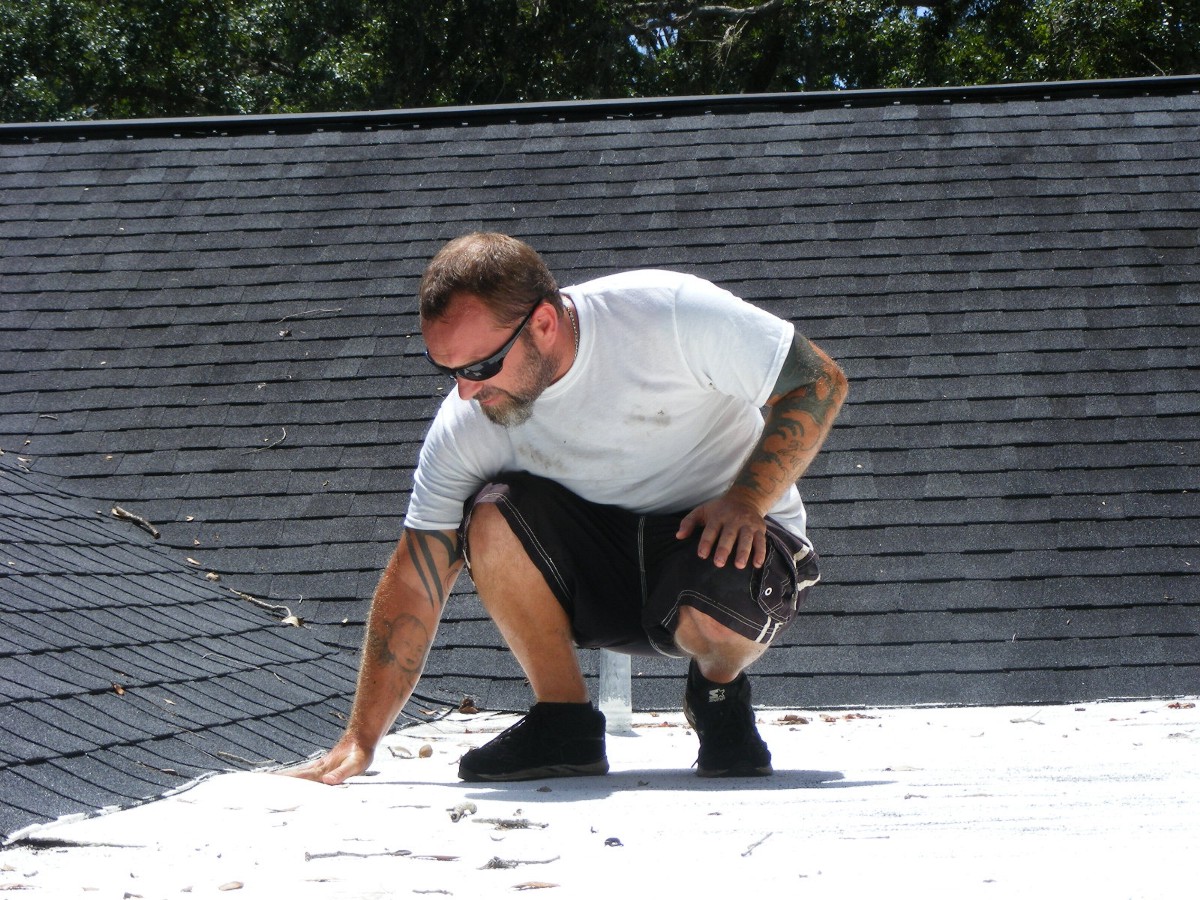
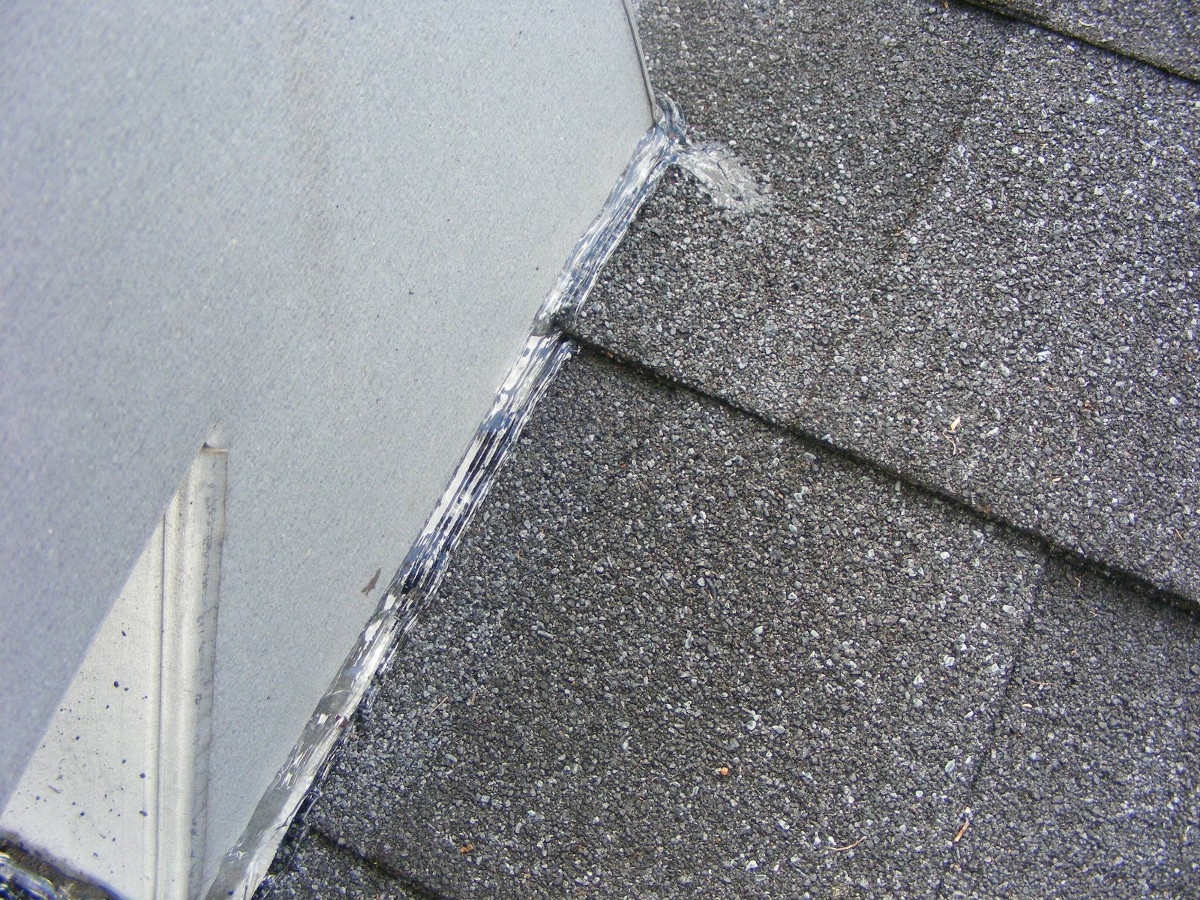
August 19, 2014: This photo was taken today as
Brock inspected the roof issues. He works for Bonaluto Roofing. This photo
shows a cut in the shingle located at the vent that comes up from the kitchen. He
would later confirm this is the source of the water when he examined the area in the attic
below this roof vent. This view shows a side view of the upper right corner of the
vent. That slice in the shingle is raised slightly on the "down" side of
the cut that lets in the rain water. There is NO sealant anywhere around the vent to
keep out the rain. When he was in the attic Brock could see the water mark
discolored trail as it flowed down the inside rafter to a point over the light fixture
where it drips into the kitchen. He did mention there was some discoloration to the
insulation where it dripped down from the rafter.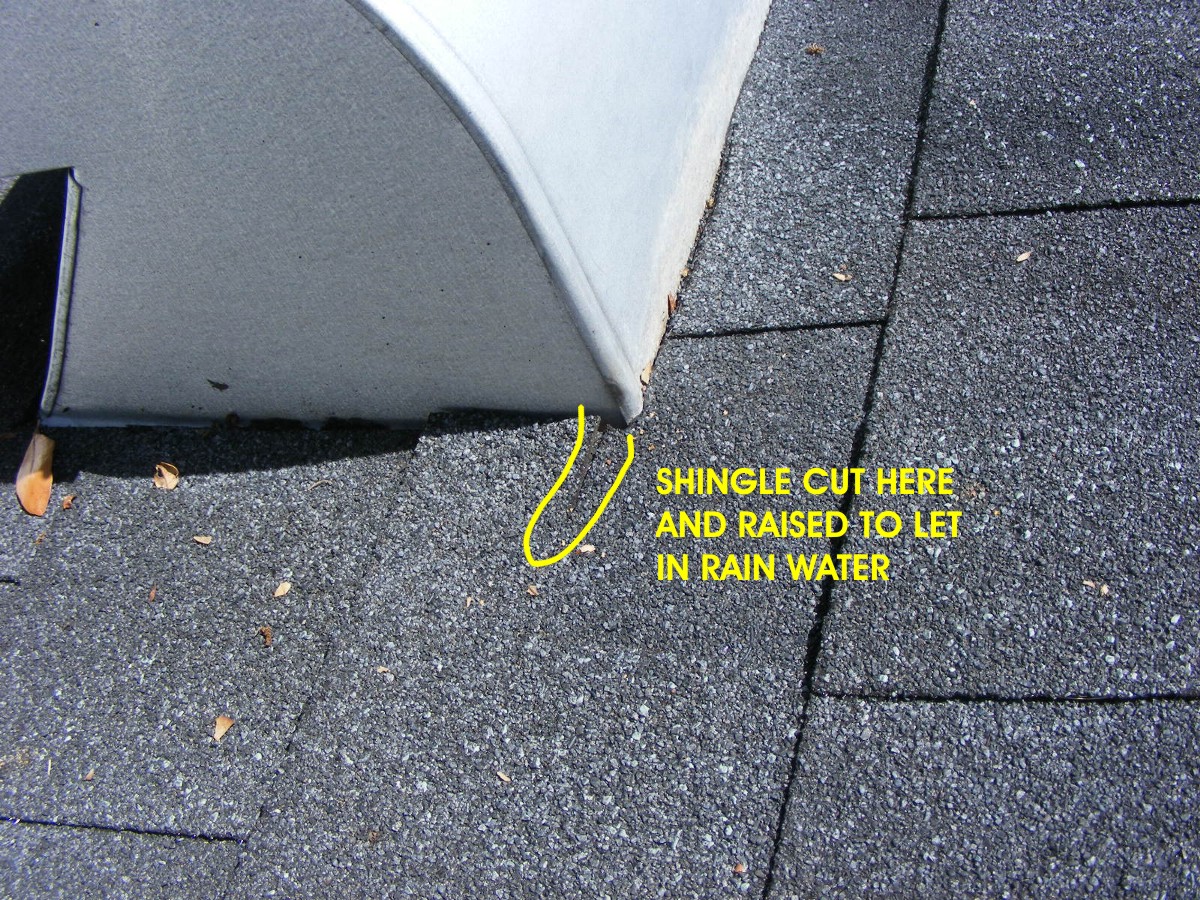
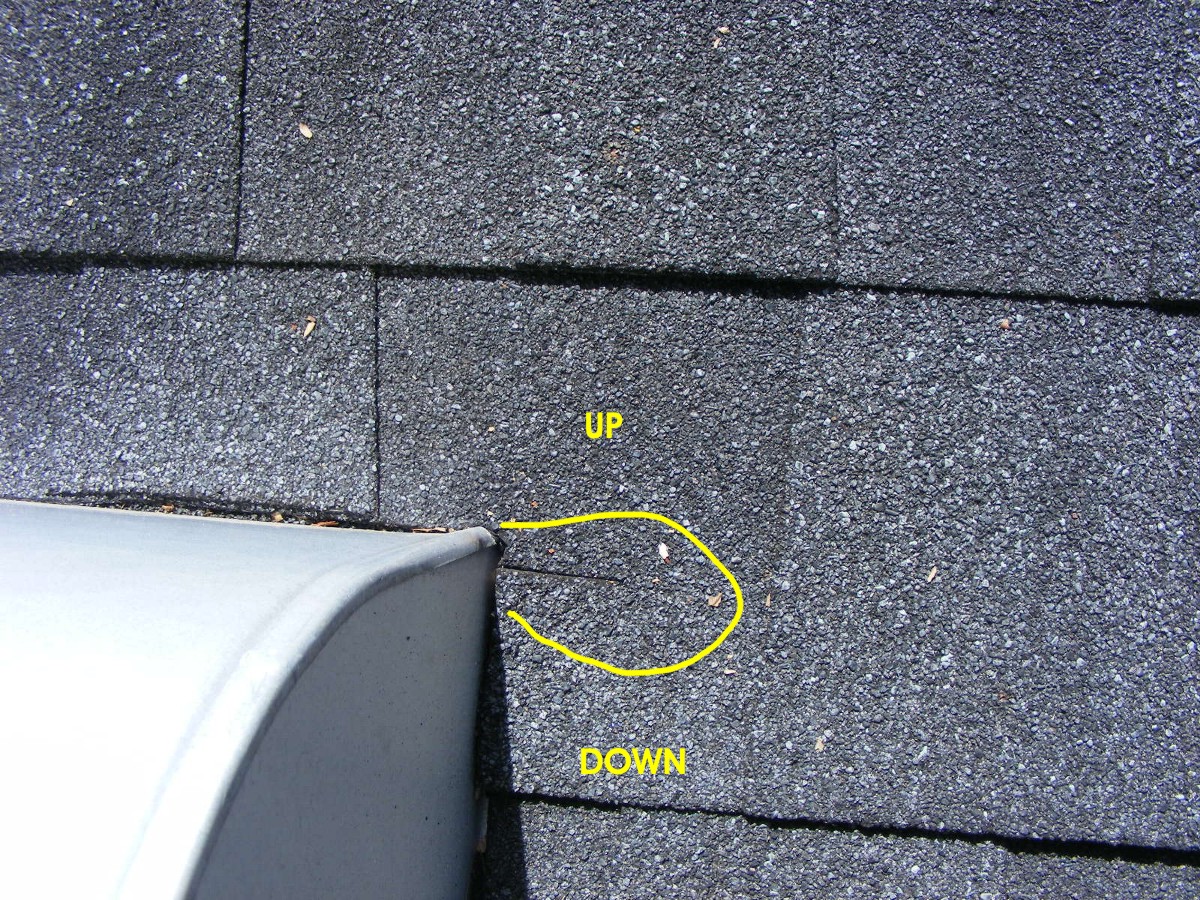
Here is a view looking down on the cut in the shingle.
Brock also noticed some issues with the roof over the Florida Room which could
cause problems.

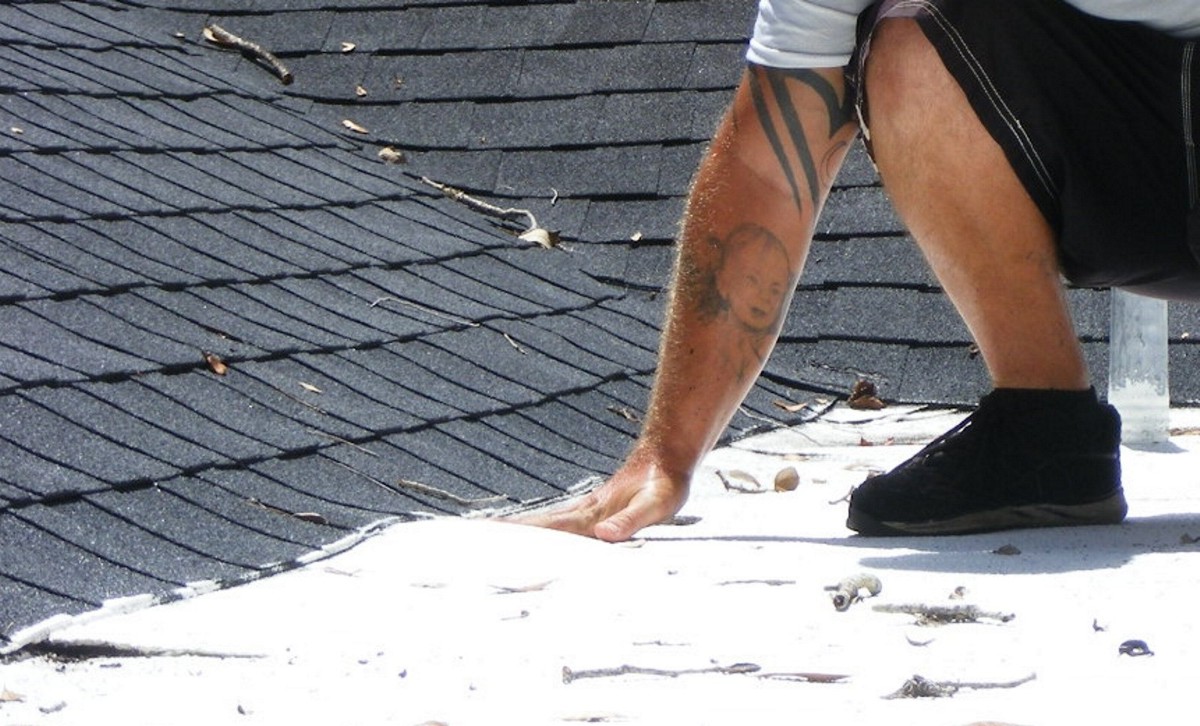
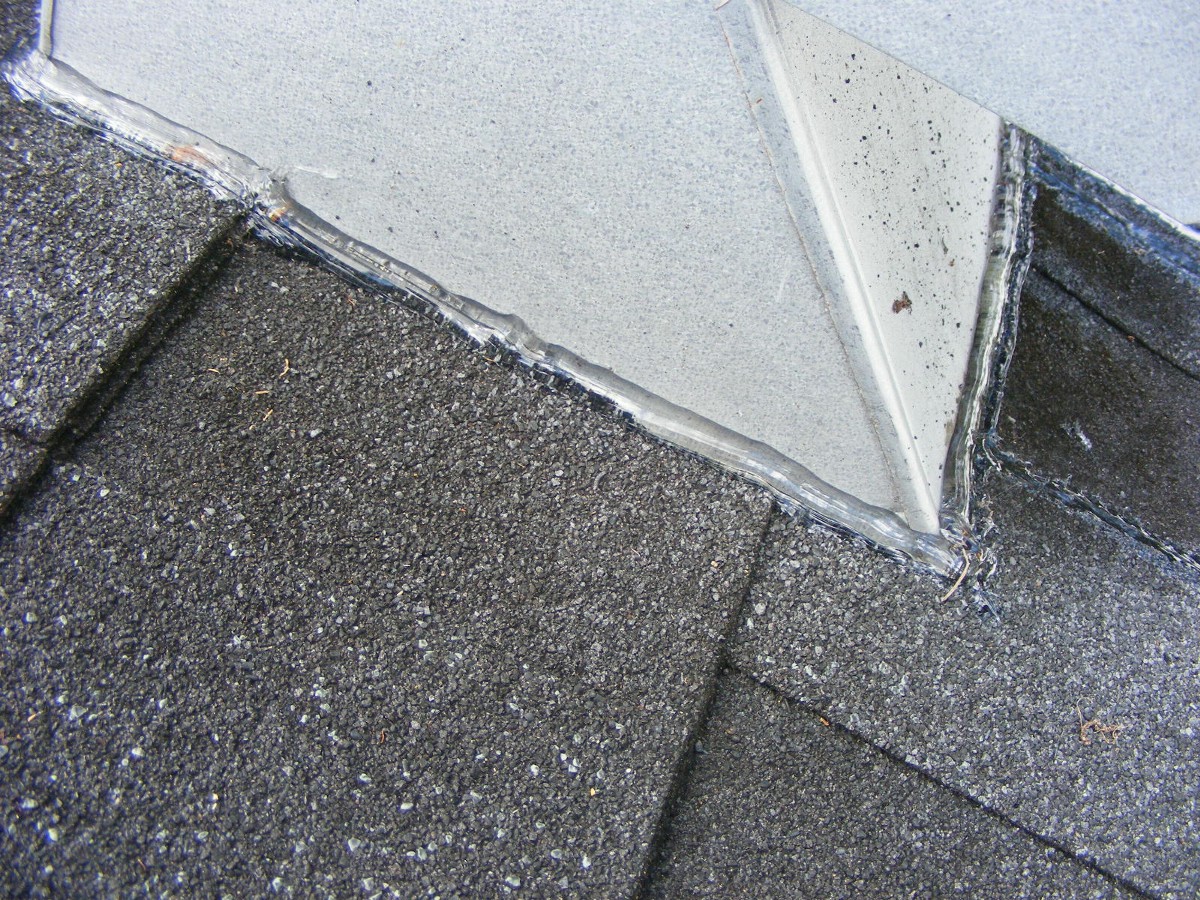
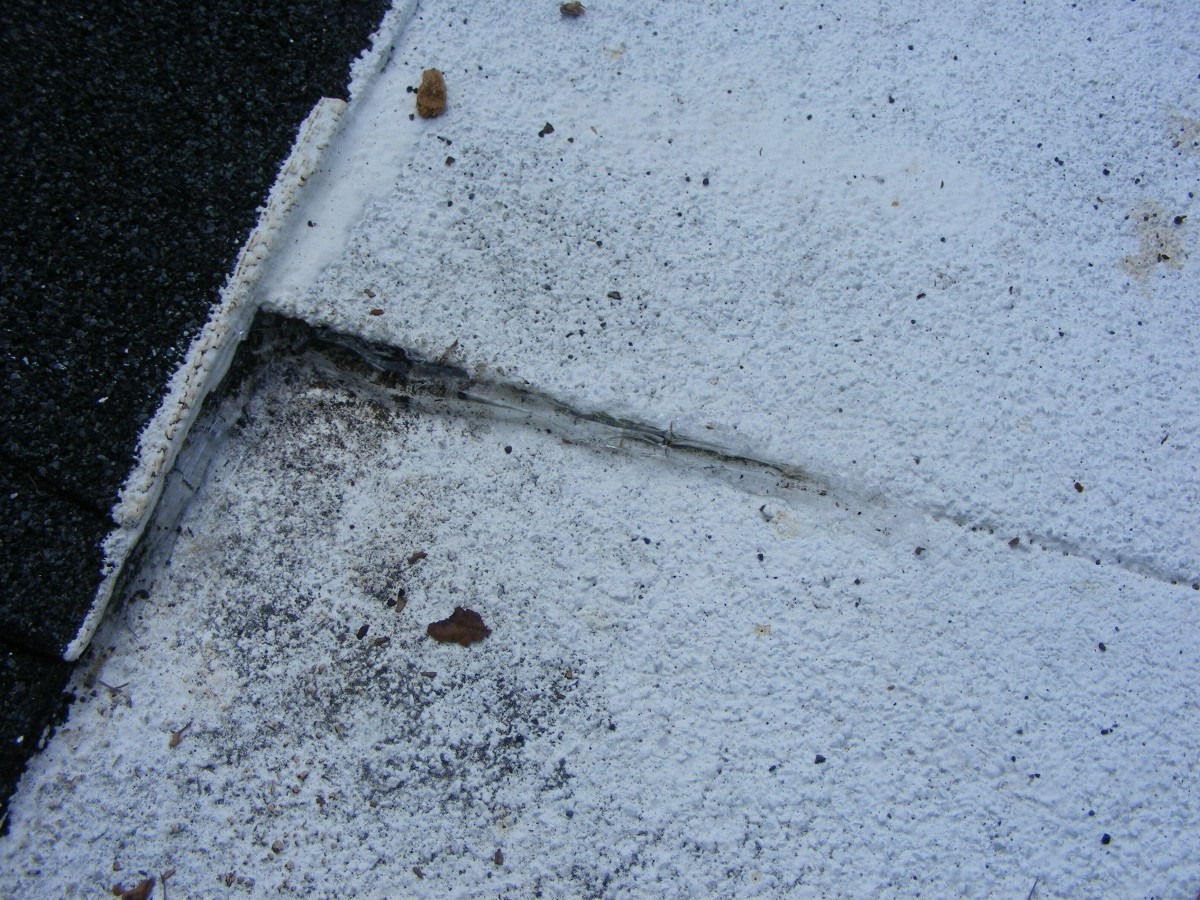
This close-up from the photo above shows an open slit in the roof.
There is a bulging area where air is under some of these locations, water is
under other bulge locations. He stepped on one bulge and water came out under a
nearby seam that was not sealed.
A close-up view of the bulge shows how large it is by his fingers hidden behind
it. Notice how the layer of shingles are raised up with the bulge.
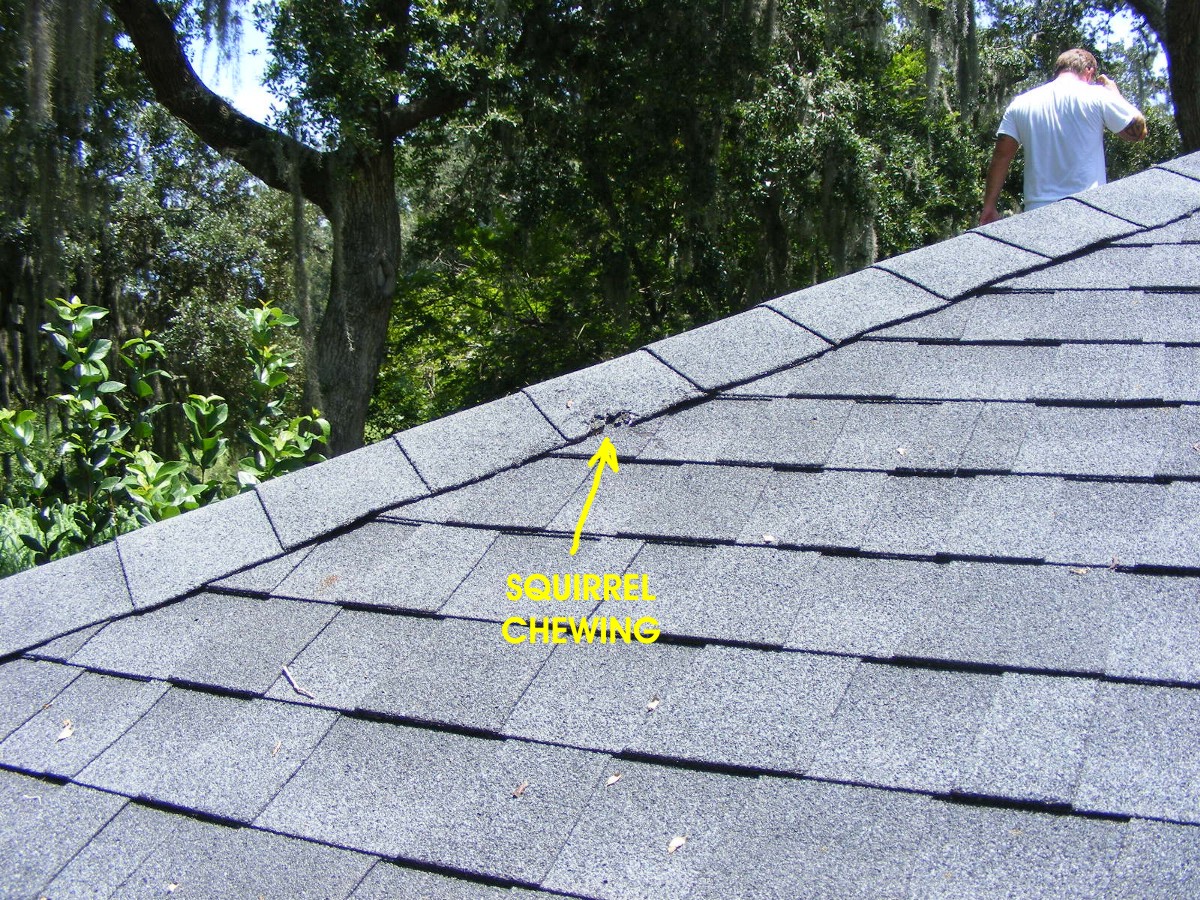
This last photo shows where a squirrel chewed on one shingle above the guest
bedroom at the north end of the house adjacent to the patio. He inspected the other
vents on the east side of the house. There were two plumbing vents and two other air
vents. He also examined the skylights while he was up there. I let him know I
have not seen any other leaks.
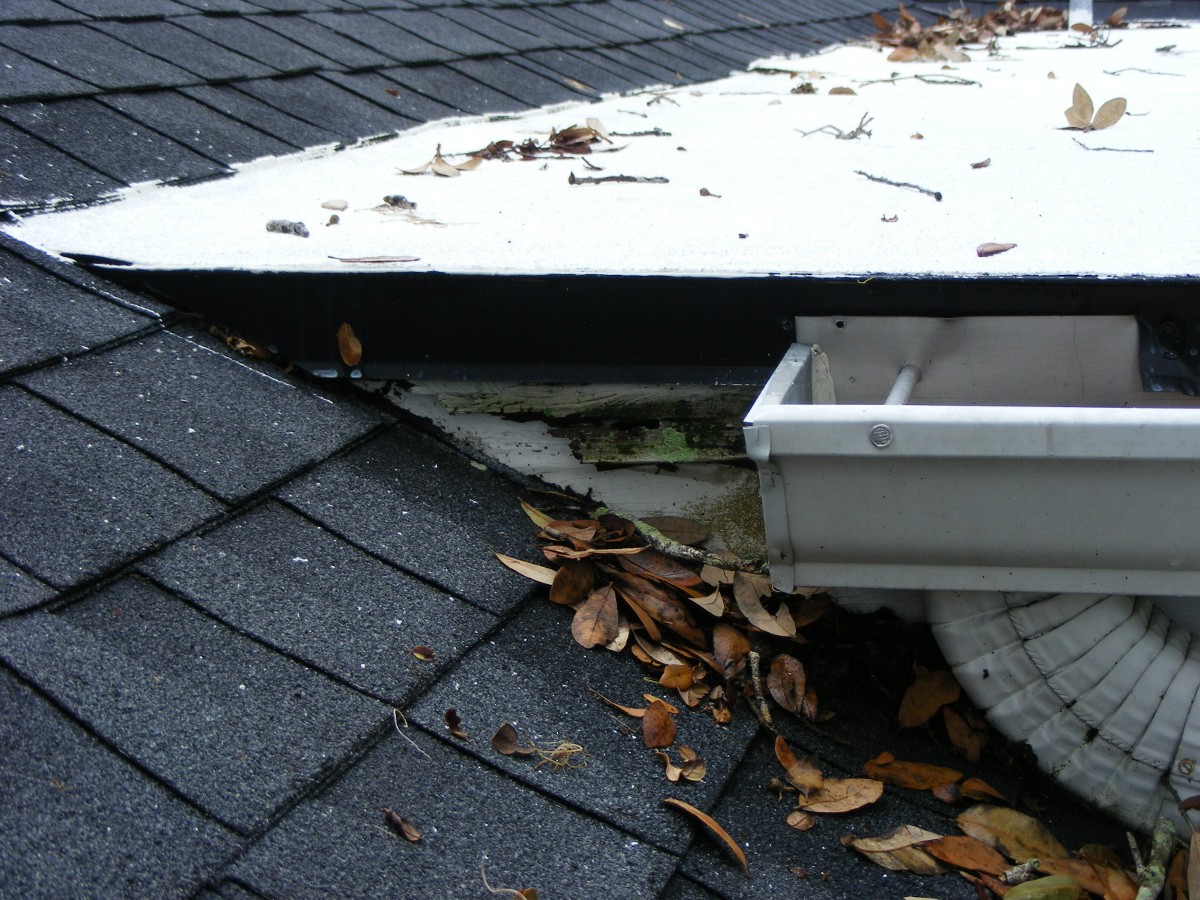
August 3, 2014: I used a leaf blower to
clean out the gutter while I was up on the roof. I also blew out the leaves near
the east end of the Florida Room. When we had heavy rain on August 15, the down
spout from this gutter at the back of the Florida Room was flowing freely into the back
yard area across the concrete walk on the northwest side of the room.
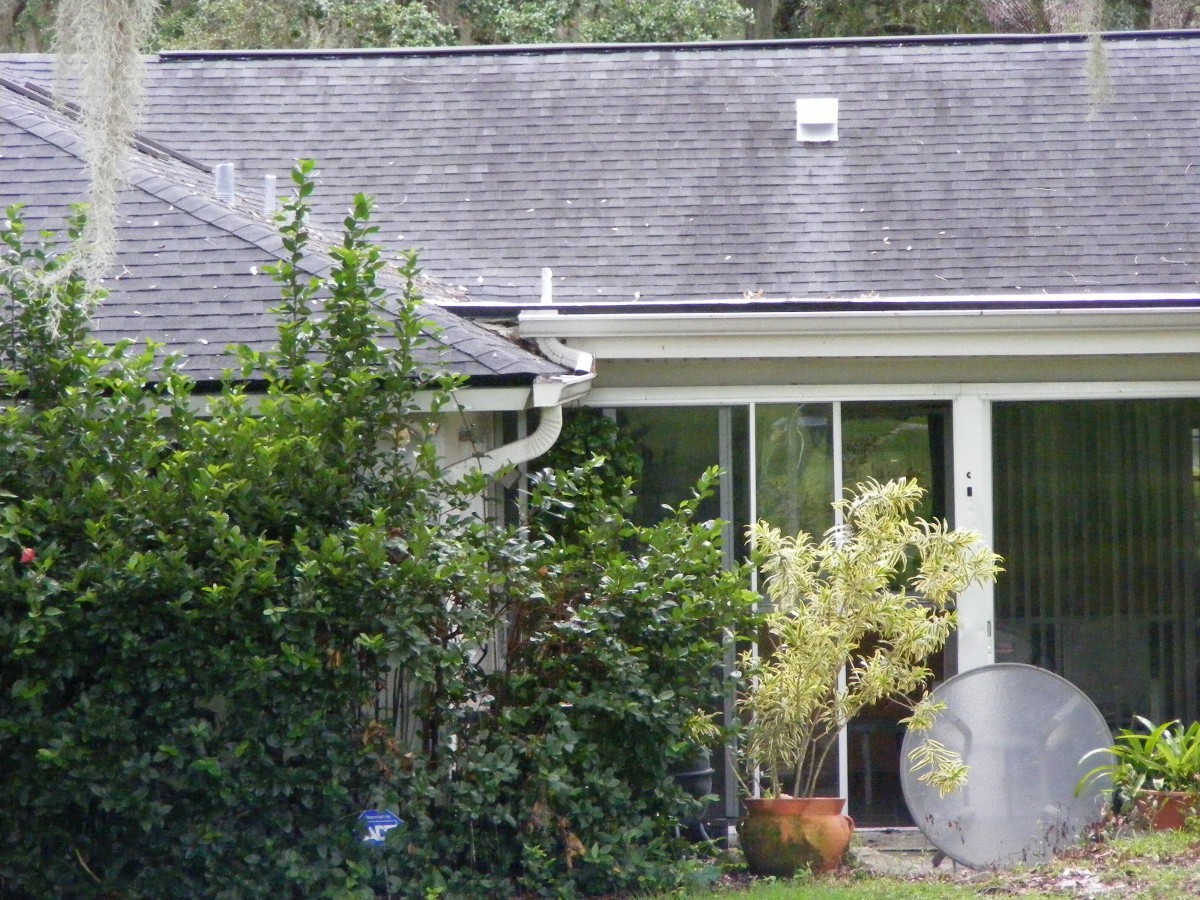
This telephoto shot of the back of the house was taken from the putting green
behind the house. This photo also shows the beginning of trimming the bushes with
the one nearest the patio.
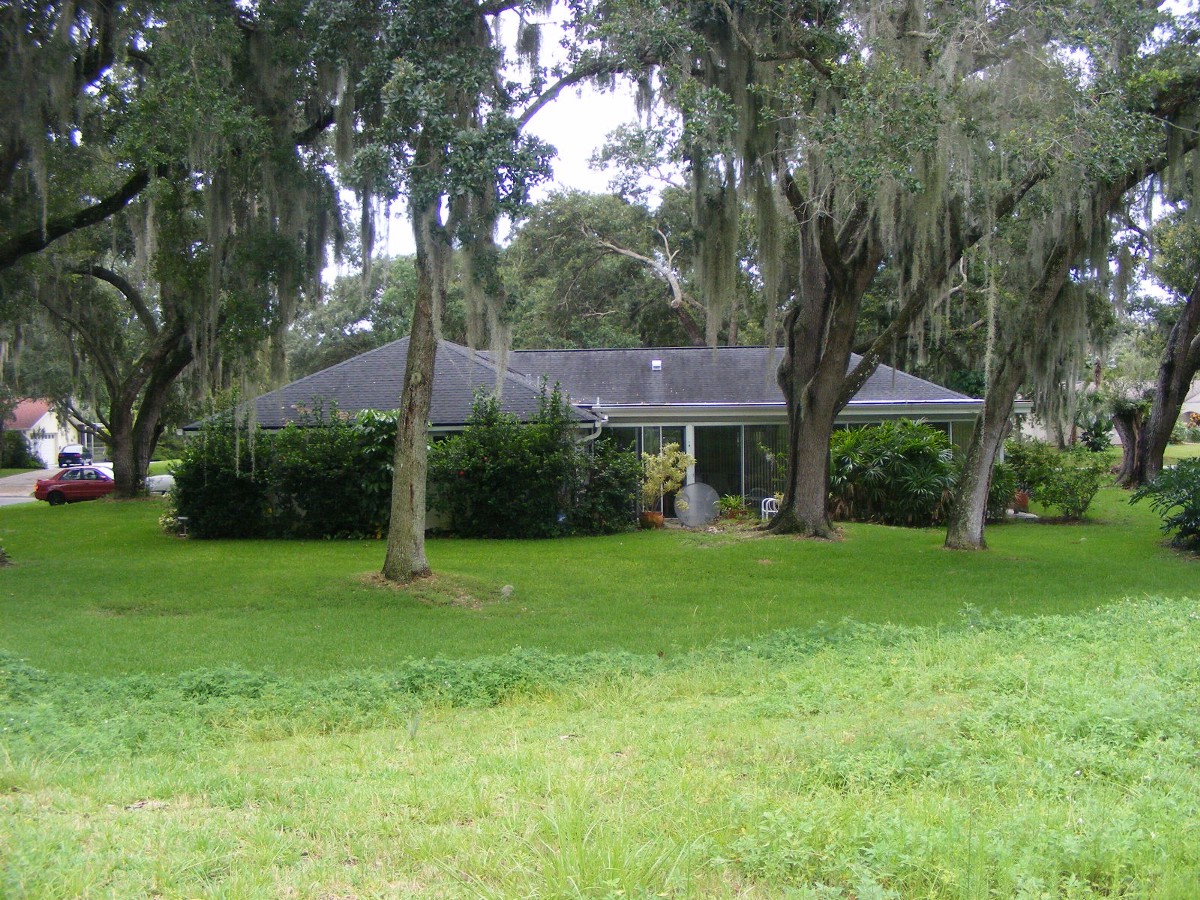
This is the view with the camera lens not using zoom mode. This puts
things in perspective when you consider all the photos you have seen from me and from
Google Earth. I find some of that Spanish moss on the ground after most thunder
storms. It turns from gray to a green tint when it gets water. It also will
kill the grass where it falls if not removed within a day or two of coming down. My
camera vantage point on the abandoned putting green is level with the roof of the Florida
Room.
August 29, 2014: Brock returned today to fix
the leak on the vent above the kitchen. The sealant has been applied around the
entire vent and under the shingle seen at the right edge of this photo on the
"down" side of the vent.
Here is the view of the west side of the vent where the shingle with the cut
has also been sealed.
He also sealed one spot on the Florida Room roof as a temporary fix. He
measured the size of that roof to provide an estimate for the full repair.
September 20, 2014: A
steady rain came last evening and overnight. The leak in the KITCHEN came back as if
nothing was done on the roof above. The rug in front of the sink had become wet
before 11:30 PM. The spot on the rug was about one foot in diameter. I placed
the plastic pan in that spot and found it had about 1/4 cup of water in it this morning
when the rain had stopped. I would guess there was an equal amount of water in the
rug before I put the pan over it before going to bed last night. The water dripped
from the light fixture just as it did before the roof was "patched" around the
vent.
July 29, 2015:
This is a short entry to the KITCHEN page about the replacement of the old microwave oven.
I picked a GE 1.6 cubic-foot model with 1000 watts of power.
Since the old one was made by GE, all the operational features are virtually the
same. A few control buttons are in a slightly different position on the panel.
With the lower cost unit, having it delivered and installed by a professional made
sense. It was a good investment. The contractor for Lowe’s is a guy from
Brevard Electric. He has done hundreds of these “over the range” microwave
installations and it showed in his skill sets.
When the old unit was removed, I confirmed it had not been
vented to the outside via the existing duct (remember the kitchen roof leak). Before
the new one was installed, the vent fan on it needed to be reconfigured to blow out the
back of the unit and it lined up perfectly with the opening to the vent pipe inside the
wall.
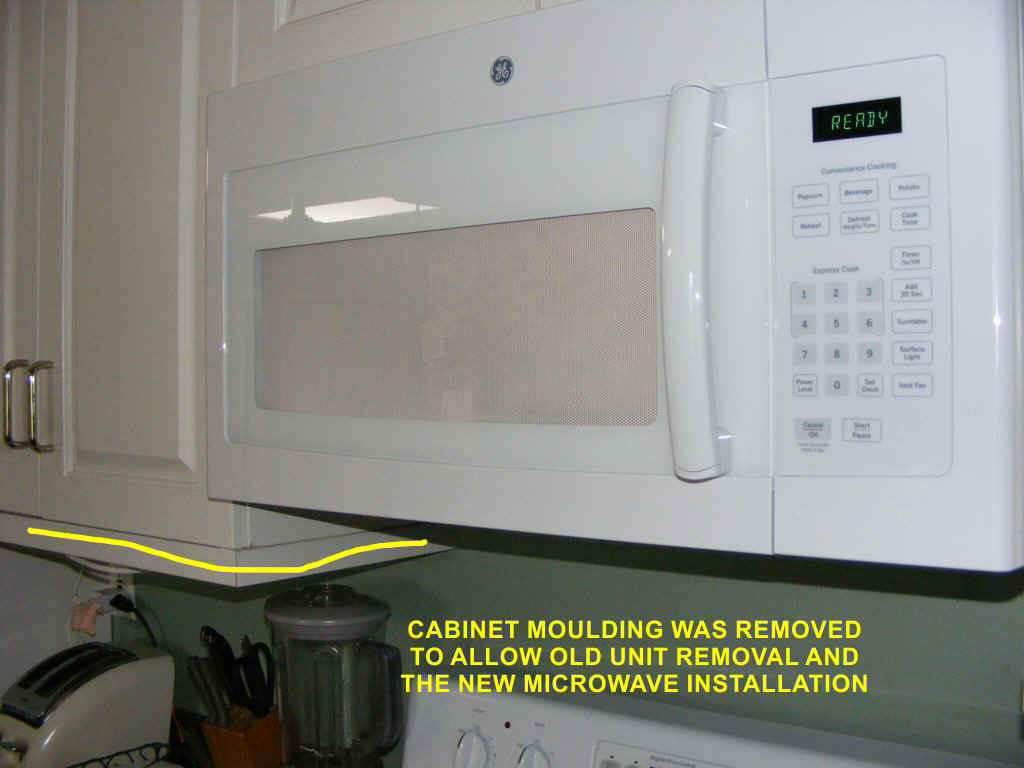
The photo shows the new unit installed and a highlighted a
section of cabinet wood trim that needed to be removed temporarily to allow the
replacement to occur. The fit to the open space between the cabinets was very close
on both the old and new units. I prepared my frozen lunch before he left and all was
fine of course. The new oven is quieter than the old one that would only operate
from 4 to 6 minutes before over-heating and shutting down all power to the unit. The
contractor took the old unit away after the installation was complete.
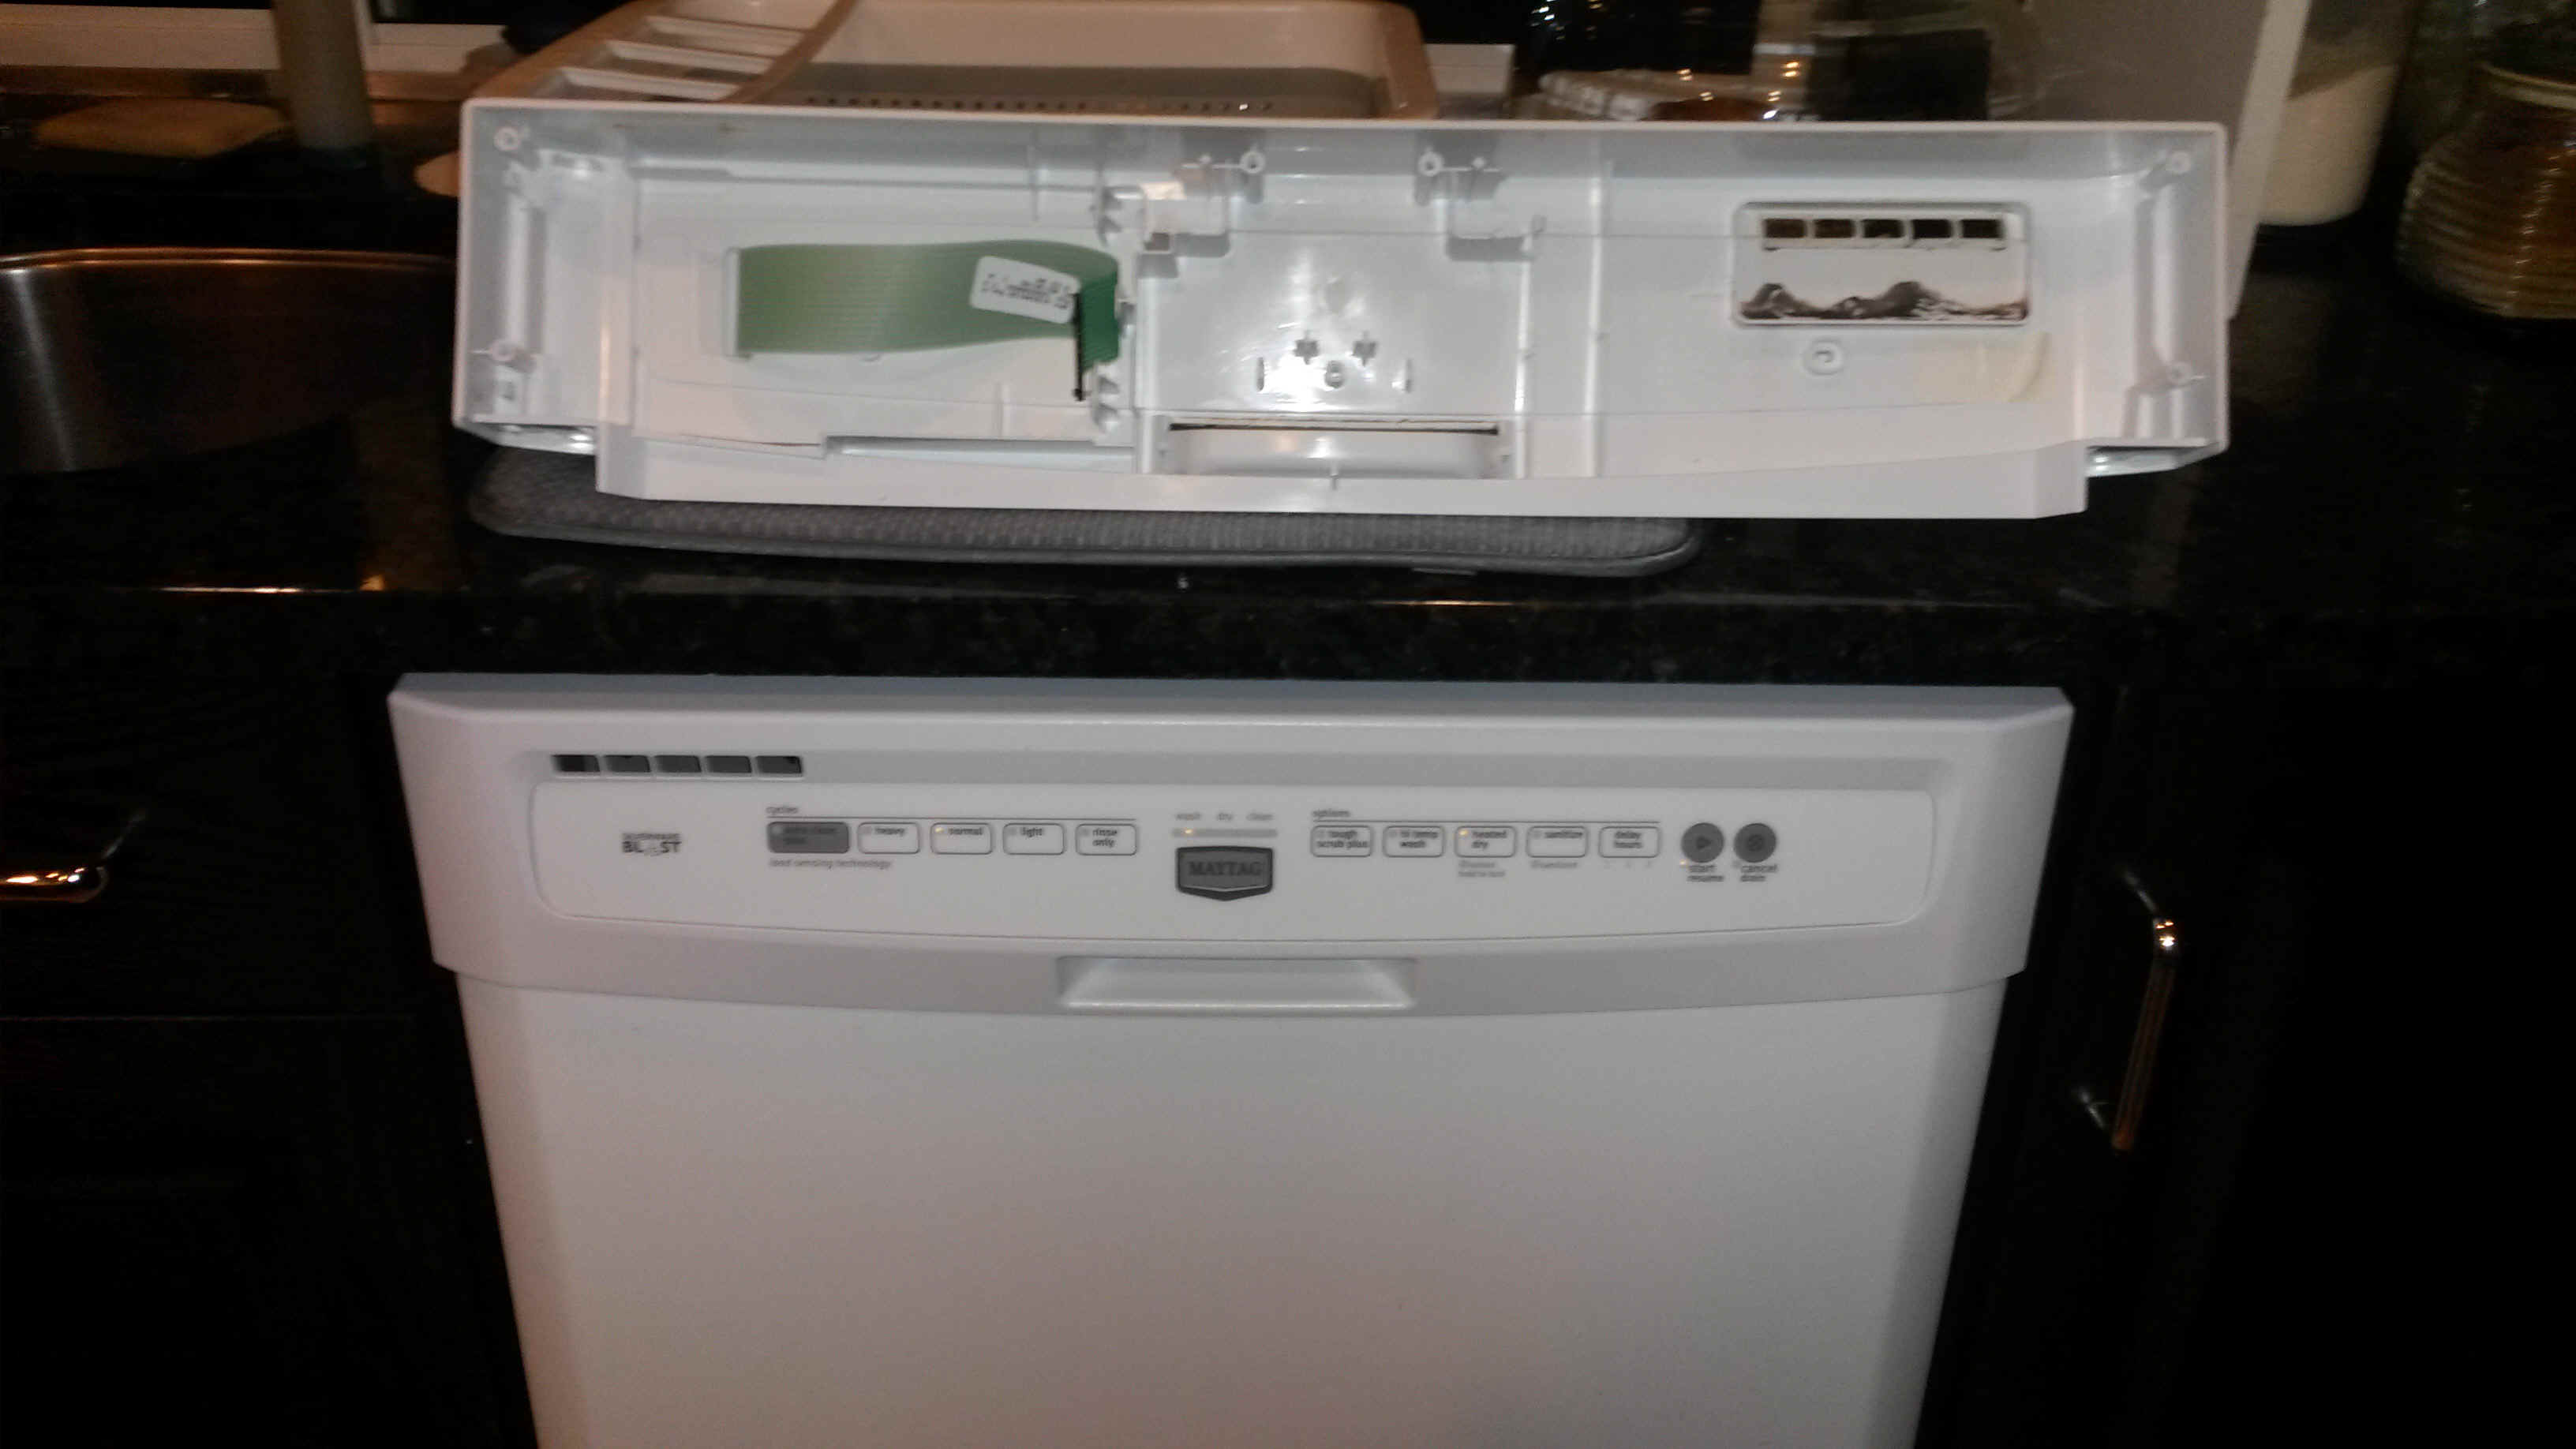
February 12, 2016: The dish
washer control panel failed a couple of weeks ago. The replacement control panel was
received and is seen installed in the photo below. The old panel is on the counter
above the dishwasher. A dark stain is visible where the steam vent is located.
The original circuit board was fine and is now installed in the new panel on the
machine. The only damage was corrosion in the tactile switches of the old panel.
Sears had the lowest cost for the control panel. Everything works just fine.
| GO TO PAGE 9 | BACK TO HOME MENU |